Getting Started with Angular Data Grid Component
28 Aug 202613 minutes to read
This guide demonstrates how to set up and configure the Angular Data Grid component, from initial installation through enabling core features like paging, sorting, filtering, and grouping.
Note: This guide supports Angular 21 and other recent Angular versions. For detailed compatibility with other Angular versions, please refer to the Angular version support matrix. Starting from Angular 19, standalone components are the default, and this guide reflects that architecture.
Ready to streamline your Syncfusion® Angular development? Discover the full potential of Syncfusion® Angular components with Syncfusion® AI Coding Assistant. Effortlessly integrate, configure, and enhance your projects with intelligent, context-aware code suggestions, streamlined setups, and real-time insights all seamlessly integrated into your preferred AI-powered IDEs like VS Code, Cursor, Syncfusion® CodeStudio and more. Explore Syncfusion® AI Coding Assistant
To get started quickly with Angular Data Grid using CLI and Schematics, you can check on this video:
Prerequisites
- Node.js 24+ (LTS recommended).
- Syncfusion CLI.
Install the Syncfusion CLI
Install the Syncfusion CLI globally using the following command:
npm install -g @syncfusion/syncfusion-cliCreate a new Angular application using Syncfusion CLI
You can create a Angular application using the Syncfusion CLI. The CLI provides two ways to create a project:
Non-interactive mode
Non-interactive mode allows you to create a project directly using a single command with the required command-line arguments.
sf new syncfusion-angular-app --framework angular --template gridIn this mode, the project configuration is passed directly in the command. The above command creates an Angular application configured with the Syncfusion® Grid component.
Interactive mode
Interactive mode guides you through the project creation process with step-by-step prompts.
sfWhen you run the sf command, the CLI prompts you to select the required project configuration. To create a Angular application with the Syncfusion® Grid component, select the following options:
√ Project name? ... syncfusion-angular-app
√ Choose Framework: » Angular
√ Choose Template: » Grid
√ Choose Theme: » Material3
√ Choose Style Format: » CSS
√ Would you like to integrate the Syncfusion MCP Server (AI Assistant) into this project? ... no
√ Would you like to install Syncfusion Component Skills for AI-powered development? ... no
√ Install dependencies and start app now? ... no
The above selections generate a Angular application configured with the Syncfusion® Grid component. You can choose different values for language, theme, style format, MCP setup, and skills installation based on your project requirements.
The Syncfusion® CLI creates the project with a predefined template. After the project is generated, you can customize or replace the component code based on your application requirements.
Run the project
Once the project is created, navigate to the project directory and run the following commands in your terminal.
cd syncfusion-angular-app
npm install
ng serve
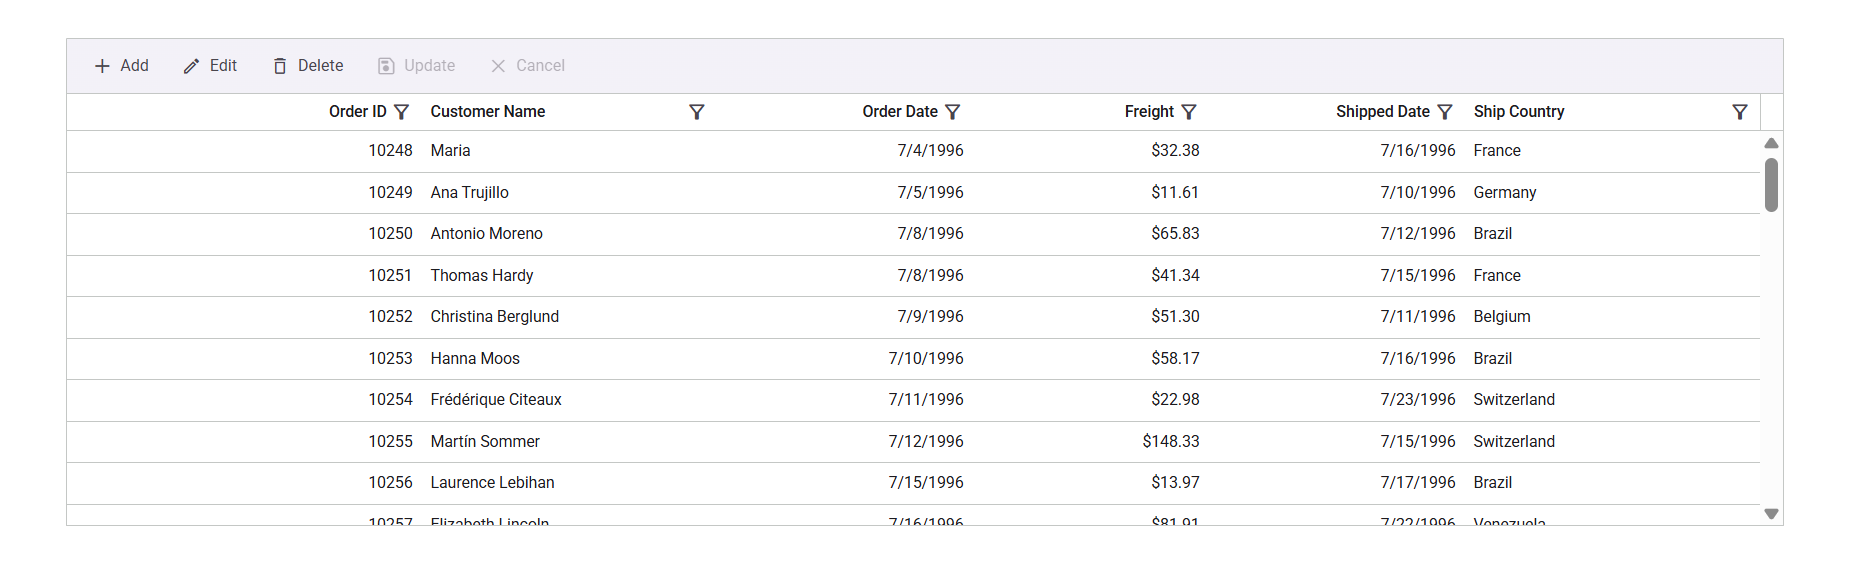
The output will appear as follows:
Prerequisites
| Requirement | Version |
|---|---|
| Angular | 12 and above |
| Node.js | 14.0.0 or above, Recommended: Latest Version |
Angular supported versions
| Angular Version | Minimum Syncfusion® Angular Data Grid Version |
|---|---|
| Angular v22 | 34.1.29 |
| Angular v21 | 31.1.17 |
| Angular v20 | 29.2.8 |
| Angular v19 | 26.1.35 |
| Angular v18 | 25.2.3 |
| Angular v17 | 23.2.4 |
| Angular v16 | 21.1.39 |
| Angular v15 | 20.4.38 |
| Angular v14 | 20.2.36 |
| Angular v13 | 19.4.38 and above |
| Angular v12 | 19.3.43 |
Browser support
| Browser | Supported Versions |
|---|---|
| Google Chrome, including Android & iOS | Latest 2 versions |
| Mozilla Firefox | Latest version |
| Microsoft Edge | Latest 2 versions |
| Apple Safari, including iOS | Latest 2 versions |
Setup the Angular application
A straightforward approach to beginning with Angular is to create a new application using the Angular CLI. Install Angular CLI globally with the following command:
npm install -g @angular/cli
Angular 21 Standalone Architecture: Standalone components are the default in Angular 21. This guide uses the modern standalone architecture. If you need more information about the standalone architecture, refer to the Standalone Guide.
Create a new application
With Angular CLI installed, execute this command to generate a new application:
ng new syncfusion-angular-app
- This command will prompt you to configure settings like enabling Angular routing and choosing a stylesheet format.
? Which stylesheet format would you like to use? (Use arrow keys)
> CSS             [ https://developer.mozilla.org/docs/Web/CSS                     ]
  Sass (SCSS)     [ https://sass-lang.com/documentation/syntax#scss                ]
  Sass (Indented) [ https://sass-lang.com/documentation/syntax#the-indented-syntax ]
  Less            [ http://lesscss.org                                             ]
- By default, a CSS-based application is created. Use SCSS if required:
ng new syncfusion-angular-app --style=scss
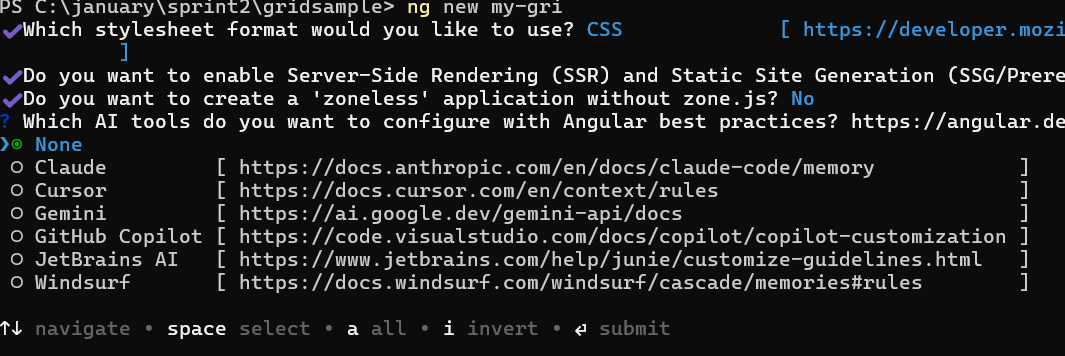
- During project setup, when prompted for the Server-side rendering (SSR) option, choose the appropriate configuration.

- Select the required AI tool or ‘none’ if you do not need any AI tool.
- Navigate to your newly created application directory:
cd syncfusion-angular-app
Note: In Angular 19 and below, it uses
app.component.ts,app.component.html,app.component.cssetc. In Angular 20+, the CLI generates a simpler structure withsrc/app/app.ts,app.html, andapp.css(no.component.suffixes).
Adding Syncfusion® Angular Grids package
To install the Grids package, use the following command:
npm install @syncfusion/ej2-angular-grids --save
Adding CSS reference
Themes for Syncfusion® Data Grid components can be applied using CSS files provided through npm theme packages. For available themes, refer to the Themes documentation.
Install the Material 3 theme package using the following command:
npm install @syncfusion/ej2-material3-theme --saveThen add the following CSS reference to the src/styles.css file:
@import "../node_modules/@syncfusion/ej2-material3-theme/styles/grid/index.css";Add Data Grid component
Modify the template in the src/app/app.ts file to render the Data Grid component. Add the Angular Data Grid by using <ejs-grid> selector in template section of the app.ts file.
import { Component } from '@angular/core';
import { GridModule } from '@syncfusion/ej2-angular-grids';

// Defines the data to be displayed in the Grid.
const data: object[] = [
    { OrderID: 10248, CustomerName: 'Ana Trujillo', OrderDate: new Date(2025, 0, 12), ShipCountry: 'France', Freight: 32.38 },
    { OrderID: 10249, CustomerName: 'Martin Sommer', OrderDate: new Date(2025, 0, 15), ShipCountry: 'Germany', Freight: 11.61 },
    { OrderID: 10250, CustomerName: 'Thomas Hardy', OrderDate: new Date(2025, 1, 5), ShipCountry: 'Brazil', Freight: 65.83 },
    { OrderID: 10251, CustomerName: 'Elizabeth Lincoln', OrderDate: new Date(2025, 1, 18), ShipCountry: 'France', Freight: 41.34 },
    { OrderID: 10252, CustomerName: 'Victoria Ashworth', OrderDate: new Date(2025, 2, 10), ShipCountry: 'Belgium', Freight: 51.30 },
    { OrderID: 10253, CustomerName: 'Martine Rance', OrderDate: new Date(2025, 2, 22), ShipCountry: 'Brazil', Freight: 58.17 }
]

@Component({
    imports: [GridModule],
    standalone: true,
    selector: 'app-root',
    template: `
        <!-- Assigns the dataset to the Grid component -->
        <ejs-grid [dataSource]='data'>
            <!-- Define the columns to be displayed -->
            <e-columns>
                <e-column field='OrderID' headerText='Order ID' textAlign='Right' width=90></e-column>
                <e-column field='CustomerName' headerText='Customer Name' width=100></e-column>
                <e-column field='OrderDate' headerText='Order Date' textAlign='Right' format='yMd' width=100></e-column>
                <e-column field='Freight' headerText='Freight' textAlign='Right' format='C2' width=120></e-column>
                <e-column field='ShipCountry' headerText='Ship Country' width=100></e-column>
            </e-columns>
        </ejs-grid>
    `
})

export class App {
    public data: object[] = data;
}
import { bootstrapApplication } from '@angular/platform-browser';
import { appConfig } from './app/app.config';
import { App } from './app/app';
bootstrapApplication(App, appConfig)
.catch((err) => console.error(err));@import "../node_modules/@syncfusion/ej2-material3-theme/styles/grid/index.css";Run the application
ng serve --open
Then open the URL displayed in the terminal.
Registering Syncfusion license
The Syncfusion® Angular Data Grid requires a valid license key to be registered in the application. To prevent license validation warnings, refer to the Syncfusion licensing documentation.
Troubleshooting
-
Grid styles are not applied: Ensure the required Syncfusion theme CSS is imported in
src/styles.css. -
Trial license warning message: Register a valid Syncfusion license key using the
registerLicense()method from@syncfusion/ej2-base.
Looking for the full Angular Data Grid component overview, features, pricing, and documentation? Visit the Angular Data Grid page.
See also
- Data Grid Feature Modules
- Data Binding
- How to get current query in Angular Data Grid
- Apply Data Grid Localization from external JSON file in Angular Data Grid
- How to render the Syncfusion Data Grid in jHipster spring boot Angular App
- Calculate Height of Angular Data Grid
- How to set tabindex for input element and NumericTextBox in Angular Data Grid
- How to toggle between List and Data Grid View in Angular?
- How to get started easily with an example of Angular 6 data grid/datatable?
- How to render Angular Data Grid with material theme
- Getting Started ASP.NET Core with Angular using Project Template
- Getting Started with Angular CLI as Front end in ASP.NET MVC
- Getting Started with Ionic and Angular
- Getting Started with Angular and Electron
- How to get started easily with Angular 9 data grid?
- How to get started easily with Angular 8 data grid?
- How to handle errors in Angular Data Grid component?
- How to get started easily with Angular 7 Data Grid/DataTable?
- How to get started easily with an example of Angular 5 data grid?
- How to get started easily with Angular 4 data grid?