Getting Started with ASP.NET Core Chat UI
06 Aug 20267 minutes to read
This section briefly explains how to include the ASP.NET Core Chat UI control in your ASP.NET Core application using Visual Studio.
Prerequisites
.NET and Visual Studio compatibility
| .NET version | Minimum Visual Studio version |
|---|---|
| .NET 10.0 | Visual Studio 2026 18.0.0 or later |
| .NET 9.0 | Visual Studio 2022 17.12.0 or later |
| .NET 8.0 | Visual Studio 2022 17.8.0 or later |
| .NET Core SDK 3.1 | Visual Studio 2019 16.4 or later |
| .NET Core SDK 2.0 | Visual Studio 2017 15.7 or later |
Browser support
| Browser | Versions |
|---|---|
| Google Chrome, including Android & iOS | Latest Version |
| Mozilla Firefox | Latest Version |
| Microsoft Edge | Latest Version |
| Apple Safari, including iOS | Latest Version |
| Opera | Latest Version |
| Microsoft Internet Explorer | 11 |
Create an ASP.NET Core Web App with Razor Pages
Create an ASP.NET Core Web App using Visual Studio via Microsoft Templates or the Syncfusion® ASP.NET Core Extension. For detailed instructions, refer to the ASP.NET Core Web App Getting Started documentation.
Install the required ASP.NET Core packages
To add ASP.NET Core Chat UI control in the app, open the NuGet package manager in Visual Studio (Tools → NuGet Package Manager → Manage NuGet Packages for Solution), search for and install the Syncfusion.AspNetCore.InteractiveChat and Syncfusion.AspNetCore.Themes packages. All Syncfusion ASP.NET Core packages are available in nuget.org. See the NuGet packages topic for details.
Alternatively, you can install the same package using the Package Manager Console with the following commands.
Install-Package Syncfusion.AspNetCore.InteractiveChat -Version 35.1.37
Install-Package Syncfusion.AspNetCore.Themes -Version 35.1.37
Add the ASP.NET Core Tag Helpers
After the packages are installed installed, open the ~/Pages/_ViewImports.cshtml file and import the Syncfusion.AspNetCore.Base and Syncfusion.AspNetCore.InteractiveChat Tag Helpers.
@addTagHelper *, Syncfusion.AspNetCore.Base
@addTagHelper *, Syncfusion.AspNetCore.InteractiveChat
Add stylesheet and script resources
The theme stylesheet and script are referenced from CDN. Include the stylesheet and script references inside the <head> of the ~/Pages/Shared/_Layout.cshtml
<head>
    ...
    <!-- Syncfusion ASP.NET Core controls styles -->
    <link rel="stylesheet" href="_content/Syncfusion.AspNetCore.Themes/styles/fluent2.css" />
    <!-- Syncfusion ASP.NET Core controls scripts -->
    <script src="_content/Syncfusion.AspNetCore.InteractiveChat/scripts/sf-chat-ui.min.js"></script>
</head>
Register the Script Manager
Open the ~/Pages/Shared/_Layout.cshtml file and register the script manager <ejs-scripts> at the end of the <body> element as follows.
<body>
    ...
    <!-- Syncfusion ASP.NET Core Script Manager -->
    <ejs-scripts></ejs-scripts>
</body>
Add ASP.NET Core Chat UI control
Add the ASP.NET Core Chat UI control in the ~/Pages/Index.cshtml file.
@using Syncfusion.EJ2.InteractiveChat;

<div class="chatui-container" style="height: 400px; width: 400px;">
    <ejs-chatui id="chatUI">
        <e-chatui-user id="user1" user="Albert"></e-chatui-user>
    </ejs-chatui>
</div>
using Syncfusion.EJ2.InteractiveChat;
public ChatUIUser CurrentUser { get; set; }
public ChatUIUser CurrentUserModel { get; set; } = new ChatUIUser() { Id = "user1", User = "Albert" };
public ActionResult Default()
{
CurrentUser = CurrentUserModel;
ViewBag.CurrentUser = CurrentUser;
return View();
}Run the application
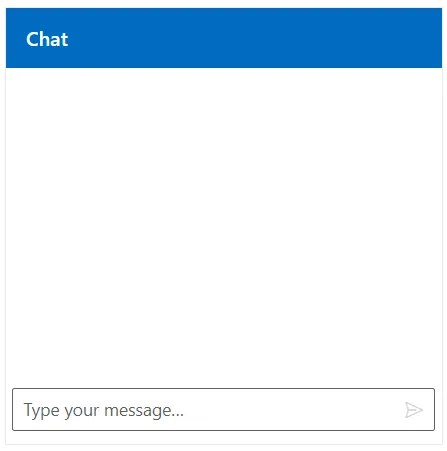
Press Ctrl+F5 (Windows) or ⌘+F5 (macOS) to launch the application. The ASP.NET Core Chat UI will render in your default web browser.
Configure messages and user
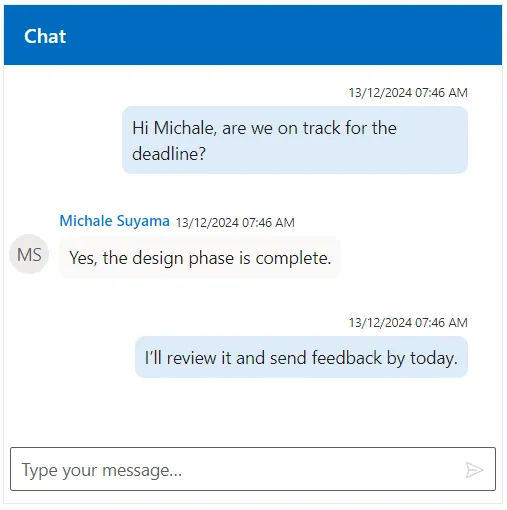
You can use the <e-chatui-messages> tag directive to group all the messages and <e-chatui-message> directive to define each message and the <e-chatui-user> tag directive to configure the current user for the chat.
@using Syncfusion.EJ2.InteractiveChat;

<div class="chatui-container" style="height:380px; width:450px">
    <ejs-chatui id="chatUser">
        <e-chatui-user id="user1" user="Albert"></e-chatui-user>
        <e-chatui-messages>
            @foreach (var message in ViewBag.ChatMessagesData)
            {
                <e-chatui-message text="@message.Text" author="@message.Author"></e-chatui-message>
            }
        </e-chatui-messages>
    </ejs-chatui>
</div>
using Syncfusion.EJ2.InteractiveChat;
public ChatUIUser CurrentUser { get; set; }
public List<ChatUIMessage> ChatMessagesData { get; set; } = new List<ChatUIMessage>();
public ChatUIUser CurrentUserModel { get; set; } = new ChatUIUser() { Id = "user1", User = "Albert" };
public ChatUIUser MichaleUserModel { get; set; } = new ChatUIUser() { Id = "user2", User = "Michale Suyama" };
public void OnGet()
{
CurrentUser = CurrentUserModel;
ChatMessagesData.Add(new ChatUIMessage()
{
Text = "Hi Michale, are we on track for the deadline?",
Author = CurrentUserModel
});
ChatMessagesData.Add(new ChatUIMessage()
{
Text = "Yes, the design phase is complete.",
Author = MichaleUserModel
});
ChatMessagesData.Add(new ChatUIMessage()
{
Text = "I’ll review it and send feedback by today.",
Author = CurrentUserModel
});
}