Getting Started with Angular Grid Component
30 Jan 202624 minutes to read
This guide demonstrates how to set up and configure the Syncfusion Angular Grid component, from initial installation through enabling core features like paging, sorting, filtering, and grouping.
Note: This guide supports Angular 21 and other recent Angular versions. For detailed compatibility with other Angular versions, please refer to the Angular version support matrix. Starting from Angular 19, standalone components are the default, and this guide reflects that architecture.
Ready to streamline your Syncfusion® Angular development? Discover the full potential of Syncfusion® Angular components with Syncfusion® AI Coding Assistant. Effortlessly integrate, configure, and enhance your projects with intelligent, context-aware code suggestions, streamlined setups, and real-time insights—all seamlessly integrated into your preferred AI-powered IDEs like VS Code, Cursor, Syncfusion® CodeStudio and more. Explore Syncfusion® AI Coding Assistant
To get started quickly with Angular Grid using CLI and Schematics, you can check on this video:
Prerequisites
Ensure your development environment meets the System Requirements for Syncfusion® Angular UI Components.
SetUp the Angular application
A straightforward approach to beginning with Angular is to create a new application using the Angular CLI. Install Angular CLI globally with the following command:
npm install -g @angular/cliAngular 21 Standalone Architecture: Standalone components are the default in Angular 21. This guide uses the modern standalone architecture. If you need more information about the standalone architecture, refer to the Standalone Guide.
Installing a specific version
To install a particular version of Angular CLI, use:
npm install -g @angular/[email protected]Create a new application
With Angular CLI installed, execute this command to generate a new application:
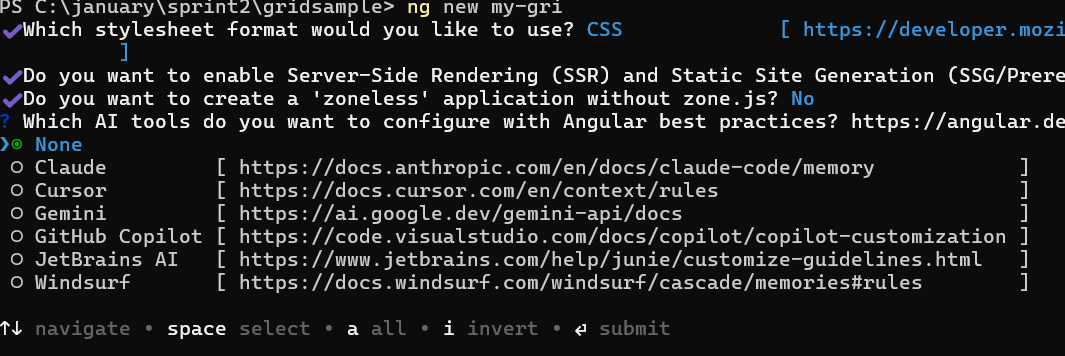
ng new syncfusion-angular-app- This command will prompt you to configure settings like enabling Angular routing and choosing a stylesheet format.
? Which stylesheet format would you like to use? (Use arrow keys)
> CSS [ https://developer.mozilla.org/docs/Web/CSS ]
Sass (SCSS) [ https://sass-lang.com/documentation/syntax#scss ]
Sass (Indented) [ https://sass-lang.com/documentation/syntax#the-indented-syntax ]
Less [ http://lesscss.org ]- By default, a CSS-based application is created. Use SCSS if required:
ng new syncfusion-angular-app --style=scss- During project setup, when prompted for the Server-side rendering (SSR) option, choose the appropriate configuration.

- Select the required AI tool or ‘none’ if you do not need any AI tool.

- Navigate to your newly created application directory:
cd syncfusion-angular-appNote: In Angular 19 and below, it uses
app.component.ts,app.component.html,app.component.cssetc. In Angular 20+, the CLI generates a simpler structure withsrc/app/app.ts,app.html, andapp.css(no.component.suffixes).
Adding Syncfusion® Angular packages
Syncfusion®’s Angular component packages are available on npmjs.com. To use Syncfusion® Angular components, install the necessary package.
This guide uses the Angular Grid Component for demonstration. Add the Angular Grid component with:
ng add @syncfusion/ej2-angular-gridsThis command will perform the following configurations:
- Add the
@syncfusion/ej2-angular-gridspackage and peer dependencies to yourpackage.json. - Import the Grid component in your application.
- Register the default Syncfusion® Material theme in
angular.json.
For more details on version compatibility, refer to the Version Compatibility section.
Syncfusion® offers two package structures for Angular components:
- Ivy library distribution package format
- Angular compatibility compiler (ngcc), which is Angular’s legacy compilation pipeline.
Syncfusion®’s latest Angular packages are provided as Ivy-compatible and suited for Angular 12 and above. To install the package, execute:ng add @syncfusion/ej2-angular-gridsFor applications not compiled with Ivy, use the
ngcctagged packages:The ngcc packages are still compatible with Angular CLI versions 15 and below. However, they may generate warnings suggesting the use of IVY compiled packages. Starting from Angular 16, support for the ngcc package has been completely removed. If you have further questions regarding ngcc compatibility, please refer to the following FAQ.
npm add @syncfusion/[email protected]
Import Syncfusion® CSS styles
Syncfusion® Angular component themes can be added in various ways: via CSS or SCSS styles from npm packages, CDN, CRG, or Theme Studio.
The Material theme is added to your styles.css when you run ng add (this happens automatically by default).
To stylize only specific Syncfusion® components, import the necessary styles. For example, to style only the Grid component:
@import '../node_modules/@syncfusion/ej2-base/styles/material.css';
@import '../node_modules/@syncfusion/ej2-buttons/styles/material.css';
@import '../node_modules/@syncfusion/ej2-calendars/styles/material.css';
@import '../node_modules/@syncfusion/ej2-dropdowns/styles/material.css';
@import '../node_modules/@syncfusion/ej2-inputs/styles/material.css';
@import '../node_modules/@syncfusion/ej2-navigations/styles/material.css';
@import '../node_modules/@syncfusion/ej2-popups/styles/material.css';
@import '../node_modules/@syncfusion/ej2-splitbuttons/styles/material.css';
@import '../node_modules/@syncfusion/ej2-notifications/styles/material.css';
@import '../node_modules/@syncfusion/ej2-angular-grids/styles/material.css';Ensure that the import order aligns with the component’s dependency sequence.
For using SCSS styles, refer to this guide.
Add Grid component
Modify the template in the [src/app/app.ts] file to render the grid component.
Add the Angular Grid by using <ejs-grid> selector in template section of the app.ts file.
import { Component, OnInit } from '@angular/core';
import { GridModule } from '@syncfusion/ej2-angular-grids'
@Component({
imports: [
GridModule
],
standalone: true,
selector: 'app-root',
// specifies the template string for the Grid component
template: `<ejs-grid> </ejs-grid>`
})
export class AppComponent implements OnInit {
ngOnInit(): void {
}
}Defining row data
Bind data to the Grid component using the dataSource property. The property accepts either an array of JavaScript objects or a DataManager instance.
import { GridModule } from '@syncfusion/ej2-angular-grids'
import { Component, OnInit } from '@angular/core';
import { data } from './datasource';
@Component({
imports: [
GridModule
],
standalone: true,
selector: 'app-root',
template: `<ejs-grid [dataSource]='data'> </ejs-grid>`
})
export class AppComponent implements OnInit {
public data?: object[];
ngOnInit(): void {
this.data = data;
}
}Create a [src/app/datasource.ts] file with the following sample dataset to provide JSON data to the Grid component.
export let data: Object[] = [
{
OrderID: 10248, CustomerID: 'VINET', EmployeeID: 5, OrderDate: new Date(8364186e5),
ShipName: 'Vins et alcools Chevalier', ShipCity: 'Reims', ShipAddress: '59 rue de l Abbaye',
ShipRegion: 'CJ', ShipPostalCode: '51100', ShipCountry: 'France', Freight: 32.38, Verified: !0
},
{
OrderID: 10249, CustomerID: 'TOMSP', EmployeeID: 6, OrderDate: new Date(836505e6),
ShipName: 'Toms Spezialitäten', ShipCity: 'Münster', ShipAddress: 'Luisenstr. 48',
ShipRegion: 'CJ', ShipPostalCode: '44087', ShipCountry: 'Germany', Freight: 11.61, Verified: !1
},
{
OrderID: 10250, CustomerID: 'HANAR', EmployeeID: 4, OrderDate: new Date(8367642e5),
ShipName: 'Hanari Carnes', ShipCity: 'Rio de Janeiro', ShipAddress: 'Rua do Paço, 67',
ShipRegion: 'RJ', ShipPostalCode: '05454-876', ShipCountry: 'Brazil', Freight: 65.83, Verified: !0
},
{
OrderID: 10251, CustomerID: 'VICTE', EmployeeID: 3, OrderDate: new Date(8367642e5),
ShipName: 'Victuailles en stock', ShipCity: 'Lyon', ShipAddress: '2, rue du Commerce',
ShipRegion: 'CJ', ShipPostalCode: '69004', ShipCountry: 'France', Freight: 41.34, Verified: !0
},
{
OrderID: 10252, CustomerID: 'SUPRD', EmployeeID: 4, OrderDate: new Date(8368506e5),
ShipName: 'Suprêmes délices', ShipCity: 'Charleroi', ShipAddress: 'Boulevard Tirou, 255',
ShipRegion: 'CJ', ShipPostalCode: 'B-6000', ShipCountry: 'Belgium', Freight: 51.3, Verified: !0
},
{
OrderID: 10253, CustomerID: 'HANAR', EmployeeID: 3, OrderDate: new Date(836937e6),
ShipName: 'Hanari Carnes', ShipCity: 'Rio de Janeiro', ShipAddress: 'Rua do Paço, 67',
ShipRegion: 'RJ', ShipPostalCode: '05454-876', ShipCountry: 'Brazil', Freight: 58.17, Verified: !0
},
{
OrderID: 10254, CustomerID: 'CHOPS', EmployeeID: 5, OrderDate: new Date(8370234e5),
ShipName: 'Chop-suey Chinese', ShipCity: 'Bern', ShipAddress: 'Hauptstr. 31',
ShipRegion: 'CJ', ShipPostalCode: '3012', ShipCountry: 'Switzerland', Freight: 22.98, Verified: !1
},
{
OrderID: 10255, CustomerID: 'RICSU', EmployeeID: 9, OrderDate: new Date(8371098e5),
ShipName: 'Richter Supermarkt', ShipCity: 'Genève', ShipAddress: 'Starenweg 5',
ShipRegion: 'CJ', ShipPostalCode: '1204', ShipCountry: 'Switzerland', Freight: 148.33, Verified: !0
},
{
OrderID: 10256, CustomerID: 'WELLI', EmployeeID: 3, OrderDate: new Date(837369e6),
ShipName: 'Wellington Importadora', ShipCity: 'Resende', ShipAddress: 'Rua do Mercado, 12',
ShipRegion: 'SP', ShipPostalCode: '08737-363', ShipCountry: 'Brazil', Freight: 13.97, Verified: !1
},
{
OrderID: 10257, CustomerID: 'HILAA', EmployeeID: 4, OrderDate: new Date(8374554e5),
ShipName: 'HILARION-Abastos', ShipCity: 'San Cristóbal', ShipAddress: 'Carrera 22 con Ave. Carlos Soublette #8-35',
ShipRegion: 'Táchira', ShipPostalCode: '5022', ShipCountry: 'Venezuela', Freight: 81.91, Verified: !0
},
{
OrderID: 10258, CustomerID: 'ERNSH', EmployeeID: 1, OrderDate: new Date(8375418e5),
ShipName: 'Ernst Handel', ShipCity: 'Graz', ShipAddress: 'Kirchgasse 6',
ShipRegion: 'CJ', ShipPostalCode: '8010', ShipCountry: 'Austria', Freight: 140.51, Verified: !0
},
{
OrderID: 10259, CustomerID: 'CENTC', EmployeeID: 4, OrderDate: new Date(8376282e5),
ShipName: 'Centro comercial Moctezuma', ShipCity: 'México D.F.', ShipAddress: 'Sierras de Granada 9993',
ShipRegion: 'CJ', ShipPostalCode: '05022', ShipCountry: 'Mexico', Freight: 3.25, Verified: !1
},
{
OrderID: 10260, CustomerID: 'OTTIK', EmployeeID: 4, OrderDate: new Date(8377146e5),
ShipName: 'Ottilies Käseladen', ShipCity: 'Köln', ShipAddress: 'Mehrheimerstr. 369',
ShipRegion: 'CJ', ShipPostalCode: '50739', ShipCountry: 'Germany', Freight: 55.09, Verified: !0
},
{
OrderID: 10261, CustomerID: 'QUEDE', EmployeeID: 4, OrderDate: new Date(8377146e5),
ShipName: 'Que Delícia', ShipCity: 'Rio de Janeiro', ShipAddress: 'Rua da Panificadora, 12',
ShipRegion: 'RJ', ShipPostalCode: '02389-673', ShipCountry: 'Brazil', Freight: 3.05, Verified: !1
},
{
OrderID: 10262, CustomerID: 'RATTC', EmployeeID: 8, OrderDate: new Date(8379738e5),
ShipName: 'Rattlesnake Canyon Grocery', ShipCity: 'Albuquerque', ShipAddress: '2817 Milton Dr.',
ShipRegion: 'NM', ShipPostalCode: '87110', ShipCountry: 'USA', Freight: 48.29, Verified: !0
}];Defining columns
The Grid provides the option to define columns using directives. In these column directives, various properties are available to customize column behavior.
The following properties are used in this example:
- field - Maps the column to a property name in the data source array.
- headerText - Changes the title displayed in the column header.
- textAlign - Changes the alignment of column content. By default, columns are left aligned. To change the alignment to right, set this property to Right.
- format - Formats numeric and date values using standard or custom formats. In this example, it formats numeric values as currency.
import { NgModule } from '@angular/core'
import { BrowserModule } from '@angular/platform-browser'
import { GridModule } from '@syncfusion/ej2-angular-grids'
import { PageService, SortService, FilterService, GroupService } from '@syncfusion/ej2-angular-grids'
import { Component, OnInit } from '@angular/core';
import { data } from './datasource';
@Component({
imports: [
GridModule
],
providers: [PageService,
SortService,
FilterService,
GroupService],
standalone: true,
selector: 'app-root',
template: `<ejs-grid [dataSource]='data'>
<e-columns>
<e-column field='OrderID' headerText='Order ID' textAlign='Right' width=90></e-column>
<e-column field='CustomerID' headerText='Customer ID' width=120></e-column>
<e-column field='Freight' headerText='Freight' textAlign='Right' format='C2' width=90></e-column>
<e-column field='OrderDate' headerText='Order Date' textAlign='Right' format='yMd' width=120></e-column>
</e-columns>
</ejs-grid>`
})
export class AppComponent implements OnInit {
public data?: object[];
ngOnInit(): void {
this.data = data;
}
}import { bootstrapApplication } from '@angular/platform-browser';
import { AppComponent } from './app.component';
import 'zone.js';
bootstrapApplication(AppComponent).catch((err) => console.error(err));Module injection
To create a Grid with additional features, inject the required modules. The following modules extend the Grid’s basic functionality:
- PageService - Inject this service to enable paging features.
- SortService - Inject this service to enable sorting features.
- FilterService - Inject this service to enable filtering features.
- GroupService - Inject this service to enable grouping features.
These modules should be injected into the providers section of the root NgModule or component class.
Additional feature modules are available here.
Enable paging
Paging divides Grid records into manageable pages, improving performance when handling large datasets. Set the allowPaging property to true to enable pagination. The PageService module must be injected in the providers for the pager to render. Use the pageSettings property to configure paging behavior such as page size and initial page number.
import { NgModule } from '@angular/core'
import { BrowserModule } from '@angular/platform-browser'
import { GridModule } from '@syncfusion/ej2-angular-grids'
import { PageService, SortService, FilterService, GroupService } from '@syncfusion/ej2-angular-grids'
import { Component, OnInit } from '@angular/core';
import { data } from './datasource';
import { PageSettingsModel } from '@syncfusion/ej2-angular-grids';
@Component({
imports: [
GridModule
],
providers: [PageService,
SortService,
FilterService,
GroupService],
standalone: true,
selector: 'app-root',
template: `<ejs-grid [dataSource]='data' [allowPaging]="true" [pageSettings]='pageSettings'>
<e-columns>
<e-column field='OrderID' headerText='Order ID' textAlign='Right' width=90></e-column>
<e-column field='CustomerID' headerText='Customer ID' width=120></e-column>
<e-column field='Freight' headerText='Freight' textAlign='Right' format='C2' width=90></e-column>
<e-column field='OrderDate' headerText='Order Date' textAlign='Right' format='yMd' width=120></e-column>
</e-columns>
</ejs-grid>`
})
export class AppComponent implements OnInit {
public data?: object[];
public pageSettings?: PageSettingsModel;
ngOnInit(): void {
this.data = data;
this.pageSettings = { pageSize: 6 };
}
}import { bootstrapApplication } from '@angular/platform-browser';
import { AppComponent } from './app.component';
import 'zone.js';
bootstrapApplication(AppComponent).catch((err) => console.error(err));Enable sorting
The sorting feature allows arranging Grid records in ascending or descending order based on column values. Set the allowSorting property to true to activate sorting. The SortService module must be injected in the providers for column header sorting to work. Configure sorting behavior using the sortSettings property.
import { NgModule } from '@angular/core'
import { BrowserModule } from '@angular/platform-browser'
import { GridModule } from '@syncfusion/ej2-angular-grids'
import { PageService, SortService, FilterService, GroupService } from '@syncfusion/ej2-angular-grids'
import { Component, OnInit } from '@angular/core';
import { data } from './datasource';
import { PageSettingsModel } from '@syncfusion/ej2-angular-grids';
@Component({
imports: [
GridModule
],
providers: [PageService,
SortService,
FilterService,
GroupService],
standalone: true,
selector: 'app-root',
template: `<ejs-grid [dataSource]='data' [allowPaging]="true" [allowSorting]="true" [pageSettings]="pageSettings">
<e-columns>
<e-column field='OrderID' headerText='Order ID' textAlign='Right' width=90></e-column>
<e-column field='CustomerID' headerText='Customer ID' width=120></e-column>
<e-column field='Freight' headerText='Freight' textAlign='Right' format='C2' width=90></e-column>
<e-column field='OrderDate' headerText='Order Date' textAlign='Right' format='yMd' width=120></e-column>
</e-columns>
</ejs-grid>`
})
export class AppComponent implements OnInit {
public data?: object[];
public pageSettings?: PageSettingsModel;
ngOnInit(): void {
this.data = data;
this.pageSettings = { pageSize: 6 };
}
}import { bootstrapApplication } from '@angular/platform-browser';
import { AppComponent } from './app.component';
import 'zone.js';
bootstrapApplication(AppComponent).catch((err) => console.error(err));Enable filtering
The filtering feature reduces the displayed dataset to records matching specified criteria. Set the allowFiltering property to true to enable filtering. The FilterService module must be injected in the providers array for the filter bar to render. Adjust filtering behavior using the filterSettings property.
import { NgModule } from '@angular/core'
import { BrowserModule } from '@angular/platform-browser'
import { GridModule } from '@syncfusion/ej2-angular-grids'
import { PageService, SortService, FilterService, GroupService } from '@syncfusion/ej2-angular-grids'
import { Component, OnInit } from '@angular/core';
import { data } from './datasource';
import {PageSettingsModel } from '@syncfusion/ej2-angular-grids';
@Component({
imports: [
GridModule
],
providers: [PageService,
SortService,
FilterService,
GroupService],
standalone: true,
selector: 'app-root',
template: `<ejs-grid [dataSource]='data' [allowPaging]="true" [allowSorting]="true"
[allowFiltering]="true" [pageSettings]="pageSettings">
<e-columns>
<e-column field='OrderID' headerText='Order ID' textAlign='Right' width=90></e-column>
<e-column field='CustomerID' headerText='Customer ID' width=120></e-column>
<e-column field='Freight' headerText='Freight' textAlign='Right' format='C2' width=90></e-column>
<e-column field='OrderDate' headerText='Order Date' textAlign='Right' format='yMd' width=120></e-column>
</e-columns>
</ejs-grid>`
})
export class AppComponent implements OnInit {
public data?: object[];
public pageSettings?: PageSettingsModel;
ngOnInit(): void {
this.data = data;
this.pageSettings = { pageSize: 6 };
}
}import { bootstrapApplication } from '@angular/platform-browser';
import { AppComponent } from './app.component';
import 'zone.js';
bootstrapApplication(AppComponent).catch((err) => console.error(err));Enable grouping
The grouping feature displays Grid records in a grouped format. Set the allowGrouping property to true to enable grouping. The GroupService must be injected in the providers array for the group drop area to render. Control grouping behavior using the groupSettings property.
import { NgModule } from '@angular/core'
import { BrowserModule } from '@angular/platform-browser'
import { GridModule } from '@syncfusion/ej2-angular-grids'
import { PageService, SortService, FilterService, GroupService, ToolbarService, ExcelExportService } from '@syncfusion/ej2-angular-grids'
import { Component, OnInit } from '@angular/core';
import { data } from './datasource';
import { PageSettingsModel } from '@syncfusion/ej2-angular-grids';
@Component({
imports: [
GridModule
],
providers: [PageService,
SortService,
FilterService,
GroupService,
ToolbarService,
ExcelExportService],
standalone: true,
selector: 'app-root',
template: `<ejs-grid [dataSource]='data' [allowPaging]="true" [allowSorting]="true"
[allowFiltering]="true" [allowGrouping]="true" [pageSettings]='pageSettings'>
<e-columns>
<e-column field='OrderID' headerText='Order ID' textAlign='Right' width=90></e-column>
<e-column field='CustomerID' headerText='Customer ID' width=120></e-column>
<e-column field='Freight' headerText='Freight' textAlign='Right' format='C2' width=90></e-column>
<e-column field='OrderDate' headerText='Order Date' textAlign='Right' format='yMd' width=120></e-column>
</e-columns>
</ejs-grid>`
})
export class AppComponent implements OnInit {
public data?: object[];
public pageSettings?: PageSettingsModel;
ngOnInit(): void {
this.data = data;
this.pageSettings = { pageSize: 6 };
}
}import { bootstrapApplication } from '@angular/platform-browser';
import { AppComponent } from './app.component';
import 'zone.js';
bootstrapApplication(AppComponent).catch((err) => console.error(err));Run the application
Use the following command to run the application in the browser.
ng serve --openThe output will appear as follows.
import { NgModule } from '@angular/core'
import { BrowserModule } from '@angular/platform-browser'
import { GridModule } from '@syncfusion/ej2-angular-grids'
import { PageService, SortService, FilterService, GroupService, ToolbarService, ExcelExportService } from '@syncfusion/ej2-angular-grids'
import { Component, OnInit } from '@angular/core';
import { data } from './datasource';
import { PageSettingsModel } from '@syncfusion/ej2-angular-grids';
@Component({
imports: [
GridModule
],
providers: [PageService,
SortService,
FilterService,
GroupService,
ToolbarService,
ExcelExportService],
standalone: true,
selector: 'app-root',
template: `<ejs-grid [dataSource]='data' [allowPaging]="true" [allowSorting]="true"
[allowFiltering]="true" [allowGrouping]="true" [pageSettings]='pageSettings'>
<e-columns>
<e-column field='OrderID' headerText='Order ID' textAlign='Right' width=90></e-column>
<e-column field='CustomerID' headerText='Customer ID' width=120></e-column>
<e-column field='Freight' headerText='Freight' textAlign='Right' format='C2' width=90></e-column>
<e-column field='OrderDate' headerText='Order Date' textAlign='Right' format='yMd' width=120></e-column>
</e-columns>
</ejs-grid>`
})
export class AppComponent implements OnInit {
public data?: object[];
public pageSettings?: PageSettingsModel;
ngOnInit(): void {
this.data = data;
this.pageSettings = { pageSize: 6 };
}
}import { bootstrapApplication } from '@angular/platform-browser';
import { AppComponent } from './app.component';
import 'zone.js';
bootstrapApplication(AppComponent).catch((err) => console.error(err));See also
- How to get current query in Angular Grid
- Apply Grid Localization from external JSON file in Angular Grid
- How to render the Syncfusion Grid in jHipster spring boot Angular App
- Calculate Height of Angular Grid
- How to set tabindex for input element and NumericTextBox in Angular Grid
- How to toggle between List and Grid View in Angular?
- How to get started easily with an example of Syncfusion angular 6 data grid/datatable?
- How to render Angular Grid with material theme
- Getting Started ASP.NET Core with Angular using Project Template
- Getting Started with Angular CLI as Front end in ASP.NET MVC
- Getting Started with Ionic and Angular
- Getting Started with Angular and Electron
- How to get started easily with Syncfusion angular 9 data grid?
- How to get started easily with Syncfusion angular 8 data grid?
- How to handle errors in Angular Grid component?
- How to get started easily with Syncfusion Angular 7 Data Grid/DataTable?
- How to get started easily with an example of Syncfusion angular 5 data grid?
- How to get started easily with Syncfusion angular 4 data grid?