Getting Started with ASP.NET Core File Manager
6 Aug 202621 minutes to read
This section briefly explains how to include the ASP.NET Core File Manager control in your ASP.NET Core application using Visual Studio and Visual Studio Code.
Create an ASP.NET Core Web App with Razor pages
Create an ASP.NET Core Web App using Visual Studio via Microsoft Templates or the Syncfusion® ASP.NET Core Extension. For detailed instructions, refer to the ASP.NET Core Web App Getting Started documentation.
Run the following command to create a new ASP.NET Core Web App.
dotnet new webapp -o RazorPagesMovie
code -r RazorPagesMovie
Alternatively, create an ASP.NET Core Web App using Visual Studio Code via Microsoft Templates, the Syncfusion® ASP.NET Core Extension or the C# Dev Kit extension.
Install the required ASP.NET Core packages
Install Syncfusion.AspNetCore.FileManager and Syncfusion.AspNetCore.Themes NuGet packages. All Syncfusion ASP.NET Core packages are available in nuget.org. See the NuGet packages topic for the details.
- Go to Tools → NuGet Package Manager → Manage NuGet Packages for Solution.
- Search the required NuGet packages (
Syncfusion.AspNetCore.FileManagerandSyncfusion.AspNetCore.Themes) and install them.
Alternatively, you can install the same packages using the Package Manager Console with the following command.
Install-Package Syncfusion.AspNetCore.FileManager -Version 34.2.2
Install-Package Syncfusion.AspNetCore.Themes -Version 34.2.2
Open the terminal and run the following commands.
dotnet add package Syncfusion.AspNetCore.FileManager -v 34.2.2
dotnet add package Syncfusion.AspNetCore.Themes -v 34.2.2
Add the ASP.NET Core Tag Helper
After the packages are installed, open the ~/Pages/_ViewImports.cshtml file and import the Syncfusion.AspNetCore.Base and Syncfusion.AspNetCore.FileManager Tag Helpers.
@addTagHelper *, Syncfusion.AspNetCore.Base
@addTagHelper *, Syncfusion.AspNetCore.FileManager
Add stylesheet and script resources
The theme stylesheet and script can be referenced from the CDN. Include the stylesheet and script references inside the <head> of ~/Pages/Shared/_Layout.cshtml
<head>
    ...
    <!-- ASP.NET Core controls styles -->
    <link rel="stylesheet" href="_content/Syncfusion.AspNetCore.Themes/styles/fluent2.css" />
    <!-- ASP.NET Core controls scripts -->
    <script src="_content/Syncfusion.AspNetCore.FileManager/scripts/sf-file-manager.min.js"></script>
</head>
Register the Script Manager
Open the ~/Pages/Shared/_Layout.cshtml file and register the script manager <ejs-scripts> at the end of the <body> element as follows.
<body>
    ...
    <!-- ASP.NET Core Script Manager -->
    <ejs-scripts></ejs-scripts>
</body>
Add the ASP.NET Core File Manager control
Add the ASP.NET Core File Manager control in the ~/Pages/Index.cshtml file.
Create a Controllers folder in the project and add a HomeController.cs file with the following code. Also, create a wwwroot/Files folder to store the files accessed by the File Manager.
<div class="control-section">
    <div class="sample-container" style="padding:10px">
        <!--  Filemanager control declaration -->
        <ejs-filemanager id="file">
            <e-filemanager-ajaxsettings url="/Home/FileOperations">
            </e-filemanager-ajaxsettings>
            <e-filemanager-contextmenusettings visible="false"></e-filemanager-contextmenusettings>
            <e-filemanager-navigationpanesettings visible="false"></e-filemanager-navigationpanesettings>
            <e-filemanager-toolbarsettings visible="false"></e-filemanager-toolbarsettings>
        </ejs-filemanager>
    </div>
</div>
using Microsoft.AspNetCore.Mvc;
using System;
using System.Collections.Generic;
using System.Diagnostics;
using System.IO;
using System.Text.Json;
using Microsoft.AspNetCore.Hosting;
using Microsoft.AspNetCore.Http;
using Microsoft.AspNetCore.Http.Features;
using Microsoft.AspNetCore.Cors;
using Syncfusion.EJ2.FileManager.Base;
using Syncfusion.EJ2.FileManager.PhysicalFileProvider;
// Replace "FileManagerProject" with your project name.
namespace FileManagerProject.Controllers
{
[Route("[controller]")]
public class HomeController : Controller
{
public PhysicalFileProvider operation;
public string basePath;
string root = "wwwroot\\Files";
public HomeController(IWebHostEnvironment hostingEnvironment)
{
this.basePath = hostingEnvironment.ContentRootPath;
this.operation = new PhysicalFileProvider();
this.operation.RootFolder(this.basePath + "\\" + this.root);
}
[Route("FileOperations")]
public object FileOperations([FromBody] FileManagerDirectoryContent args)
{
var fullPath = (this.basePath + "\\" + this.root + args.Path).Replace("/", "\\");
if (args.Action == "delete" || args.Action == "rename")
{
if ((args.TargetPath == null) && (args.Path == ""))
{
FileManagerResponse response = new FileManagerResponse();
response.Error = new ErrorDetails { Code = "401", Message = "Restricted to modify the root folder." };
return this.operation.ToCamelCase(response);
}
}
switch (args.Action)
{
case "read":
// reads the file(s) or folder(s) from the given path.
return this.operation.ToCamelCase(this.operation.GetFiles(args.Path, args.ShowHiddenItems));
case "delete":
// deletes the selected file(s) or folder(s) from the given path.
return this.operation.ToCamelCase(this.operation.Delete(args.Path, args.Names));
case "copy":
// copies the selected file(s) or folder(s) from a path and then pastes them into a given target path.
return this.operation.ToCamelCase(this.operation.Copy(args.Path, args.TargetPath, args.Names, args.RenameFiles, args.TargetData));
case "move":
// cuts the selected file(s) or folder(s) from a path and then pastes them into a given target path.
return this.operation.ToCamelCase(this.operation.Move(args.Path, args.TargetPath, args.Names, args.RenameFiles, args.TargetData));
case "details":
// gets the details of the selected file(s) or folder(s).
return this.operation.ToCamelCase(this.operation.Details(args.Path, args.Names, args.Data));
case "create":
// creates a new folder in a given path.
return this.operation.ToCamelCase(this.operation.Create(args.Path, args.Name));
case "search":
// gets the list of file(s) or folder(s) from a given path based on the searched key string.
return this.operation.ToCamelCase(this.operation.Search(args.Path, args.SearchString, args.ShowHiddenItems, args.CaseSensitive));
case "rename":
// renames a file or folder.
return this.operation.ToCamelCase(this.operation.Rename(args.Path, args.Name, args.NewName, false, args.ShowFileExtension, args.Data));
}
return null;
}
// uploads the file(s) into a specified path
[Route("Upload")]
[DisableRequestSizeLimit]
public IActionResult Upload(string path, long size, IList<IFormFile> uploadFiles, string action)
{
try
{
FileManagerResponse uploadResponse;
foreach (var file in uploadFiles)
{
var folders = (file.FileName).Split('/');
// checking the folder upload
if (folders.Length > 1)
{
for (var i = 0; i < folders.Length - 1; i++)
{
string newDirectoryPath = Path.Combine(this.basePath + path, folders[i]);
if (Path.GetFullPath(newDirectoryPath) != (Path.GetDirectoryName(newDirectoryPath) + Path.DirectorySeparatorChar + folders[i]))
{
throw new UnauthorizedAccessException("Access denied for Directory-traversal");
}
if (!Directory.Exists(newDirectoryPath))
{
this.operation.ToCamelCase(this.operation.Create(path, folders[i]));
}
path += folders[i] + "/";
}
}
}
uploadResponse = operation.Upload(path, uploadFiles, action, size, null);
if (uploadResponse.Error != null)
{
Response.Clear();
Response.ContentType = "application/json; charset=utf-8";
Response.StatusCode = Convert.ToInt32(uploadResponse.Error.Code);
Response.HttpContext.Features.Get<IHttpResponseFeature>().ReasonPhrase = uploadResponse.Error.Message;
}
}
catch (Exception e)
{
ErrorDetails er = new ErrorDetails();
er.Message = e.Message.ToString();
er.Code = "417";
er.Message = "Access denied for Directory-traversal";
Response.Clear();
Response.ContentType = "application/json; charset=utf-8";
Response.StatusCode = Convert.ToInt32(er.Code);
Response.HttpContext.Features.Get<IHttpResponseFeature>().ReasonPhrase = er.Message;
return Content("");
}
return Content("");
}
// downloads the selected file(s) and folder(s)
[Route("Download")]
public IActionResult Download(string downloadInput)
{
var options = new JsonSerializerOptions
{
PropertyNamingPolicy = JsonNamingPolicy.CamelCase,
};
FileManagerDirectoryContent args = JsonSerializer.Deserialize<FileManagerDirectoryContent>(downloadInput, options);
return operation.Download(args.Path, args.Names, args.Data);
}
// gets the image(s) from the given path
[Route("GetImage")]
public IActionResult GetImage(FileManagerDirectoryContent args)
{
return this.operation.GetImage(args.Path, args.Id, false, null, null);
}
}
}After creating a controller for the File Manager service, register it in the Program.cs file using:
app.MapControllers();Run the application
Press Ctrl+F5 (Windows) or ⌘+F5 (macOS) to launch the application. The ASP.NET Core File Manager control will render in your default web browser.
Open the terminal and run the following command.
dotnet run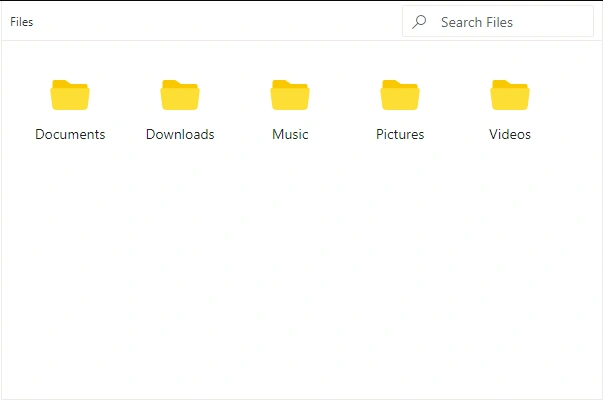
The File Manager can be rendered with
local servicefor sending ajax request. Ajax request will be sent to the server which then processes the request and sends back the response. Refer Controller file for File Manager service.
See also
- Getting Started with ASP.NET Core using Razor Pages
- Getting Started with ASP.NET Core MVC using Tag Helper
- Ajax Settings Configuration (uploadUrl, downloadUrl, getImageUrl)
- Getting Started with File Manager Overview
- Working with File Manager Views in ASP.NET Core
- Perform File Operations in File Manager
- Uploading Files in ASP.NET Core File Manager
- File Upload Operations in File Manager