Syncfusion® JavaScript (Essential® JS 2) library and Ionic Framework
20 May 20262 minutes to read
This article explains how to integrate Syncfusion® JavaScript (Essential® JS 2) controls into an Ionic application.
Prerequisites
Set up the development environment
1.Open the command prompt, and run the following command line to install the ionic with global flag.
on Windows:
npm install -g ionic cordova
on OSX / Linux:
sudo npm install -g ionic cordova
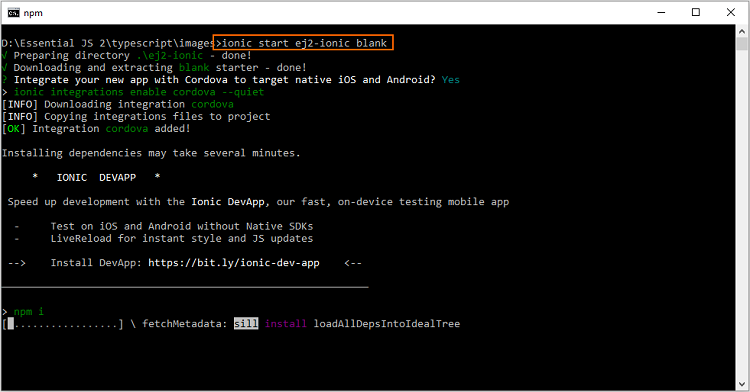
2.Then, run the following command line to create a new Ionic blank template application. The new application will be placed under ej2-ionic folder after the command complete its process, and it will install the default npm dependent packages when creating the application.
ionic start ej2-ionic blank
The list of available starter template can be listed by running ionic start --list command line.
Configuring Syncfusion® JavaScript UI control in application
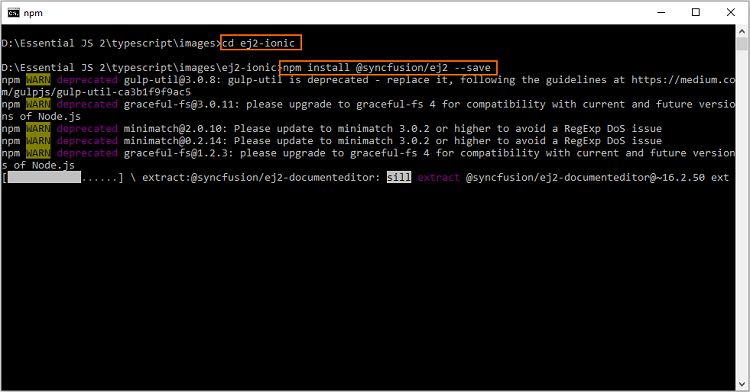
1.Navigate to the ej2-ionic folder from the command prompt, and install the @syncfusion/ej2 npm package in the application using the following command line.
cd ej2-ionic
npm install @syncfusion/ej2 --save
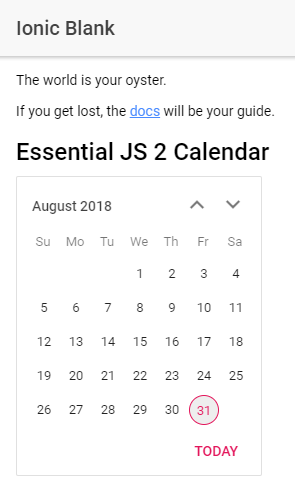
2.For getting started, the Calendar control will be added in the new application. Open the application in Visual Studio Code, and add the <div> element inside the <ion-content> element in ~/src/app/home/home.page.html file for rendering the Calendar control.
<ion-header>
    ....
    ....
</ion-header>

<ion-content padding>
    ....
    ....

    <h2>Essential JS 2 Calendar</h2>
    <!--HTML element which is going to render as Essential JS 2 Calendar control-->
    <div id="element"></div>
</ion-content>
3.Import the Calendar class from @syncfusion/ej2-calendars package, and render the Calendar control inside the platform.ready() method’s callback function of MyApp class in ~/src/app/home/home.page.ts file.
....
....
import { Calendar } from "@syncfusion/ej2-calendars";
import { Component } from '@angular/core';
import { Platform } from '@ionic/angular';

@Component({
    templateUrl: 'home.page.html'
})

export class HomePage {
constructor(platform: Platform) {
    platform.ready().then(() => {
        // initialize calendar control
        let calendarObject = new Calendar();

        // render initialized calendar
        calendarObject.appendTo('#element');
    });
}
}
4.Add the Syncfusion® JavaScript styles inside <head> element in ~/src/index.html file.
<!DOCTYPE html>
<html lang="en" dir="ltr">
    <head>
        ....
        ....
        <!-- Essential JS 2 styles -->
        <link href="https://cdn.syncfusion.com/ej2/32.2.3/fluent2.css" rel="stylesheet">
    </head>

    <body>
        ....
        ....
    </body>
</html>
5.Finally, run the following command line to start the Ionic application.
ionic serve
The Calendar control will be rendered in the Ionic application as shown in the following screenshot.