Getting Started with ASP.NET CORE
21 Aug 202614 minutes to read
This section briefly explains how to include the ASP.NET Core Splitter control in an ASP.NET Core application using Visual Studio.
Create ASP.NET Core web application with Razor pages
Create an ASP.NET Core Web App using Visual Studio via Microsoft Templates or the ASP.NET Core Extension. For detailed instructions, refer to the ASP.NET Core Web App Getting Started documentation.
Install ASP.NET Core package in the application
To add ASP.NET Core Splitter control in the app, open the NuGet package manager in Visual Studio (Tools → NuGet Package Manager → Manage NuGet Packages for Solution), search and install the Syncfusion.AspNetCore.Layouts and Syncfusion.AspNetCore.Themes packages. All Syncfusion ASP.NET Core packages are available in nuget.org. See the NuGet packages topic for details.
Alternatively, you can install the same package using the Package Manager Console with the following command.
Install-Package Syncfusion.AspNetCore.Layouts -Version 35.1.37
Install-Package Syncfusion.AspNetCore.Themes -Version 35.1.37
Add the ASP.NET Core Tag Helper
After the packages are installed, open the ~/Pages/_ViewImports.cshtml file and import the Syncfusion.AspNetCore.Base and Syncfusion.AspNetCore.Layouts Tag Helpers.
@addTagHelper *, Syncfusion.AspNetCore.Base
@addTagHelper *, Syncfusion.AspNetCore.Layouts
Add stylesheet and script resources
The theme stylesheet and script can be referenced from NuGet through Static Web Assets. Include the stylesheet and script references inside the <head> of ~/Pages/Shared/_Layout.cshtml file.
<head>
    ...
    <link rel="stylesheet" href="_content/Syncfusion.AspNetCore.Themes/styles/fluent2.css" />
    <script src="_content/Syncfusion.AspNetCore.Layouts/scripts/sf-splitter.min.js"></script>
</head>
Register the Script Manager
Open the ~/Pages/Shared/_Layout.cshtml file and register the script manager <ejs-scripts> at the end of the <body> element as follows.
<body>
    ...
    <!-- Syncfusion ASP.NET Core Script Manager -->
    <ejs-scripts></ejs-scripts>
</body>
Add ASP.NET Core Splitter control
Add the ASP.NET Core Splitter control in the ~/Pages/Index.cshtml page.
<ejs-splitter id="splitter" height="250px" width="600px">
    <e-splitter-panes>
        <e-splitter-pane content="<div></div>"></e-splitter-pane>
        <e-splitter-pane content="<div></div>"></e-splitter-pane>
        <e-splitter-pane content="<div></div>"></e-splitter-pane>
    </e-splitter-panes>
</ejs-splitter>
Run the application
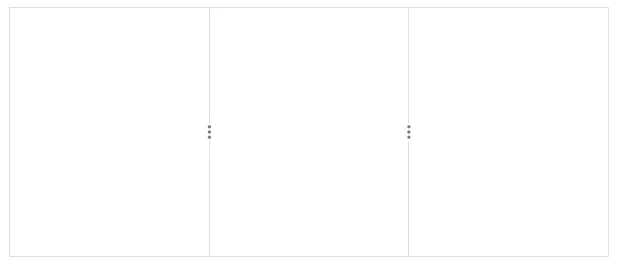
Press Ctrl+F5 (Windows) or ⌘+F5 (macOS) to run the app. The ASP.NET Core Splitter control will render in your default web browser.
Load content to the pane
You can load the pane content in either HTML element or string types using content property.
For detailed information, refer to the Pane Content section.
<ejs-splitter id="splitter" height="250px" width="550px">
<e-splitter-panes>
<e-splitter-pane content="<div class='content'><h3 class='h3'>HTML</h3><div class='code-preview'><<span>!DOCTYPE html></span><div><<span>html></span></div><div><<span>body></span></div><<span>div</span> id='custom-image'><div style='margin-left: 5px'><<span>img</span> src='src/albert.png'></div><div><<span>div</span>></div><div><<span>/body></span></div><div><<span>/html></span></div></div></div>"></e-splitter-pane>
<e-splitter-pane content="<div class='content'><h3 class='h3'>CSS</h3><div class='code-preview'><span>img {</span><div id='code-text'>margin:<span>0 auto;</span></div><div id='code-text'>display:<span>flex;</span></div><div id='code-text'>height:<span>70px;</span></div><span> }</span></div></div>"></e-splitter-pane>
<e-splitter-pane content="<div class='content'><h3 class='h3'>JavaScript</h3><div class='code-preview'><span>var</span> image = document.getElementById('custom-image');<div>image.addEventListener('click', function() {</div><div style='padding-left: 20px;'>// Code block for click action</div><span> }</span></div></div>"></e-splitter-pane>
</e-splitter-panes>
</ejs-splitter>
<style>
#code-text {
margin-left: 5px;
}
.code-preview {
margin-top: 15px;
font-size: 12px;
}
.h3 {
font-size: 14px;
margin: 4px;
}
.content {
padding: 12px;
}
.splitter-image {
margin: 0 auto;
display: flex;
height: 115px;
margin-top: 10px;
}
</style>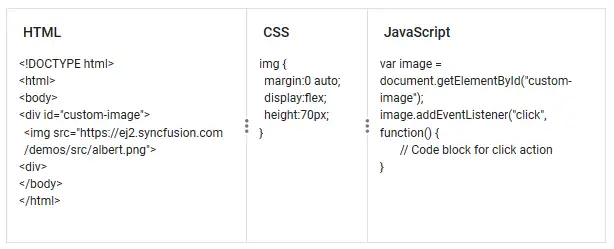
Configure pane size
You can specify the size to each pane using size property. It accepts pane values in percentage and pixel types.
In case of pane size is not declared, panes will equally share the sizes automatically.
For Horizontal orientation, panes will share the total width.
For Vertical orientation, panes will share the total height.
<ejs-splitter id="splitter" height="250px" width="550px">
<e-splitter-panes>
<e-splitter-pane size="40%" content="<div class='content'><h3 class='h3'>HTML</h3><div class='code-preview'><<span>!DOCTYPE html></span><div><<span>html></span></div><div><<span>body></span></div><<span>div</span> id='custom-image'><div style='margin-left: 5px'><<span>img</span> src='src/albert.png'></div><div><<span>div</span>></div><div><<span>/body></span></div><div><<span>/html></span></div></div></div>"></e-splitter-pane>
<e-splitter-pane size="20%" content="<div class='content'><h3 class='h3'>CSS</h3><div class='code-preview'><span>img {</span><div id='code-text'>margin:<span>0 auto;</span></div><div id='code-text'>display:<span>flex;</span></div><div id='code-text'>height:<span>70px;</span></div><span> }</span></div></div>"></e-splitter-pane>
<e-splitter-pane size="40%" content="<div class='content'><h3 class='h3'>JavaScript</h3><div class='code-preview'><span>var</span> image = document.getElementById('custom-image');<div>image.addEventListener('click', function() {</div><div style='padding-left: 20px;'>// Code block for click action</div><span> }</span></div></div>"></e-splitter-pane>
</e-splitter-panes>
</ejs-splitter>
<style>
#code-text {
margin-left: 5px;
}
.code-preview {
margin-top: 15px;
font-size: 12px;
}
.h3 {
font-size: 14px;
margin: 4px;
}
.content {
padding: 12px;
}
.splitter-image {
margin: 0 auto;
display: flex;
height: 115px;
margin-top: 10px;
}
</style>Resizable panes
Splitter allows you to change the pane dimensions by resizing the panes. By default, all the panes are resizable. You can disable the resize by using resizable property in each pane settings.
<ejs-splitter id="splitter" height="250px" width="550px">
<e-splitter-panes>
<e-splitter-pane size="40%" min="30px" resizable="false" content="<div class='content'><h3 class='h3'>HTML</h3><div class='code-preview'><<span>!DOCTYPE html></span><div><<span>html></span></div><div><<span>body></span></div><<span>div</span> id='custom-image'><div style='margin-left: 5px'><<span>img</span> src='src/albert.png'></div><div><<span>div</span>></div><div><<span>/body></span></div><div><<span>/html></span></div></div></div>"></e-splitter-pane>
<e-splitter-pane size="20%" min="15%" content="<div class='content'><h3 class='h3'>CSS</h3><div class='code-preview'><span>img {</span><div id='code-text'>margin:<span>0 auto;</span></div><div id='code-text'>display:<span>flex;</span></div><div id='code-text'>height:<span>70px;</span></div><span> }</span></div></div>"></e-splitter-pane>
<e-splitter-pane size="40%" content="<div class='content'><h3 class='h3'>JavaScript</h3><div class='code-preview'><span>var</span> image = document.getElementById('custom-image');<div>image.addEventListener('click', function() {</div><div style='padding-left: 20px;'>// Code block for click action</div><span> }</span></div></div>"></e-splitter-pane>
</e-splitter-panes>
</ejs-splitter>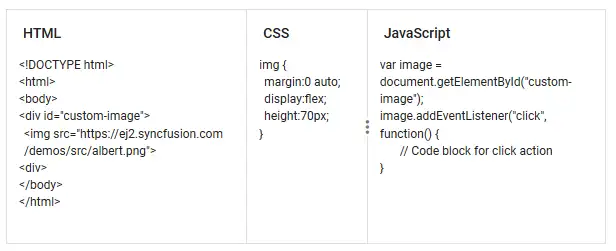
Set minimum and maximum pane sizes
Splitter allows you to set the minimum and maximum sizes for each pane. Resize will happen up to the minimum and maximum values only. It accepts the size in both percentage and pixel formats.
<ejs-splitter id="splitter" height="250px" width="550px">
<e-splitter-panes>
<e-splitter-pane size="40%" min="30px" max="60%" resizable="false" content="<div class='content'><h3 class='h3'>HTML</h3><div class='code-preview'><<span>!DOCTYPE html></span><div><<span>html></span></div><div><<span>body></span></div><<span>div</span> id='custom-image'><div style='margin-left: 5px'><<span>img</span> src='src/albert.png'></div><div><<span>div</span>></div><div><<span>/body></span></div><div><<span>/html></span></div></div></div>"></e-splitter-pane>
<e-splitter-pane size="20%" min="15%" max="40%" content="<div class='content'><h3 class='h3'>CSS</h3><div class='code-preview'><span>img {</span><div id='code-text'>margin:<span>0 auto;</span></div><div id='code-text'>display:<span>flex;</span></div><div id='code-text'>height:<span>70px;</span></div><span> }</span></div></div>"></e-splitter-pane>
<e-splitter-pane size="40%" content="<div class='content'><h3 class='h3'>JavaScript</h3><div class='code-preview'><span>var</span> image = document.getElementById('custom-image');<div>image.addEventListener('click', function() {</div><div style='padding-left: 20px;'>// Code block for click action</div><span> }</span></div></div>"></e-splitter-pane>
</e-splitter-panes>
</ejs-splitter>Orientation
Splitter supports both Horizontal and Vertical orientation for the panes. By default, it will be rendered in Horizontal orientation. You can change it by using orientation property.
<ejs-splitter id="splitter" height="200px" width="550px" orientation="Vertical">
    <e-splitter-panes>
        <e-splitter-pane size="50%" min="30%" content="<div class='content'> Top pane</div>"></e-splitter-pane>
        <e-splitter-pane size="50%" min="30%" content="<div class='content'> Bottom pane</div>"></e-splitter-pane>
    </e-splitter-panes>
</ejs-splitter>

<style>
    .content {
        justify-content: center;
        text-align: center;
        align-items: center;
        height: 100%;
        display: flex;
    }
</style>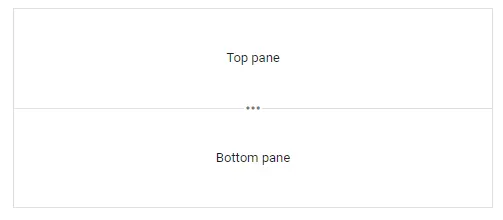
Nested Splitter
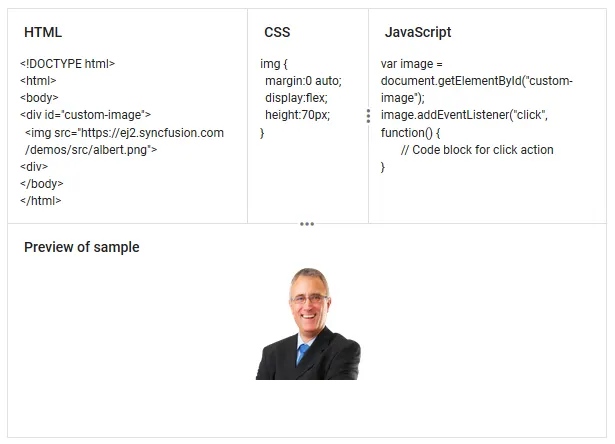
Splitter provides support to render the nested pane to achieve the complex layouts. You can render the nested splitter using the <div> element provided for parent splitter.
Also, you can render the nested splitter using direct child of the splitter pane. For this, nested splitter should have 100% width and height to match with the parent pane dimensions.
@{
var pane4Content = "<div class='content'><h3 class='h3'>Preview of sample</h3><div class='splitter-image'><img class='img1' src='https://ej2.syncfusion.com/demos/src/listview/images/albert.png' style='width: 20%;margin: 0 auto;'></div></div>";
}
<div class="pane1">
<ejs-splitter id="outerSplitter" height="430px" width="600px" orientation="Vertical" created="onLoad">
<e-splitter-panes>
<e-splitter-pane size="50%" min="30%"></e-splitter-pane>
<e-splitter-pane content=@pane4Content></e-splitter-pane>
</e-splitter-panes>
</ejs-splitter>
</div>
<style>
.h3 {
font-size: 14px;
margin: 4px;
}
.content {
padding: 12px;
}
.splitter-image {
margin: 0 auto;
display: flex;
height: 115px;
margin-top: 10px;
}
#code-text {
margin-left: 5px;
}
.code-preview {
margin-top: 15px;
font-size: 12px;
}
</style>
<script>
var pane1Content = "<div><div class='content'><h3 class='h3'>HTML</h3><div class='code-preview'><<span>!DOCTYPE html></span><div><<span>html></span></div>" +
"<div><<span>body></span></div><<span>div</span> id='custom-image'><div style='margin-left: 5px'><<span>img</span> src='src/albert.png'></div>" +
"<div><<span>div</span>></div><div><<span>/body></span></div><div><<span>/html></span></div></div></div></div>";
var pane2Content = "<div><div class='content'><h3 class='h3'>CSS</h3><div class='code-preview'><span>img {</span><div id='code-text'>margin:<span>0 auto;</span></div>" +
"<div id='code-text'>display:<span>flex;</span></div><div id='code-text'>height:<span>70px;</span></div><span>}</span></div></div></div>";
var pane3Content = "<div><div class='content'><h3 class='h3'>JavaScript</h3><div class='code-preview'><span>var </span>" +
"image = document.getElementById('custom-image');<div>image.addEventListener('click', function() {</div>" +
"<div style='padding-left: 20px;'>// Code block for click action</div><span> }</span></div></div></div>";
function onLoad() {
document.getElementById('outerSplitter').querySelector('.e-pane-vertical').setAttribute('id', 'Innersplitter');
var splitterObj = new ej.layouts.Splitter({
height: '250px',
paneSettings: [
{
size: '40%', min: '30px', resizable: false, content: pane1Content
},
{
size: '20%', min: '15%', content: pane2Content
},
{
size: '40%', content: pane3Content
}
],
width: '100%'
});
splitterObj.appendTo('#Innersplitter');
}
</script>