Getting Started with ASP.NET Core Inline AI Assist control
23 Jul 202612 minutes to read
This section briefly explains how to include the ASP.NET Core Inline AI Assist control in your ASP.NET Core application using Visual Studio.
Create an ASP.NET Core Web App with Razor pages
Create an ASP.NET Core Web App using Visual Studio via Microsoft Templates or the Syncfusion® ASP.NET Core Extension. For detailed instructions, refer to the ASP.NET Core Web App Getting Started documentation.
Install the required ASP.NET Core packages
To add ASP.NET Core Inline AI Assist control in the app, open the NuGet package manager in Visual Studio (Tools → NuGet Package Manager → Manage NuGet Packages for Solution), search for and install the Syncfusion.AspNetCore.InteractiveChat and Syncfusion.AspNetCore.Themes packages. All Syncfusion ASP.NET Core packages are available on nuget.org. See the NuGet packages topic for details.
Alternatively, you can install the same packages using the Package Manager Console with the following command.
Install-Package Syncfusion.AspNetCore.InteractiveChat -Version 34.1.29
Install-Package Syncfusion.AspNetCore.Themes -Version 34.1.29
Add ASP.NET Core Tag Helpers
After the packages are installed, open the ~/Pages/_ViewImports.cshtml file and import the Syncfusion.AspNetCore.Base and Syncfusion.AspNetCore.InteractiveChat Tag Helpers.
@addTagHelper *, Syncfusion.AspNetCore.Base
@addTagHelper *, Syncfusion.AspNetCore.InteractiveChat
Add stylesheet and script resources
The theme stylesheet and script can be referenced from CDN. Include the stylesheet and script references inside the <head> of ~/Pages/Shared/_Layout.cshtml file.
<head>
    ...
    @* ASP.NET Core controls styles *@
    <link rel="stylesheet" href="_content/Syncfusion.AspNetCore.Themes/styles/fluent2.css" />
    @* ASP.NET Core controls scripts *@
    <script src="_content/Syncfusion.AspNetCore.InteractiveChat/scripts/sf-inline-ai-assist.min.js"></script>
</head>
Register the Script Manager
Open the ~/Pages/Shared/_Layout.cshtml file and register the script manager <ejs-scripts> at the end of the <body> element as follows.
<body>
...
@* ASP.NET Core Script Manager *@
<ejs-scripts></ejs-scripts>
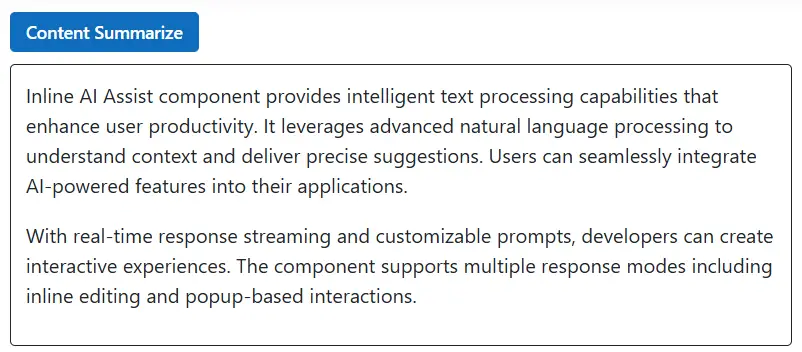
</body>Add ASP.NET Core Inline AI Assist control
Add the ASP.NET Core Inline AI Assist control in the ~/Pages/Index.cshtml file.
@using Syncfusion.EJ2.InteractiveChat;

<style>
    #editableText {
        width: 100%;
        min-height: 120px;
        max-height: 300px;
        overflow-y: auto;
        font-size: 16px;
        padding: 12px;
        border-radius: 4px;
        border: 1px solid;
    }
</style>

<div class="container" style="height: 350px; width: 650px;">
    <button id="summarizeBtn" class="e-btn e-primary" style="margin-bottom: 10px;" onclick="onSummarizeClick()">Content Summarize</button>
    <div id="editableText" contenteditable="true">
        <p>Inline AI Assist component provides intelligent text processing capabilities that enhance user productivity. It leverages advanced natural language processing to understand context and deliver precise suggestions. Users can seamlessly integrate AI-powered features into their applications.</p>
        <p>With real-time response streaming and customizable prompts, developers can create interactive experiences. The component supports multiple response modes including inline editing and popup-based interactions.</p>
    </div>

    <ejs-inlineaiassist id="defaultInlineAssist" relateTo="#summarizeBtn" target="#container" created="onCreated" promptRequest="onPromptRequest">
        <e-inlineaiassist-responsesettings itemSelect="onItemSelect"></e-inlineaiassist-responsesettings>
    </ejs-inlineaiassist>
</div>
Run the application
Press Ctrl+F5 (Windows) or ⌘+F5 (macOS) to launch the application. The ASP.NET Core Inline AI Assist control will render in your default web browser.
RelateTo and Target configuration
You can use the RelateTo property to position the Inline AI Assist relative to a specific DOM element. It accepts either a CSS selector string (e.g., ‘.container’ or ‘#id’) or an HTMLElement. The Target property specifies the element or CSS selector where the Inline AI Assist will be appended. It accepts either a CSS selector string (e.g., ‘.container’ or ‘#id’) or an HTMLElement.
@using Syncfusion.EJ2.InteractiveChat;

<style>
    #editableText {
        width: 100%;
        min-height: 120px;
        max-height: 300px;
        overflow-y: auto;
        font-size: 16px;
        padding: 12px;
        border-radius: 4px;
        border: 1px solid;
    }
</style>

<div class="container" style="height: 350px; width: 650px;">
    <button id="summarizeBtn" class="e-btn e-primary" style="margin-bottom: 10px;" onclick="onSummarizeClick()">Content Summarize</button>
    <div id="editableText" contenteditable="true">
        <p>Inline AI Assist component provides intelligent text processing capabilities that enhance user productivity. It leverages advanced natural language processing to understand context and deliver precise suggestions. Users can seamlessly integrate AI-powered features into their applications.</p>
        <p>With real-time response streaming and customizable prompts, developers can create interactive experiences. The component supports multiple response modes including inline editing and popup-based interactions.</p>
    </div>

    <ejs-inlineaiassist id="defaultInlineAssist" relateTo="#summarizeBtn" target="#container" created="onCreated" promptRequest="onPromptRequest">
        <e-inlineaiassist-responsesettings itemSelect="onItemSelect"></e-inlineaiassist-responsesettings>
    </ejs-inlineaiassist>
</div>

<script>
    var inlineAssist;

    function onCreated() {
        inlineAssist = this;
    }

    function onPromptRequest(args) {
        setTimeout(function () {
            var defaultResponse = 'For real-time prompt processing, connect the Inline AI Assist component to your preferred AI service, such as OpenAI or Azure Cognitive Services. Ensure you obtain the necessary API credentials to authenticate and enable seamless integration.';
            inlineAssist.addResponse(defaultResponse);
        }, 1000);
    }

    function onItemSelect(args) {
        if (args.command.label === 'Accept') {
            var editable = document.getElementById('editableText');
            if (editable) {
                editable.innerHTML = '<p>' + inlineAssist.prompts[inlineAssist.prompts.length - 1].response + '</p>';
            }
            inlineAssist.hidePopup();
        } else if (args.command.label === 'Discard') {
            inlineAssist.hidePopup();
        }
    }

    function onSummarizeClick() {
        if (inlineAssist) {
            inlineAssist.showPopup();
        }
    }
</script>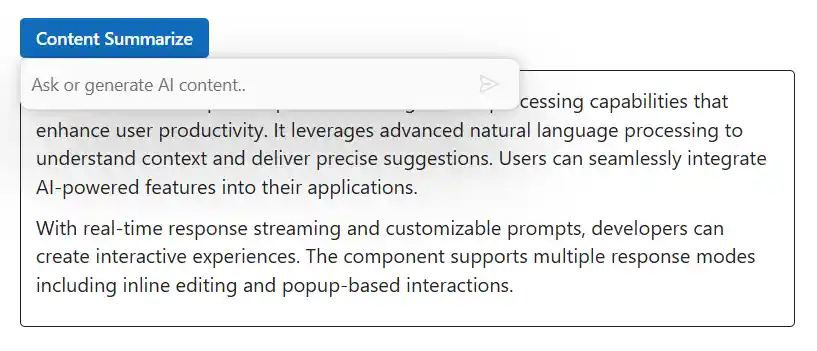
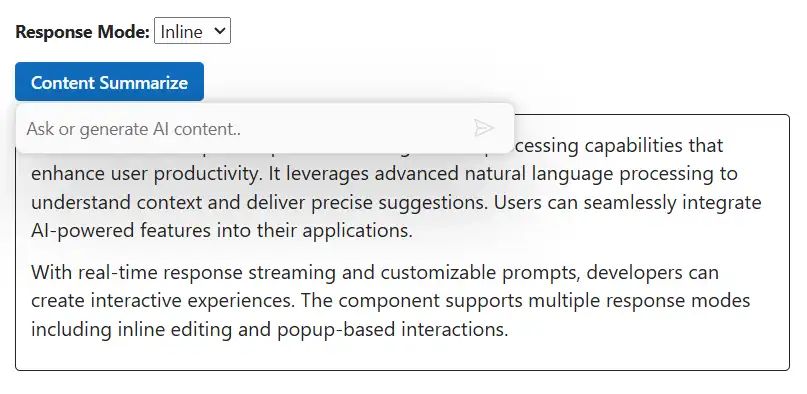
Response display modes
Responses can be shown in two modes: Inline (updates content in-place) and Popup (shows responses in a floating popup). Use the ResponseMode property to choose the desired behavior.
@using Syncfusion.EJ2.InteractiveChat;

<style>
    #editableText {
        width: 100%;
        min-height: 120px;
        max-height: 300px;
        overflow-y: auto;
        font-size: 16px;
        padding: 12px;
        border-radius: 4px;
        border: 1px solid;
    }
</style>

<div class="container" style="height: 350px; width: 650px;">
    <div style="margin-bottom: 10px;">
        <label for="responseMode">Response Mode:</label>
        <select id="responseMode" onchange="onResponseModeChange()">
            <option value="Popup">Popup</option>
            <option value="Inline">Inline</option>
        </select>
    </div>
    <button id="summarizeBtn" class="e-btn e-primary" style="margin-bottom: 10px;" onclick="onSummarizeClick()">Content Summarize</button>
    <div id="editableText" contenteditable="true">
        <p>Inline AI Assist component provides intelligent text processing capabilities that enhance user productivity. It leverages advanced natural language processing to understand context and deliver precise suggestions. Users can seamlessly integrate AI-powered features into their applications.</p>
        <p>With real-time response streaming and customizable prompts, developers can create interactive experiences. The component supports multiple response modes including inline editing and popup-based interactions.</p>
    </div>

    <ejs-inlineaiassist id="defaultInlineAssist" responseMode="Popup" relateTo="#summarizeBtn" created="onCreated" promptRequest="onPromptRequest">
        <e-inlineaiassist-responsesettings itemSelect="onItemSelect"></e-inlineaiassist-responsesettings>
    </ejs-inlineaiassist>
</div>

<script>
    var inlineAssist;

    function onCreated() {
        inlineAssist = this;
    }

    function onPromptRequest(args) {
        setTimeout(function () {
            var defaultResponse = 'For real-time prompt processing, connect the Inline AI Assist component to your preferred AI service, such as OpenAI or Azure Cognitive Services. Ensure you obtain the necessary API credentials to authenticate and enable seamless integration.';
            inlineAssist.addResponse(defaultResponse);
        }, 1000);
    }

    function onItemSelect(args) {
        if (args.command.label === 'Accept') {
            var editable = document.getElementById('editableText');
            if (editable) {
                editable.innerHTML = '<p>' + inlineAssist.prompts[inlineAssist.prompts.length - 1].response + '</p>';
            }
            inlineAssist.hidePopup();
        } else if (args.command.label === 'Discard') {
            inlineAssist.hidePopup();
        }
    }

    function onSummarizeClick() {
        if (inlineAssist) {
            inlineAssist.showPopup();
        }
    }

    function onResponseModeChange() {
        var modeSelect = document.getElementById('responseMode');
        if (modeSelect && inlineAssist) {
            inlineAssist.responseMode = modeSelect.value;
            inlineAssist.showPopup();
        }
    }
</script>