Getting Started with ASP.NET CORE InplaceEditor
17 Aug 202612 minutes to read
This section briefly explains how to include the ASP.NET Core In-place Editor control in an ASP.NET Core application using Visual Studio.
Create an ASP.NET Core Web App with Razor Pages
Create an ASP.NET Core Web App using Visual Studio via Microsoft Templates or the Syncfusion® ASP.NET Core Extension. For detailed instructions, refer to the ASP.NET Core Web App Getting Started documentation.
Install the required ASP.NET Core packages
To add ASP.NET Core In-place Editor control in the app, open the NuGet package manager in Visual Studio (Tools → NuGet Package Manager → Manage NuGet Packages for Solution), search for and install the Syncfusion.AspNetCore.InPlaceEditor and Syncfusion.AspNetCore.Themes packages. All Syncfusion ASP.NET Core packages are available in nuget.org. See the NuGet packages topic for details.
Alternatively, you can install the same package using the Package Manager Console with the following commands.
Install-Package Syncfusion.AspNetCore.InPlaceEditor -Version 35.1.37
Install-Package Syncfusion.AspNetCore.Themes -Version 35.1.37
Add the ASP.NET Core Tag Helpers
After the packages are installed, open the ~/Pages/_ViewImports.cshtml file and import the Syncfusion.AspNetCore.Base and Syncfusion.AspNetCore.InPlaceEditor Tag Helpers.
@addTagHelper *, Syncfusion.AspNetCore.Base
@addTagHelper *, Syncfusion.AspNetCore.InPlaceEditor
Add stylesheet and script resources
The theme stylesheet and script can be referenced from the CDN. Include the stylesheet and script references inside the <head> of ~/Pages/Shared/_Layout.cshtml
<head>
    ...
    <!-- ASP.NET Core controls styles -->
    <link rel="stylesheet" href="_content/Syncfusion.AspNetCore.Themes/styles/fluent2.css" />
    <!-- ASP.NET Core controls scripts -->
    <script src="_content/Syncfusion.AspNetCore.InPlaceEditor/scripts/sf-inplace-editor.min.js"></script>
</head>
Register the script manager
Open the ~/Pages/Shared/_Layout.cshtml file and register the script manager <ejs-scripts> at the end of the <body> element as follows.
<body>
    ...
    <!-- ASP.NET Core Script Manager -->
    <ejs-scripts></ejs-scripts>
</body>
Add ASP.NET Core In-place Editor control
Add the ASP.NET Core In-place Editor control in the ~/Pages/Index.cshtml file.
<ejs-inplaceeditor id="element">
</ejs-inplaceeditor>
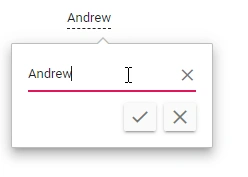
Add the In-place Editor with Textbox
By default, the ASP.NET Core TextBox control is rendered in In-place Editor with the type property set as Text.
@{
    ...
    var modalData = new { placeholder = "Enter employee name" };
    var value = "Andrew";
}

<div style="margin:0 auto; width:300px;">
    <ejs-inplaceeditor id="element" type="Text" value="value" model="modalData">
    </ejs-inplaceeditor>
</div>
Run the application
Press Ctrl+F5 (Windows) or ⌘+F5 (macOS) to launch the application. The ASP.NET Core In-place Editor control will render in your default web browser.
Configuring DropDownList
You can render the ASP.NET Core DropDownList by changing the type property as DropDownList and configure its properties and methods using the model property.
In the following sample, type and model values are configured to render the DropDownList control.
@{
    ...
    string[] genderData = new string[] { "Male", "Female" };
    var modalData = new { placeholder = "Select gender", dataSource = genderData };
}

<div style="margin:0 auto; width:300px;">
    <ejs-inplaceeditor id="element" type="DropDownList" model="modalData" mode="Inline">
    </ejs-inplaceeditor>
</div>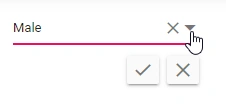
Integrate DatePicker
You can render the DatePicker by changing the type property as Date and also configure its properties and methods using the model property.
In the following sample, type and model values are configured to render the DatePicker control.
@{
    ...
    var dateValue = new DateTime(2018, 12, 04);
    var modalData = new { showTodayButton = true };
}

<div style="margin:0 auto; width:300px;">
    <ejs-inplaceeditor id="element" type="Date" value="dateValue" model="modalData">
    </ejs-inplaceeditor>
</div>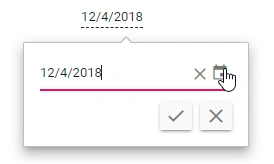
In the following sample, type and model values are configured to render the TextBox, DropDownList and DatePicker control.
@{
    ...
    var elementModel = new { placeholder = "Enter your name" };
    var dateValue = new DateTime(2018, 12, 04);
    var dateModel = new { showTodayButton = true, placeholder = "Select date of birth" };
    string[] genderData = new string[] { "Male", "Female" };
    var genderModel = new { placeholder = "Select gender", dataSource = genderData };
    var elementValue = "Andrew";
    var dropValue = "Male";
}

<div id='container'>
    <div class="control-group">
        <div class="e-heading">
            <h3> Modify Basic Details </h3>
        </div>
        <table>
            <tr>
                <td>Name</td>
                <td class='left'>
                    <ejs-inplaceeditor id="element" value="elementValue" model="elementModel" mode='Inline'>
                    </ejs-inplaceeditor>
                </td>
            </tr>
            <tr>
                <td>DOB</td>
                <td class='left'>
                    <ejs-inplaceeditor id="dateofbirth" type="Date" value="dateValue" model="dateModel" mode='Inline'>
                    </ejs-inplaceeditor>
                </td>
            </tr>
            <tr>
                <td>Gender</td>
                <td class='left'>
                    <ejs-inplaceeditor id="gender" type="DropDownList" value="dropValue" model="genderModel" mode='Inline'>
                    </ejs-inplaceeditor>
                </td>
            </tr>
        </table>
    </div>
</div>
<style>
    #container .control-group {
        margin-top: 50px;
    }

        #container .control-group table {
            margin: auto;
        }

            #container .control-group table td {
                height: 70px;
                width: 150px;
            }

    #container .e-heading {
        text-align: center;
    }

    #container .control-group table td {
        text-align: left;
    }
</style>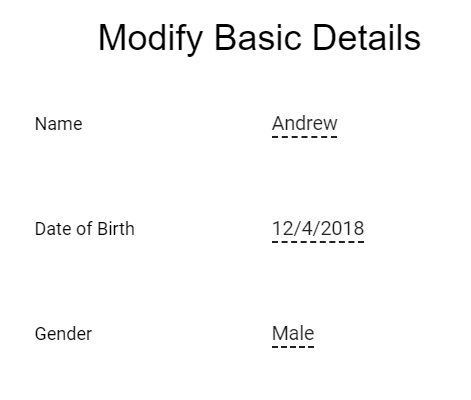
Submitting data to the server (save)
You can submit the editor value to the server by configuring the url, adaptor and primaryKey properties.
| Property | Usage |
|---|---|
url |
Gets the URL for server submit action. |
adaptor |
Specifies the adaptor type that is used by DataManager to communicate with DataSource. |
primaryKey |
Defines the unique primary key of the editable field which can be used for saving data in the database. |
The
primaryKeyproperty is mandatory. If it’s not set, edited data is not sent to the server.
Refresh with modified value
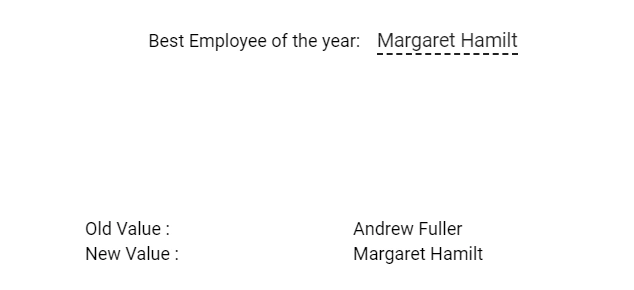
The edited data is submitted to the server and you can see the new values getting reflected in the In-place Editor.
@{
	string[] frameWorkList = new string[] { "Andrew Fuller", "Janet Leverling", "Laura Callahan", "Margaret Hamilt", "Michael Suyama", "Nancy Davloio", "Robert King" };
	var elementModel = new { dataSource = frameWorkList, placeholder = "Select employee", popupHeight = "200px" };
	var url = "https://ej2services.syncfusion.com/development/web-services/api/Editor/UpdateData";
	var textValue = "Andrew Fuller";
}

<div class="control_wrapper">
    <div id='container'>
        <div class='control-group'>
            Best Employee of the year:
            <ejs-inplaceeditor id="element" type="DropDownList" value="textValue" model="elementModel" mode='Inline' name="Employee" url="https://ej2services.syncfusion.com/development/web-services/api/Editor/UpdateData" primaryKey="Employee" adaptor="UrlAdaptor" actionSuccess="actionSuccess">
            </ejs-inplaceeditor>
        </div>
        <table style='margin:auto;width:50%'>
            <tr>
                <td style="text-align: left">
                    Old Value :
                </td>
                <td id="oldValue" style="text-align: left"></td>
            </tr>
            <tr>
                <td style="text-align: left">
                    New Value :
                </td>
                <td id="newValue" style="text-align: left">
                    Andrew Fuller
                </td>
            </tr>
        </table>
    </div>
</div>
<style>
    .e-inplaceeditor {
        min-width: 200px;
        text-align: left
    }

    #container .control-group {
        text-align: center;
        margin: 100px auto;
    }
</style>
<script>
    function actionSuccess(e) {
        var newEle = document.getElementById('newValue');
        var oldEle = document.getElementById('oldValue');
        oldEle.textContent = newEle.textContent;
        newEle.textContent = e.value;
    }
</script>