Getting Started with React Accumulation Chart
10 Aug 20268 minutes to read
This section describes the steps to create a simple Accumulation Chart component.
A quick video overview of the React Accumulation Charts setup is available:
Prerequisites
Before getting started, ensure that your development environment meets the system requirements for Syncfusion® React UI components. That page documents the supported React, Node.js, and npm versions, and includes the React-version compatibility table for Syncfusion React components.
Set up a development environment
To set up a React application quickly, use create-vite-app, which provides a faster development environment, smaller bundle sizes, and optimized builds compared to traditional tools like create-react-app. For detailed steps, refer to the Vite installation instructions. Vite sets up the environment using JavaScript and optimizes applications for production.
As an alternative, you can create a React application using
create-react-app. For detailed instructions, refer to this documentation.
To create a new React application, run one of the following commands based on your preferred language:
React with JavaScript
npm create vite@latest my-app -- --template react
React with TypeScript
npm create vite@latest my-app -- --template react-ts
During the setup process, the CLI will prompt you for a few configuration options. Select the following:
- Which linter to use? → ESLint
- Install with npm and start now? → Yes
Selecting Yes automatically installs the project dependencies and starts the development server.
After verifying that the application starts successfully, terminate the development server in the terminal and proceed to the next step.
Then, navigate to the project directory:
cd my-app
Install the Syncfusion® React Accumulation Chart package
All Syncfusion Essential® JS 2 packages are published to the npm registry.
Install the React Accumulation package using the following command:
npm install @syncfusion/ej2-react-chartsAdd the Accumulation Chart component to the project
Add the Accumulation Chart component to src/App.tsx using the following code.
import { AccumulationChartComponent } from '@syncfusion/ej2-react-charts';
function App() {
  return (<AccumulationChartComponent />);
}
export default App;
Running
npm run devat this point renders an empty Accumulation Chart area. Continue with the next steps to inject modules, add data, and configure a series so the chart can render the data.
Inject Required Modules
Accumulation Chart features are delivered as separate modules and must be explicitly injected. The Inject component accepts a services array that registers the modules required by the Accumulation Chart component. Injecting only the modules you need helps reduce the application bundle size.
In this example, the PieSeries module is injected to render a basic pie chart.
-
PieSeries- Inject this module into theservicesarray to enable pie series rendering.
Import the required module from the Chart package and register it through the Inject component as shown below.
import { AccumulationChartComponent, PieSeries, Inject } from '@syncfusion/ej2-react-charts';

function App() {
  return (
    <AccumulationChartComponent id="charts">
      <Inject services={[PieSeries]} />
    </AccumulationChartComponent>
  );
}

export default App;
At this stage, no pie series is rendered because the Accumulation Chart component has not yet been configured with a data source.
Populate the Accumulation Chart with data
Define the data in src/App.tsx and bind it to the Accumulation Chart.
import * as React from "react";
import * as ReactDOM from "react-dom";
import {
  AccumulationChartComponent, AccumulationSeriesCollectionDirective,
  AccumulationSeriesDirective, Inject, PieSeries, AccumulationLegend
} from '@syncfusion/ej2-react-charts';

function App() {
  const data = [
    { x: 'Jan', y: 3, text: 'Jan: 3' }, { x: 'Feb', y: 3.5, text: 'Feb: 3.5' },
    { x: 'Mar', y: 7, text: 'Mar: 7' }, { x: 'Apr', y: 13.5, text: 'Apr: 13.5' },
    { x: 'May', y: 19, text: 'May: 19' }, { x: 'Jun', y: 23.5, text: 'Jun: 23.5' },
    { x: 'Jul', y: 26, text: 'Jul: 26' }, { x: 'Aug', y: 25, text: 'Aug: 25' },
    { x: 'Sep', y: 21, text: 'Sep: 21' }, { x: 'Oct', y: 15, text: 'Oct: 15' }
  ];

  return (
    <AccumulationChartComponent id="charts">
      <Inject services={[PieSeries, AccumulationLegend]} />
      <AccumulationSeriesCollectionDirective>
        <AccumulationSeriesDirective
          dataSource={data}
          xName="x"
          yName="y"
          radius="90%"
          type="Pie"
        />
      </AccumulationSeriesCollectionDirective>
    </AccumulationChartComponent>
  );
}
export default App;
ReactDOM.render(<App />, document.getElementById("charts"));
import * as React from "react";
import * as ReactDOM from "react-dom";
import {
AccumulationChartComponent, AccumulationSeriesCollectionDirective,
AccumulationSeriesDirective, Inject, PieSeries, AccumulationLegend
} from '@syncfusion/ej2-react-charts';
function App() {
const data = [
{ x: 'Jan', y: 3, text: 'Jan: 3' }, { x: 'Feb', y: 3.5, text: 'Feb: 3.5' },
{ x: 'Mar', y: 7, text: 'Mar: 7' }, { x: 'Apr', y: 13.5, text: 'Apr: 13.5' },
{ x: 'May', y: 19, text: 'May: 19' }, { x: 'Jun', y: 23.5, text: 'Jun: 23.5' },
{ x: 'Jul', y: 26, text: 'Jul: 26' }, { x: 'Aug', y: 25, text: 'Aug: 25' },
{ x: 'Sep', y: 21, text: 'Sep: 21' }, { x: 'Oct', y: 15, text: 'Oct: 15' }
];
return (
<AccumulationChartComponent id="charts">
<Inject services={[PieSeries, AccumulationLegend]} />
<AccumulationSeriesCollectionDirective>
<AccumulationSeriesDirective
dataSource={data}
xName="x"
yName="y"
radius="90%"
type="Pie"
/>
</AccumulationSeriesCollectionDirective>
</AccumulationChartComponent>
);
}
export default App;
ReactDOM.render(<App />, document.getElementById("charts"));Run the application
Run the application using the following command:
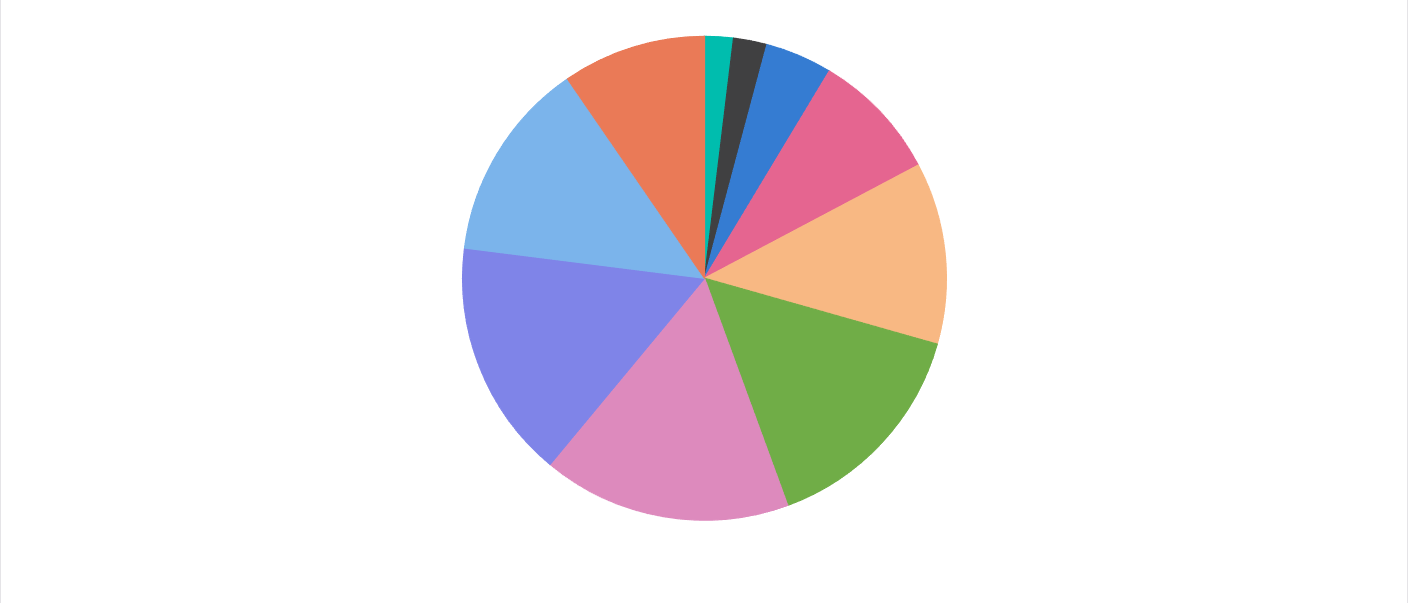
npm run devOpen the generated local URL (for example, http://localhost:5173/) in the browser. The application displays the basic pie chart as shown below: