Compatibility between Essential® JS 1 and Essential® JS2
01 Aug 20263 minutes to read
Use Essential® JS 1 and Essential® JS 2 controls together on the same web page. This guide shows how to set them up without style or functionality conflicts.
Prerequisites
- Visual Studio Code
- Basic understanding of HTML and JavaScript
Quick Setup
Step 1: Get started with Syncfusion® Essential JS 2
Follow the Quick Start guide to create an Essential JS 2 application with a basic Button control.
Step 2: Use Compatibility Styles
Replace your default style with the compatibility style to prevent UI conflicts.
Reference the styles from the CDN:
https://cdn.syncfusion.com/ej2/styles/compatibility/material.css
Step 3: Add Syncfusion® control to the application
Create a folder named quickstart and add an index.html file inside it.
Below is a ready-to-use HTML file that includes both EJ1 and EJ2 controls:
<!DOCTYPE html>
<head>
    <title>Essential JS 2 - Essential JS 1</title>
    <!-- Essential JS 1 default theme -->
    <link href=" http://cdn.syncfusion.com/16.1.0.24/js/web/flat-azure/ej.web.all.compatibility.min.css " rel="stylesheet" type="text/css" />
    <!-- Essential JS 2 material theme -->
    <link href="https://cdn.syncfusion.com/ej2/styles/compatibility/material.css" rel="stylesheet" type="text/css" />
    <!-- Essential JS 1 scripts -->
    <script src="https://cdn.syncfusion.com/js/assets/external/jquery-1.10.2.min.js" type="text/javascript"></script>
    <script src="https://cdn.syncfusion.com/js/assets/external/jquery.easing.1.3.min.js" type="text/javascript"></script>
    <script src=" https://cdn.syncfusion.com/16.1.0.24/js/web/ej.web.all.min.js" type="text/javascript"></script>
    <!-- Essential JS 2 script -->
    <script src=" https://cdn.syncfusion.com/ej2/dist/ej2.min.js" type="text/javascript"></script>
</head>

<body>
    <div style="margin: 50px;">
        <!-- Add HTML Button element for Essential JS 2 -->
        <h2>Essential JS 2 Button</h2>
        <button id="btn2">Essential JS 2</button>
    </div>
	<div style="margin: 50px;">
        <h2>Essential JS 1 Button</h2>
        <!-- Add HTML Button element for Essential JS 1 -->
        <button id="btn1">Essential JS 1</button>
    </div>
    <script>
   // Extend ej namespace with Syncfusion
   $.extend(ej, Syncfusion);
   // Initialize Essential JS 1 JavaScript Button component
   $("#btn1").ejButton({
        size: "medium",
        showRoundedCorner: true,
   })
   // Initialize Essential JS 2 JavaScript Button component
   var button = new ej.buttons.Button();
   button.appendTo('#btn2');
</script>
</body>

</html>
Step 4: Run the application
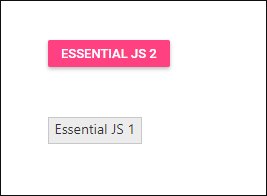
Open the HTML file in your browser. Both EJ1 and EJ2 controls should render without conflicts.
Important Notes
- Load order: EJ1 resources (jQuery + EJ1 script) must come before EJ2 resources.
- Compatibility styles: Always use the compatibility theme to prevent visual conflicts.
-
Namespace: Extend the
ejnamespace withSyncfusionbefore initializing controls.
See Also
- Essential JS 2 Quick Start: A step-by-step quickstart that walks you through creating a minimal Syncfusion EJ2 application (CDN and local examples).
- GitHub Samples - EJ2 Quickstart: Ready-to-run sample projects demonstrating CDN and local setups for common EJ2 scenarios.