Getting Started with JavaScript (ES5) Controls in ASP.NET Web Forms
26 Sep 20263 minutes to read
This guide provides a comprehensive walkthrough for integrating Syncfusion JavaScript (ES5) controls into an ASP.NET Web Forms application using NuGet-based installation. It includes step-by-step instructions for project setup and dependency configuration, along with a minimal working example using the Grid component to validate the implementation.
Prerequisites
To get started with the ASP.NET Web Forms application, ensure that the following software is installed on the machine.
- .NET Framework 4.8
- ASP.NET Web Forms
- Visual Studio 2022
Create ASP.NET Web Forms application
-
Choose File > New > Project… in the Visual Studio menu bar.
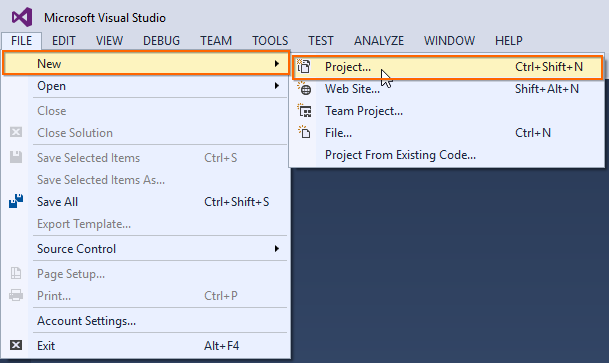
-
Select ASP.NET Web Forms Site, change the application name, and then click OK.
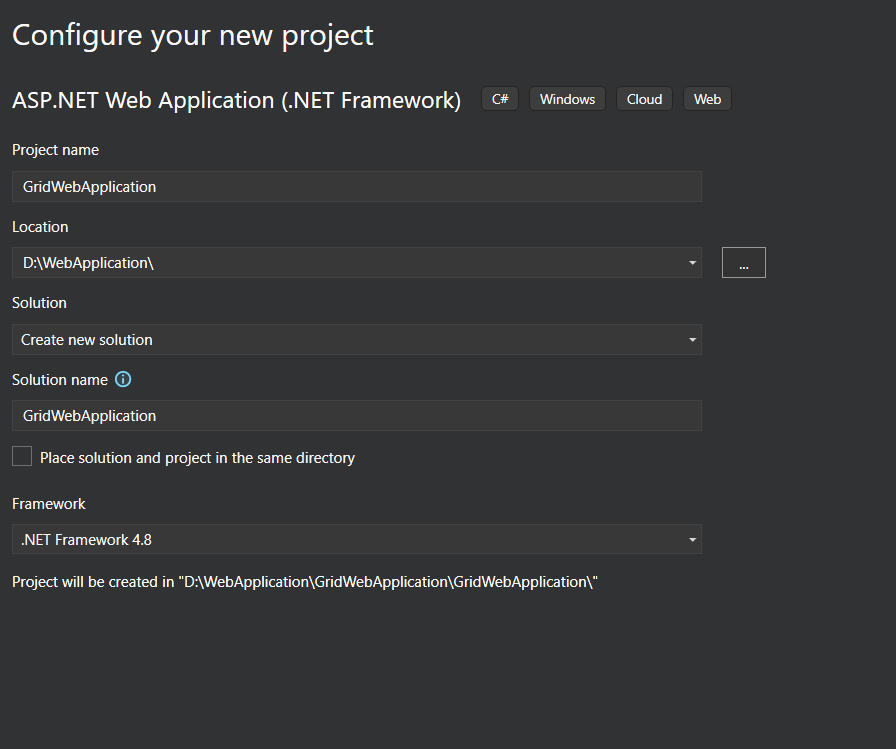
Configure Syncfusion® JavaScript (ES5) control in the Web Forms application
-
Search the
Syncfusion.EJ2.JavaScriptkeyword in the Browse tab and install the Syncfusion.EJ2.JavaScript in the application by using the NuGet Package Manager.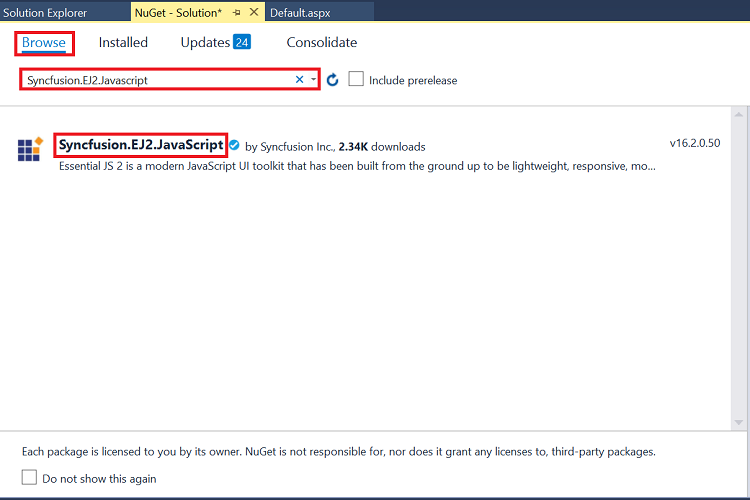
The Syncfusion JavaScript NuGet package will be included in the project after the installation process is completed.
-
Open
~/Site.masterfile and add the required styles and script references of Syncfusion® JavaScript controls to the<head>element.<head> <!-- Syncfusion CSS --> <link href="https://cdn.syncfusion.com/ej2/34.2.2/material3.css" rel="stylesheet"> <!-- Syncfusion JS --> <script src="https://cdn.syncfusion.com/ej2/34.2.2/dist/ej2.min.js"></script> </head> -
Open the
~/Default.aspxfile, add the Syncfusion® JavaScript control to the<div>element, and initialize the Grid control inside the<script>element.<div class="row"> <h2>Syncfusion Javascript (ES5) Grid Component</h2> <div id="Grid"></div> <script> var data = [ { Inventor: "Thomas Edison", NumberofPatentFamilies: 150, Country: "USA", Active: "Yes", Mainfieldsofinvention: "Electricity" }, { Inventor: "Nikola Tesla", NumberofPatentFamilies: 100, Country: "Serbia", Active: "No", Mainfieldsofinvention: "Electrical" }, { Inventor: "Alexander Bell", NumberofPatentFamilies: 50, Country: "UK", Active: "No", Mainfieldsofinvention: "Telecom" } ]; // Grid var grid = new ej.grids.Grid({ dataSource: data, columns: [ { field: 'Inventor', headerText: 'Inventor Name' }, { field: 'NumberofPatentFamilies', headerText: 'Patents' }, { field: 'Country', headerText: 'Country' }, { field: 'Active', headerText: 'Active' }, { field: 'Mainfieldsofinvention', headerText: 'Field' } ], }); grid.appendTo('#Grid'); </script> </div> -
Run the application. The Syncfusion® JavaScript Grid control will render in the web browser.
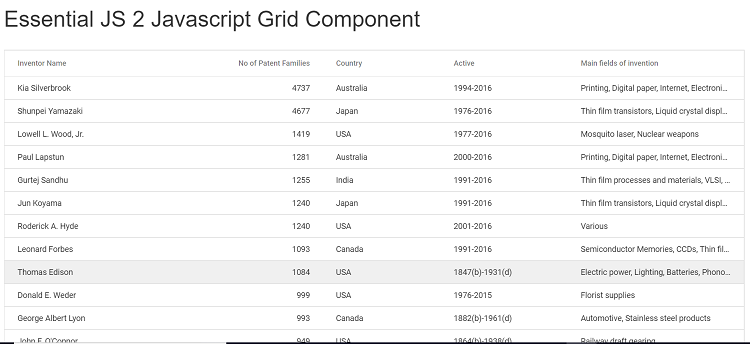
See More
- Syncfusion Grid Documentation: Detailed Grid features, API reference, and advanced examples.
- Syncfusion NuGet Packages: Use NuGet to add EJ2 packages to Visual Studio projects for offline and managed deployments.