Contact Support
Z-order in the ASP.NET CORE Image Editor control
12 Mar 20255 minutes to read
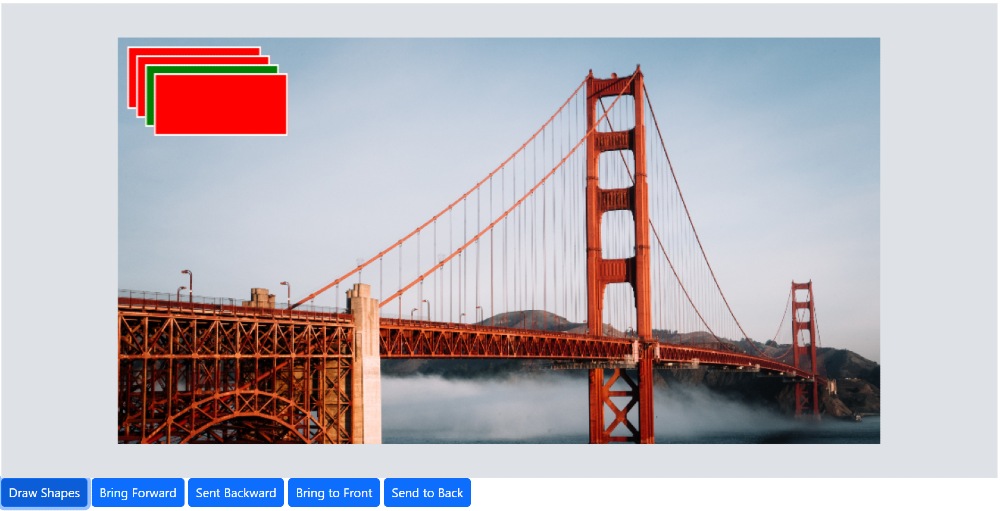
We are excited to introduce z-order support in the Image Editor. It’s a powerful tool that allows users to adjust the positioning of annotations. This feature is particularly useful for designing personalized templates like greeting cards or posters, where managing the layering of multiple annotations is crucial for a polished final product.
Types of adjustment in the Image Editor z-order support.
-
Bring forward- Switch the selected annotation with the annotation one layer ahead of it. -
Sent Backward- Switch the selected annotation with the annotation one layer behind it. -
Bring to Front- Move the selected annotation to ahead of all other annotations. -
Send to Back- Move the selected annotation to behind all other annotations.
In the following example, you can use the z-order support.
@{
    var imageTool = new string[] { };
}

<div class="col-lg-12 control-section e-img-editor-sample">
    <ejs-imageeditor id="image-editor" created="created" toolbar="@imageTool"></ejs-imageeditor>
</div>
<ejs-button id="btn" onclick="clickHandler()" cssClass="e-primary" content="Draw Shapes"></ejs-button>
<ejs-button id="btn1" onclick="clickHandler1()" cssClass="e-primary" content="Bring Forward"></ejs-button>
<ejs-button id="btn2" onclick="clickHandler2()" cssClass="e-primary" content="Sent Backward"></ejs-button>
<ejs-button id="btn3" onclick="clickHandler3()" cssClass="e-primary" content="Bring to Front"></ejs-button>
<ejs-button id="btn4" onclick="clickHandler4()" cssClass="e-primary" content="Send to Back"></ejs-button>

<script>
    function created() {
        var imageEditorObj = ej.base.getComponent(document.getElementById('image-editor'), 'image-editor');
        if (ej.base.Browser.isDevice) {
            imageEditorObj.open('https://ej2.syncfusion.com/demos/src/image-editor/images/flower.png');
        } else {
            imageEditorObj.open('https://ej2.syncfusion.com/demos/src/image-editor/images/bridge.png');
        }
    }
    function clickHandler() {
        var imageEditorObj = ej.base.getComponent(document.getElementById('image-editor'), 'image-editor');
        var dimension = imageEditorObj.getImageDimension();
        imageEditorObj.drawRectangle(dimension.x + 10, dimension.y + 10, 150, 70, null, null, 'red');
        imageEditorObj.drawRectangle(dimension.x + 20, dimension.y + 20, 150, 70, null, null, 'red');
        imageEditorObj.drawRectangle(dimension.x + 30, dimension.y + 30, 150, 70, null, null, 'green');
        imageEditorObj.drawRectangle(dimension.x + 40, dimension.y + 40, 150, 70, null, null, 'red');
    }
    function clickHandler1() {
        var imageEditorObj = ej.base.getComponent(document.getElementById('image-editor'), 'image-editor');
        imageEditorObj.bringForward('shape_3');
    }
    function clickHandler2() {
        var imageEditorObj = ej.base.getComponent(document.getElementById('image-editor'), 'image-editor');
        imageEditorObj.sendBackward('shape_3');
    }
    function clickHandler3() {
        var imageEditorObj = ej.base.getComponent(document.getElementById('image-editor'), 'image-editor');
        imageEditorObj.bringToFront('shape_3');
    }
    function clickHandler4() {
        var imageEditorObj = ej.base.getComponent(document.getElementById('image-editor'), 'image-editor');
        imageEditorObj.sendToBack('shape_3');
    }
</script>

<style>
    .image-editor {
        margin: 0 auto;
    }

    .e-img-editor-sample {
        height: 80vh;
        width: 100%;
    }

    @@media only screen and (max-width: 700px) {
        .e-img-editor-sample {
            height: 75vh;
            width: 100%;
        }
    }

    .control-wrapper {
        height: 100%;
    }
</style>
public ActionResult Default()
{
return View();
}Output be like the below.