Getting Started with ASP.NET Core in VS Code using Razor pages
6 Dec 20243 minutes to read
This article provides a step-by-step instruction for building ASP.NET Core web application using the Visual Studio Code and ASP.NET Core tag helper.
Prerequisites
System requirements for ASP.NET Core components
Create an ASP.NET Core web application
1.Create a new folder and open it in the VS Code by File > Open Folder….
NOTE
Visual Studio Code displays a dialog box that asks
Do you trust the authors of the files in this folder. Select:
* The checkbox trust the authors of all files in the parent folder.
* Yes, I trust the authors.
2.Open the Integrated Terminal by selecting a menu using View > Terminal in VS Code.
3.Run the following command in the terminal to create a new ASP.NET Core web application.
dotnet new webapp -o AspNetCoreWebAppThe dotnet new command creates new Razor Pages project in the AspNetCoreWebApp folder. Refer to this topic for more information about .NET CLI commands.
4.Run the following command in the terminal to open the project in current instance of the VS Code.
code -r AspNetCoreWebAppInstall Syncfusion® ASP.NET Core package in the application
Run the following command in the terminal to install Syncfusion.EJ2.AspNet.Core NuGet package in the application.
dotnet add package Syncfusion.EJ2.AspNet.CoreRefer to NuGet packages topic for more details about NuGet packages.
Add Syncfusion® ASP.NET Core Tag Helper
Open ~/Pages/_ViewImports.cshtml file and import the Syncfusion.EJ2 TagHelper.
@addTagHelper *, Syncfusion.EJ2Add stylesheet and script resources
Here, the theme and script is referred using CDN inside the <head> of ~/Pages/Shared/_Layout.cshtml file as follows,
<head>
    ...
    <!-- Syncfusion ASP.NET Core controls style -->
    <link rel="stylesheet" href="https://cdn.syncfusion.com/ej2/34.1.29/material.css" />
    <!-- Syncfusion ASP.NET Core controls script -->
    <script src="https://cdn.syncfusion.com/ej2/34.1.29/dist/ej2.min.js"></script>
</head>
Also, register the script manager <ejs-script> at the end of <body> in the ASP.NET Core application as follows.
<body>
    ...
    <!-- Syncfusion ASP.NET Core Script Manager -->
    <ejs-scripts></ejs-scripts>
</body>
NOTE
Checkout the Themes topic to learn different ways (CDN, NPM package, and CRG) to refer styles in ASP.NET Core application, and to have the expected appearance for Syncfusion® ASP.NET Core controls.
NOTE
Checkout the Adding Script Reference topic to learn different approaches for adding script references in your ASP.NET Core application.
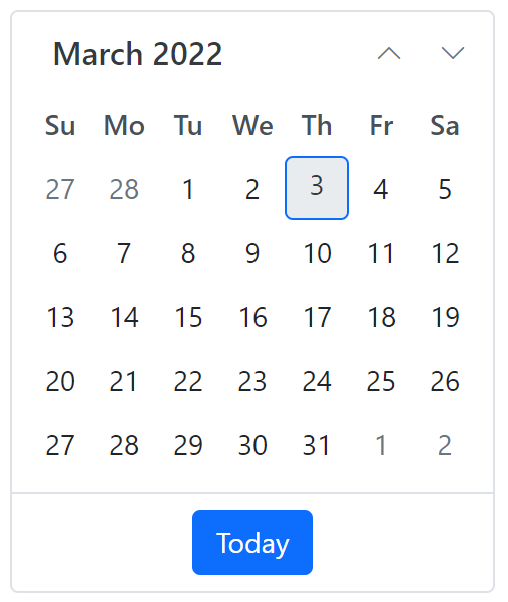
Add ASP.NET Core Calendar control
Now, add the Syncfusion® ASP.NET Core Calendar tag helper in ~/Pages/Index.cshtml page.
<div>
    <ejs-calendar id="calendar"></ejs-calendar>
</div>
Press Ctrl+F5 to run the app. Set Select Environment to .NET Core, if settings required for VS Code. Then, the default web browser launched with Syncfusion® ASP.NET Core Calendar control.