Getting Started with Vue 3 Pivot Table
18 Aug 20269 minutes to read
This article provides a step-by-step guide for setting up a Vite project with a JavaScript environment and integrating the Syncfusion® Vue Pivot Table component using the Composition API / Options API.
The Composition API is a new feature introduced in Vue.js 3 that provides an alternative way to organize and reuse component logic. It allows developers to write components as functions that use smaller, reusable functions called composition functions to manage their properties and behavior.
The Options API is the traditional way of writing Vue.js components, where the component logic is organized into a series of options that define the component’s properties and behavior. These options include data, methods, computed properties, watchers, life cycle hooks, and more.
Prerequisites
Ensure your development environment meets the System requirements for Syncfusion® Vue UI components.
Set up the Vite project
A recommended approach for beginning with Vue is to scaffold a project using Vite. To create a new Vite project, use one of the commands that are specific to either NPM or Yarn.
npm create vite@latestyarn create viteThe scaffold wizard will then prompt for the following options:
1. Define the project name: We can specify the name of the project directly. Let’s specify the name of the project as my-project for this article.
? Project name: » my-project2. Select Vue as the framework. It will create a Vue 3 project.
? Select a framework: » - Use arrow-keys. Return to submit.
Vanilla
> Vue
  React
  Preact
  Lit
  Svelte
  Others
3. Choose JavaScript as the framework variant to build this Vite project using JavaScript and Vue.
? Select a variant: » - Use arrow-keys. Return to submit.
> JavaScript
  TypeScript
  Customize with create-vue ↗
  Nuxt ↗
4. Install dependencies and start the development server. When prompted, select Yes to install with npm and start now.
Install with npm and start now?: YesSince you selected Yes, the development server should start automatically. If you selected No, please follow these steps to set up and start the project manually:
cd my-project
npm install
cd my-project
yarn installNow that my-project is ready to run with default settings, let’s add Syncfusion® components to the project.
Add Syncfusion® Vue Pivot Table packages
To install the Pivot Table component, run the following command:
npm install @syncfusion/ej2-vue-pivotview --saveyarn add @syncfusion/ej2-vue-pivotviewImport Syncfusion® CSS styles
Themes for the Syncfusion® Vue Pivot Table can be applied using CSS or SASS files from the npm theme packages, CDN, CRG, or Theme Studio. For more information, refer to the themes documentation.
The following example demonstrates the installation of the Tailwind 3 theme package from npm. Each component in this theme package includes an index.css file that automatically loads all required dependency styles.
To install the Tailwind 3 theme package, use the following command:
npm install @syncfusion/ej2-tailwind3-theme --saveyarn add @syncfusion/ej2-tailwind3-themeImport the required theme styles in the <style> section of the src/App.vue file:
@import '../node_modules/@syncfusion/ej2-tailwind3-theme/styles/pivotview/index.css';Before including Syncfusion styles, make sure to remove the default styles defined in style.css. This helps prevent unintended style overrides and ensures that Syncfusion components render correctly.
Adding the Pivot Table component
The Pivot Table code should be added to the src/App.vue file.
<template>
  <div id="app">
    <ejs-pivotview :height="height" :width="width" :dataSourceSettings="dataSourceSettings"></ejs-pivotview>
  </div>
</template>

<script setup>
import { provide } from "vue";
import { PivotViewComponent as EjsPivotview } from "@syncfusion/ej2-vue-pivotview";

const dataSourceSettings = {
  dataSource: [
      { 'Sold': 31, 'Amount': 52824, 'Country': 'France', 'Products': 'Mountain Bikes', 'Year': 'FY 2025', 'Quarter': 'Q1' },
      { 'Sold': 51, 'Amount': 86904, 'Country': 'France', 'Products': 'Mountain Bikes', 'Year': 'FY 2025', 'Quarter': 'Q2' },
      { 'Sold': 90, 'Amount': 153360, 'Country': 'France', 'Products': 'Mountain Bikes', 'Year': 'FY 2025', 'Quarter': 'Q3' },
      { 'Sold': 25, 'Amount': 42600, 'Country': 'France', 'Products': 'Mountain Bikes', 'Year': 'FY 2025', 'Quarter': 'Q4' }
  ],
  expandAll: true,
  columns: [{ name: 'Year' }, { name: 'Quarter' }],
  rows: [{ name: 'Country' }, { name: 'Products' }],
  values: [{ name: 'Amount', caption: 'Sold Amount' }, { name: 'Sold', caption: 'Units Sold' }],
  formatSettings: [{ name: 'Amount', format: 'C0' }]
};
const height = 350;
const width = '100%';

</script>
<style>
@import '../node_modules/@syncfusion/ej2-tailwind3-theme/styles/pivotview/index.css';
</style><template>
<ejs-pivotview :height="height" :width="width" :dataSourceSettings="dataSourceSettings"></ejs-pivotview>
</template>
<script>
import { PivotViewComponent } from "@syncfusion/ej2-vue-pivotview";
export default {
name: "App",
// Declaring component and its directives.
components: {
"ejs-pivotview": PivotViewComponent
},
// Bound properties declaration.
data() {
return {
dataSourceSettings: {
dataSource: [
{ 'Sold': 31, 'Amount': 52824, 'Country': 'France', 'Products': 'Mountain Bikes', 'Year': 'FY 2025', 'Quarter': 'Q1' },
{ 'Sold': 51, 'Amount': 86904, 'Country': 'France', 'Products': 'Mountain Bikes', 'Year': 'FY 2025', 'Quarter': 'Q2' },
{ 'Sold': 90, 'Amount': 153360, 'Country': 'France', 'Products': 'Mountain Bikes', 'Year': 'FY 2025', 'Quarter': 'Q3' },
{ 'Sold': 25, 'Amount': 42600, 'Country': 'France', 'Products': 'Mountain Bikes', 'Year': 'FY 2025', 'Quarter': 'Q4' }
],
expandAll: true,
columns: [{ name: 'Year' }, { name: 'Quarter' }],
rows: [{ name: 'Country' }, { name: 'Products' }],
values: [{ name: 'Amount', caption: 'Sold Amount' }, { name: 'Sold', caption: 'Units Sold' }],
formatSettings: [{ name: 'Amount', format: 'C0' }]
},
height: '350px',
width: '100%'
};
},
};
</script>
<style>
@import "../node_modules/@syncfusion/ej2-tailwind3-theme/styles/pivotview/index.css";
</style>Run the project
To run the project, use the following command:
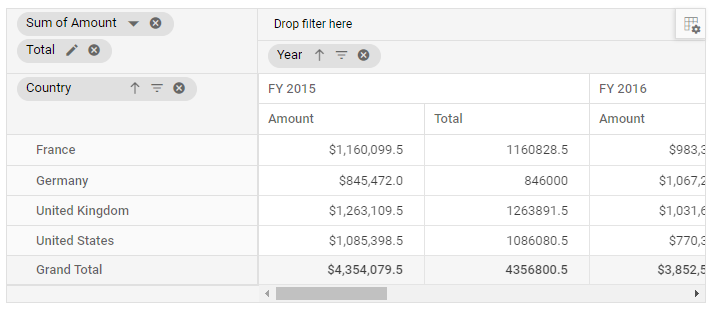
npm run devyarn run devThe development server starts and the app can be viewed at the local URL printed in the terminal (typically http://localhost:5173). The output will appear as follows: