Getting Started with Vue 3 Linear Gauge
12 Aug 20264 minutes to read
This article provides a step-by-step guide to creating a Vite JavaScript project and integrating the Syncfusion® Vue Linear Gauge component using either the Composition API or the Options API.
The Composition API groups related logic into reusable functions. The Options API organizes component logic with options such as data, methods, and life cycle hooks. Choose the API that best fits the application’s structure.
The Linear Gauge visualizes numeric values along a linear scale. It can display horizontal or vertical gauges, ranges, and marker or bar pointers.
Prerequisites
Ensure that the development environment meets the system requirements for Syncfusion® Vue UI components.
Set Up the Vite Project
Create a Vite project using npm or yarn.
npm
npm create vite@latest my-app -- --template vueyarn
yarn create vite my-app --template vueIf Vite prompts you to install dependencies and start the project immediately, select No. The project dependencies and Syncfusion package are installed in the following steps.
Navigate to the project directory:
cd my-appInstall the project dependencies using the selected package manager:
npm
npm installyarn
yarn installAdd the Syncfusion® Vue Linear Gauge Package
Syncfusion® packages are published on npm.
Install the package using either npm or yarn.
npm
npm install @syncfusion/ej2-vue-lineargaugeyarn
yarn add @syncfusion/ej2-vue-lineargaugeAdd the Syncfusion® Vue Linear Gauge Component
Follow these steps to add the Vue Linear Gauge component using the Composition API or Options API.
Step 1: Import and Register the Component
Import the Linear Gauge component in src/App.vue.
In the Composition API example, use the <script setup> syntax. The aliases correspond to the custom-element names in the template, and imported components are available without a components option.
<script setup>
import {
  LinearGaugeComponent as EjsLineargauge
} from '@syncfusion/ej2-vue-lineargauge';
</script><script>
import {
LinearGaugeComponent
} from '@syncfusion/ej2-vue-lineargauge';
export default {
name: 'App',
components: {
'ejs-lineargauge': LinearGaugeComponent
}
};
</script>Step 2: Define the Linear Gauge in the Template
Add the Linear Gauge to the template section of src/App.vue.
<template>
<div id="app">
<ejs-lineargauge></ejs-lineargauge>
</div>
</template>Here is the summarized code for the above steps. Replace the contents of src/App.vue with either the Composition API or Options API example.
<template>
<div id="app">
<ejs-lineargauge></ejs-lineargauge>
</div>
</template>
<script setup>
import { LinearGaugeComponent as EjsLineargauge } from '@syncfusion/ej2-vue-lineargauge';
</script><template>
<div id="app">
<ejs-lineargauge></ejs-lineargauge>
</div>
</template>
<script>
import {
  LinearGaugeComponent
} from '@syncfusion/ej2-vue-lineargauge';

export default {
  name: 'App',
  components: {
    'ejs-lineargauge': LinearGaugeComponent
  }
};
</script>Run the Project
Save src/App.vue, and then start the development server:
npm
npm run devyarn
yarn run devOpen the URL displayed in the terminal, commonly http://localhost:5173, and verify that the Linear Gauge is displayed correctly.
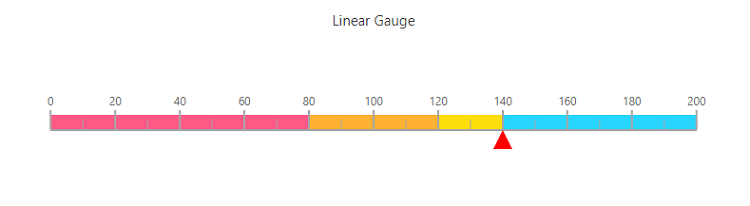
Sample: Explore the Vite-based Vue Linear Gauge getting-started sample.
Troubleshooting
- The Linear Gauge is not rendered. Verify that the component and all child directives are imported or registered correctly and check the browser console for package or runtime errors.
- A module-not-found error occurs. Ensure that the required Linear Gauge package is installed, and then restart the development server.
- A package or Vue version error occurs. Confirm that the installed package release supports Vue 3 and the project’s Node.js version.
For additional assistance, refer to the Vue Linear Gauge API documentation.