Getting Started with the Vue File Manager in Vue 3
06 Aug 202611 minutes to read
This article provides a step-by-step guide for setting up a Vite project with a JavaScript environment and integrating the Vue File Manager component using the Composition API / Options API.
The Composition API is a new feature introduced in Vue.js 3 that provides an alternative way to organize and reuse component logic. It allows developers to write components as functions that use smaller, reusable functions called composition functions to manage their properties and behavior.
The Options API is the traditional way of writing Vue.js components, where the component logic is organized into a series of options that define the component’s properties and behavior. These options include data, methods, computed properties, watchers, life cycle hooks, and more.
To get started quickly with Vue File Manager, you can check on this video:
Prerequisites
- Node.js 24+ (LTS recommended).
- Syncfusion CLI.
Install the Syncfusion CLI
Install the Syncfusion CLI globally using the following command:
npm install -g @syncfusion/syncfusion-cliSet up the Vite project using Syncfusion CLI
You can create a Vue application with Vite using the Syncfusion CLI. The CLI provides two ways to create a project:
Non-interactive mode
Non-interactive mode allows you to create a project directly using a single command with the required command-line arguments.
sf new my-project --framework vue --template file-managerIn this mode, the project configuration is passed directly in the command. The above command creates a Vue application with Vite and configured it with the Syncfusion® File Manager component. The generated project uses the TypeScript and the Composition API.
Interactive mode
Interactive mode guides you through the project creation process with step-by-step prompts.
sfWhen you run the sf command, the CLI prompts you to select the required project configuration options. To create a Vue application with Vite and the Syncfusion® File Manager component, select the following options:
√ Project name? ... my-project
√ Choose Framework: » Vue
√ Choose Language: » JavaScript
√ Choose Template: » File Manager
√ Choose Theme: » Material3
√ Choose Style Format: » CSS
√ Would you like to integrate the Syncfusion MCP Server (AI Assistant) into this project? ... no
√ Would you like to install Syncfusion Component Skills for AI-powered development? ... no
√ Install dependencies and start app now? ... no
The above selections generate a Vue application with Vite and configure it with the Syncfusion® File Manager component. You can choose different values for language, theme, style format, MCP setup, and skills installation based on your project requirements.
The Syncfusion® CLI creates the project with a predefined template. After the project is generated, you can customize or replace the component code based on your application requirements.
Run the project
Once the project is created, navigate to the project directory and run the following commands in your terminal.
cd my-project
npm install
npm run dev
The output will appear as follows:
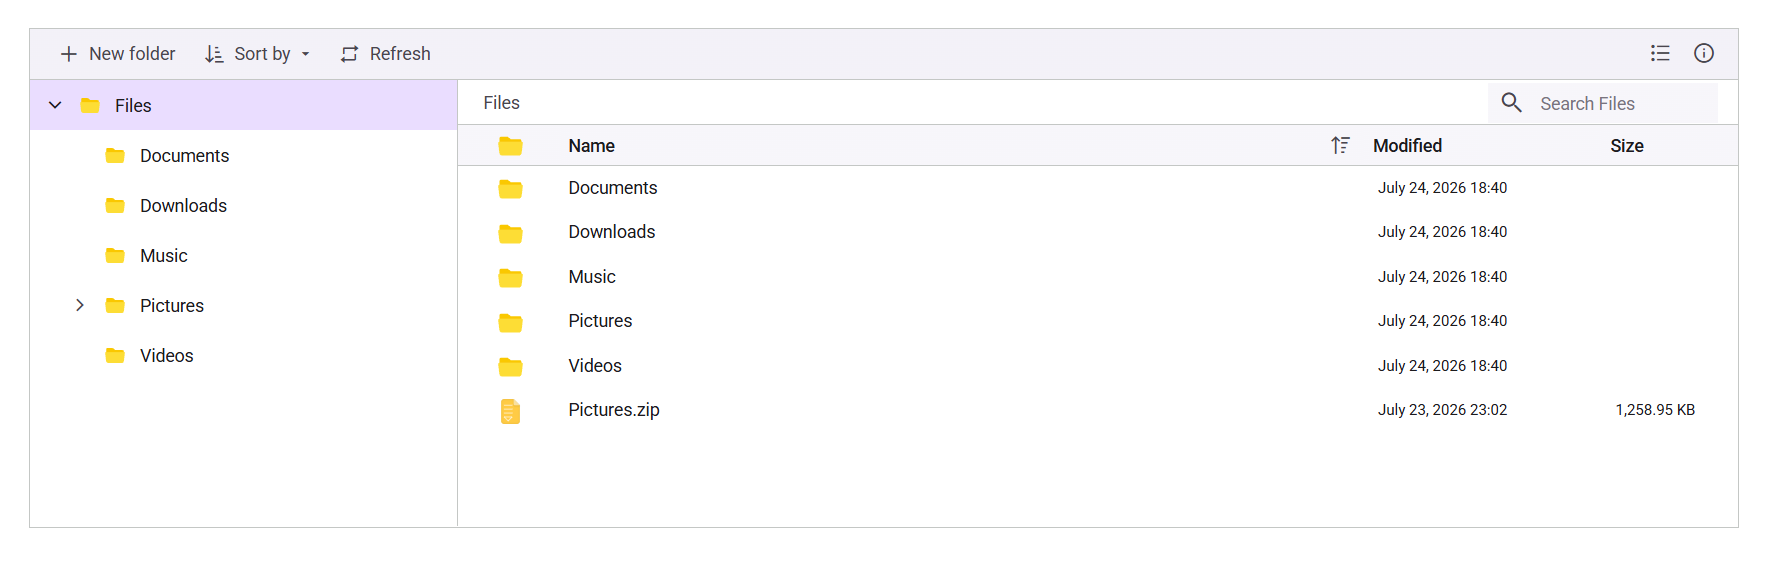
Prerequisites
| Requirement | Version |
|---|---|
| Vue | 2.6 or higher |
| Node.js | 16.0.0 or above |
Vue supported versions
| Vue version | Minimum Syncfusion Vue File Manager version |
|---|---|
| Vue v2.7 | 20.3.47 and above |
| Vue v3.0 | 19.2.44 and above |
Browser Support
| Browser | Supported versions |
|---|---|
| Chrome | Latest |
| Firefox | Latest |
| Opera | Latest |
| Edge | 13+ |
| Internet Explorer (IE) | 11+ |
| Safari | 9+ |
| iOS Safari | 9+ |
| Android Browser / Chrome for Android | 4.4+ |
| Windows Mobile | IE 11+ |
Set up the Vite project
A recommended approach for beginning with Vue is to scaffold a project using Vite. To create a new Vite project, use one of the commands that are specific to either NPM or Yarn.
npm create vite@latest
or
yarn create vite
Using one of the above commands will lead you to set up additional configurations for the project as below:
1.Define the project name: We can specify the name of the project directly. Let’s specify the name of the project as my-project for this article.
? Project name: » my-project
2.Select Vue as the framework. It will create a Vue 3 project.
? Select a framework: » - Use arrow-keys. Return to submit.
Vanilla
> Vue
  React
  Preact
  Lit
  Svelte
  Others
3.Choose JavaScript as the framework variant to build this Vite project using JavaScript and Vue.
? Select a variant: » - Use arrow-keys. Return to submit.
> JavaScript
  TypeScript
  Customize with create-vue ↗
  Nuxt ↗
4.Install dependencies and start the dev server.
Install with npm and start now?: Yes
Since you selected Yes, the development server should start automatically. If you selected No, please follow these steps to set up and start the project manually:
cd my-project
npm install
or
cd my-project
yarn install
Now that my-project is ready to run with default settings, let’s add Vue components to the project.
Add Syncfusion® Vue packages
To install the Vue File Manager component, use the following command:
npm install @syncfusion/ej2-vue-filemanager --save
or
yarn add @syncfusion/ej2-vue-filemanager
Import Syncfusion® CSS styles
Themes for Syncfusion® File Manager components can be applied using CSS files provided through npm theme packages. For available themes, refer to the Themes documentation.
Install the Material 3 theme package using the following command:
npm install @syncfusion/ej2-material3-theme --saveThen add the following CSS reference to the src/App.vue file:
<style>
    @import "../node_modules/@syncfusion/ej2-material3-theme/styles/file-manager/index.css";
</style>
The order of CSS imports matters. Import base styles first, then component-specific styles. Missing CSS imports can result in misaligned layouts, buttons without styling, or missing visual elements in popups and dialogs.
Add Syncfusion® Vue component
Add the following code to the src/App.vue file. The Composition API and Options API variants are shown below; choose the one that matches your project style.
To enable file operation functionality in the File Manager, configure the url property within the ajaxSettings. This URL handles the file operation requests from the server.
<template>
    <div id="app">
        <ejs-filemanager id="file-manager" :ajaxSettings="ajaxSettings">
        </ejs-filemanager>
    </div>
</template>
<script setup>
import { FileManagerComponent as EjsFilemanager} from "@syncfusion/ej2-vue-filemanager";

const ajaxSettings = {
    url: "https://physical-service.syncfusion.com/api/FileManager/FileOperations"
}

</script>
<style>
    @import "../node_modules/@syncfusion/ej2-material3-theme/styles/file-manager/index.css";
</style><template>
<div id="app">
<ejs-filemanager id="file-manager" :ajaxSettings="ajaxSettings">
</ejs-filemanager>
</div>
</template>
<script>
import { FileManagerComponent } from "@syncfusion/ej2-vue-filemanager";
export default {
name: "App",
components: {
"ejs-filemanager":FileManagerComponent
},
data () {
return {
ajaxSettings:
{
url: "https://physical-service.syncfusion.com/api/FileManager/FileOperations"
}
}
}
}
</script>
<style>
@import "../node_modules/@syncfusion/ej2-material3-theme/styles/file-manager/index.css";
</style>Server-side setup
The sample uses https://physical-service.syncfusion.com/api/FileManager/FileOperations as the url endpoint in ajaxSettings.
To use your own files, host a File Manager service and replace the url value with your service endpoint. See the File System Provider documentation for setup details.
Registering Your Syncfusion License
Generate a license key from the Syncfusion License Dashboard and register it before rendering your Vue 3 application:
```javascript
import { registerLicense } from '@syncfusion/ej2-base';

registerLicense('YOUR_LICENSE_KEY');
```
Note: A valid Syncfusion license is required for production use. Without a valid license, a trial license warning message will be displayed.
Run the project
To run the project, use the following command:
npm run dev
or
yarn run dev
For migrating from Vue 2 to Vue 3, refer to the migration documentation.
Looking for the full Vue File Manager component overview, features, pricing, and documentation? Visit the Vue File Manager page.
Production build
To create an optimized production build:
npm run build
Preview the production build locally by serving the generated dist folder with a static server:
npx serve dist
Troubleshooting
-
File Manager not rendering styles: Ensure the theme CSS is imported in
src/App.vueand that you removed any default Vue CLI starter styles that may override the File Manager styles. -
Trial license warning banner: Register a license key via
registerLicense()from@syncfusion/ej2-base. -
Port 8080 already in use: Stop the conflicting process or run the Vue CLI dev server on a different port with
npm run serve -- --port 3000.
See also
- Getting Started with Vue UI Components using Composition API and TypeScript
- Getting Started with Vue UI Components using Options API and TypeScript
- Ajax Settings Configuration (uploadUrl, downloadUrl, getImageUrl)
- Injecting Services for Overview
- File Manager Views
- File Manager File Operations
- File Manager Upload
- File Manager Customization