How can I help you?
Getting Started with the React DropDownList Component in the Preact
21 Feb 20264 minutes to read
This article provides a step-by-step guide for setting up a Preact project and integrating the Syncfusion® React DropDownList component.
Preact is a fast and lightweight JavaScript library for building user interfaces, often used as an alternative to larger frameworks like React. Preact is designed for smaller file sizes and faster performance, making it ideal for projects where load times and bundle size are critical.
Prerequisites
System requirements for Syncfusion® React UI components
Set up the Preact project
To create a new Preact project, use one of the commands that are specific to either NPM or Yarn.
npm init preactor
yarn init preactUsing one of the above commands starts the project setup process with the following configuration steps:
1. Define the project name: We can specify the name of the project directly. Let’s specify the name of the project as my-project for this article.
T  Preact - Fast 3kB alternative to React with the same modern API
|
*  Project directory:
|  my-project
—
2. Select JavaScript as the framework variant for the Preact project.
T  Preact - Fast 3kB alternative to React with the same modern API
|
*  Project language:
|  > JavaScript
|    TypeScript
—
3. Then configure the project as below for this article.
T  Preact - Fast 3kB alternative to React with the same modern API
|
*  Use router?
|    Yes / > No
—
|
*  Prerender app (SSG)?
|    Yes / > No
—
|
*  Use ESLint?
|    Yes / > No
—
5. After completing the setup steps for my-project, run the following command to navigate to the project directory:
cd my-projectNow that my-project is ready to run with default settings, let’s add Syncfusion® components to the project.
Add the Syncfusion® React packages
Syncfusion® React component packages are available at npmjs.com. To use Syncfusion® React components in the project, install the corresponding npm package.
This article uses the React DropDownList component as an example. To use the React DropDownList component in the project, the @syncfusion/ej2-react-dropdowns package needs to be installed using the following command:
npm install @syncfusion/ej2-react-dropdowns --saveor
yarn add @syncfusion/ej2-react-dropdownsImport Syncfusion® CSS styles
Import themes for the Syncfusion® React component using CSS or SASS styles from npm packages, CDN, CRG, or Theme Studio. Refer to themes topic for information about built-in themes and ways to reference themes in your React project.
In this article, the Material 3 theme is applied using CSS styles, which are available in installed packages. The necessary Material 3 CSS styles for the DropDownList component and its dependents were imported into the src/style.css file.
@import "../node_modules/@syncfusion/ej2-base/styles/material3.css";
@import "../node_modules/@syncfusion/ej2-inputs/styles/material3.css";
@import "../node_modules/@syncfusion/ej2-react-dropdowns/styles/material3.css";
The order of importing CSS styles should be in line with its dependency graph.
Add the Syncfusion® React component
Follow the steps below to add the React DropDownList component to the Preact project:
1. Before adding the DropDownList component to your markup, import the DropDownList component in the src/index.jsx file.
import { DropDownListComponent } from '@syncfusion/ej2-react-dropdowns';2. Then, define the DropDownList component with the dataSource property. Declare the values for the dataSource property.
import { DropDownListComponent } from '@syncfusion/ej2-react-dropdowns';
import { render } from 'preact';
import './style.css';
function App() {
// define the array of data
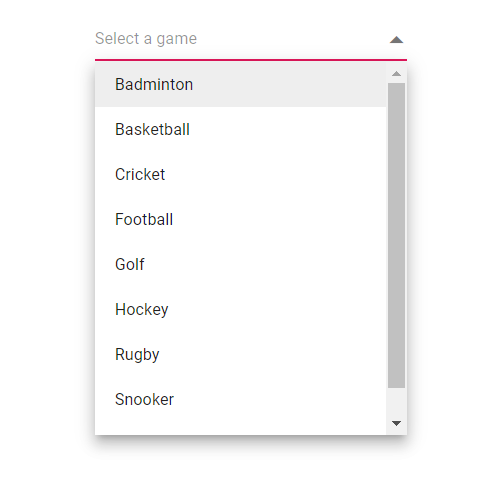
const sportsData = ['Badminton', 'Basketball', 'Cricket', 'Football', 'Golf', 'Hockey', 'Rugby', 'Snooker', 'Tennis'];
return (
// specifies the tag for render the DropDownList component
<DropDownListComponent id="ddlelement" dataSource={sportsData} placeholder="Select a game"/>);
}
render(<App />, document.querySelector('#app'));Run the project
To run the project, use the following command:
npm run devor
yarn run devThe output will appear as follows: