Getting Started
17 Feb 20226 minutes to read
This section briefly explains about how to render Tooltip component in your ASP.NET MVC application. You can refer ASP.NET MVC Getting Started documentation page for introduction part of the system requirements and configure the common specifications.
Starting with
v16.2.0.x, if you reference Syncfusion assemblies from trial setup or from the NuGet feed, you also have to include a license key in your projects. Please refer to this link to know about registering Syncfusion license key in your ASP .NET MVC application to use our components.
Adding Tooltip component to the Application
Tooltip component can be rendered with the help of @Html.EJS().Tooltip tag helper. Add the below code to your index.cshtml page which is present under Views/Home folder, where the Tooltip is initialized.
@Html.EJS().Tooltip("Tooltip").Content("Lets go green & Save Earth !!!").ContentTemplate(@<span id='target'>Show Tooltip</span>).Render()Run the application
After successful compilation of your application, simply press F5 to run the application.
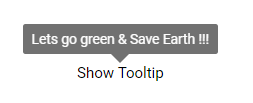
The following example shows a basic Tooltip.
@using Syncfusion.EJ2
@using Syncfusion.EJ2.Popups
@Html.EJS().Tooltip("Tooltip").Content("Lets go green & Save Earth !!!").ContentTemplate(@<span id='target'>Show Tooltip</span>).Render()
public IActionResult Index()
{
return View();
}In the above sample code,
#targetis theidof the element in a page to which theTooltipis initialized.
Output be like the below.
Initialize Tooltip within a container
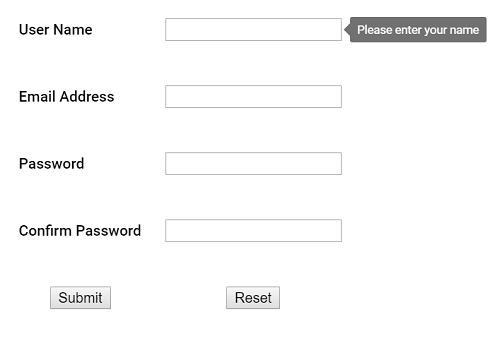
You can create Tooltips on multiple targets within a container. To do so, you have to define specific target elements to the target
property so that the Tooltip is initialized only on matched targets within a container. In this case, the Tooltip content is assigned from the title attribute of the target element.
Refer to the following code example to create a Tooltip on multiple targets within a container.
@using Syncfusion.EJ2
@using Syncfusion.EJ2.Popups
@Html.EJS().Tooltip("Tooltip").Target(".e-info").Position(Syncfusion.EJ2.Popups.Position.RightCenter).ContentTemplate(@<form id="details" role="form">
                        <table>
                            <tr>
                                <td class="info"> User Name:</td>
                                <td> <input type="text" class="e-info" name="firstname" title="Please enter your name"> </td>
                            </tr>
                            <tr>
                                <td class="info"> Email Address:</td>
                                <td> <input type="text" class="e-info" name="email" title="Enter a valid email address"></td>
                            </tr>
                            <tr>
                                <td class="info"> Password:</td>
                                <td> <input type="password" class="e-info" name="password" title="Be at least 8 characters length"></td>
                            </tr>
                            <tr>
                                <td class="info"> Confirm Password:</td>
                                <td> <input type="password" class="e-info" name="Cpwd" title="Re-enter your password"></td>
                            </tr>
                        </table>
                        <input id="sample" type="submit" value="Submit">
                        <input id="clear" type="reset" value="Reset">
                        </form>).Render()

<style>
    #container {
        visibility: hidden;
    }

    #loader {
        color: #008cff;
        height: 40px;
        left: 45%;
        position: absolute;
        top: 45%;
        width: 30%;
    }

    #details table th, #details table td {
        padding: 15px;
        text-align: left;
    }

    #details .info {
        font-weight: bold;
    }

</style>
public IActionResult Index()
{
return View();
}Output be like the below.

In the above sample,
#detailsrefers to the container’s id, and the target.e-inforefers to the target elements available within that container.
