How can I help you?
Getting started with Vue DataManager in Quasar Framework
18 Mar 202624 minutes to read
The Syncfusion® Vue DataManager enables efficient data management in Vue applications. It seamlessly interacts with various data sources (remote or local) and provides functionalities like sorting, filtering, paging, and CRUD (Create, Read, Update, Delete) operations, enhancing the data presentation capabilities of your Vue application.
This guide details the steps involved in setting up Quasar project and integrating the Syncfusion® Vue Data Manager using the Composition API.
The Quasar Framework is an open-source framework based on Vue.js, empowering developers to build high-performance and responsive applications across various platforms, including web, mobile, and desktop.
Prerequisites for Syncfusion® Vue UI Components
Before you start using Syncfusion® Vue UI components, ensure that your system meets the following prerequisites by referring to the system requirements documentation. This documentation provides information about supported browsers, Vue.js versions, and other dependencies required for using Syncfusion® Vue UI components effectively.
System requirements for Syncfusion® Vue UI components
Dependencies
This section provides information about the Essential® dependencies required for integrating the Syncfusion® Vue DataManager into your Vue projects. These dependencies are necessary for managing and manipulating data effectively within your applications.
-
@syncfusion/ej2-data: The@syncfusion/ej2-datapackage serves as the core component for Syncfusion® data management functionalities. It includes critical features such as DataManager, which enables various data operations like sorting, filtering, and paging. By integrating this package into your Vue project, you gain access to powerful tools for handling data efficiently. -
@syncfusion/ej2-base: The@syncfusion/ej2-basepackage serves as the foundational layer for other Syncfusion® packages. It provides Essential® utilities and helpers required for seamless integration and functionality of Syncfusion® components within your Vue applications.
|-- @syncfusion/ej2-data
    |-- @syncfusion/ej2-base
    |-- es6-promise (Required when window.Promise is not available)
@syncfusion/ej2-data requires the presence of a Promise feature in global environment. In the browser, window.Promise must be available.
Installation and configuration
Setting up a Quasar project for Vue development is straightforward. Quasar’s CLI simplifies the process, offering a seamless experience to get you started with a comprehensive Vue application. Follow these steps to create and configure a new Quasar project:
Step 1: Create a new Quasar project
To create a new Quasar project, open your terminal and navigate to your desired project directory. Then, execute the following command:
npm init quasar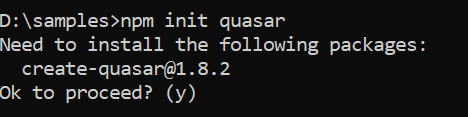
If you are new to the Quasar framework, you will need to press yes to proceed with the installation.
Step 2: Configure project settings
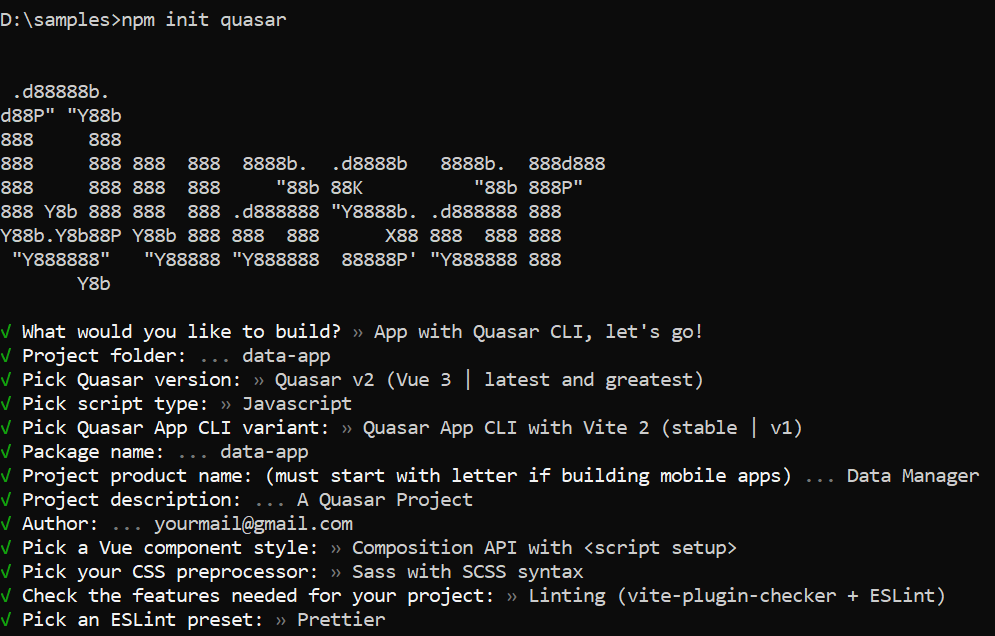
After executing the above command, you will be prompted to configure the project settings. Follow the prompts and provide the necessary information:
-
Select project type: Choose “App with Quasar CLI, let’s go!” to create a new Quasar application.
? What would you like to build? » - Use arrow-keys. Return to submit. > App with Quasar CLI, let's go! - spa/pwa/ssr/bex/electron/capacitor/cordova AppExtension (AE) for Quasar CLI Quasar UI kit -
Define the project folder: Specify the name for your project folder where all project files will be stored.
? Project folder: » data-app -
Quasar version: Choose “Quasar v2 (Vue 3 latest and greatest)” for the latest version of Quasar with Vue 3.
? Pick Quasar version: » - Use arrow-keys. Return to submit. > Quasar v2 (Vue 3 | latest and greatest) - recommended Quasar v1 (Vue 2) -
Script type: Choose the script type for your project. Select either JavaScript or TypeScript.
? Pick script type: » - Use arrow-keys. Return to submit. > Javascript Typescript -
Quasar app CLI variant: Choose the variant that suits your project requirements. For example, select “Quasar App CLI with Vite 2”.
? Pick Quasar App CLI variant: » - Use arrow-keys. Return to submit. > Quasar App CLI with Vite 2 (stable | v1) - recommended Quasar App CLI with Vite 5 (BETA | next major version - v2) Quasar App CLI with Webpack (stable | v3) Quasar App CLI with Webpack (BETA | next major version - v4) -
Package name: Enter the package name for your project. This should be a unique identifier for your project.
? Package name: » data-app -
Project product name: Provide a name for your Quasar project. This is the name that will be displayed in the project’s metadata.
? Project product name: (must start with letter if building mobile apps) » Data Manager -
Project description: Enter a brief description of your project to provide context for other developers.
? Project description: » A Quasar Project -
Author: Provide your email or name as the author of the project.
? Author: » [email protected] -
Vue component style: Choose the Vue component style you prefer. For example, select “Composition API with
<script setup>”.? Pick a Vue component style: » - Use arrow-keys. Return to submit. > Composition API with <script setup> - recommended Composition API Options API -
CSS preprocessor: Choose your preferred CSS preprocessor. For example, select “Sass with SCSS syntax”. This determines the syntax for writing stylesheets in your project.
? Pick your CSS preprocessor: » - Use arrow-keys. Return to submit. > Sass with SCSS syntax Sass with indented syntax None (the others will still be available) -
Feature: Select the features needed for your project. For example, select Linting (vite-plugin-checker + ESLint) for linting.
? Check the features needed for your project: » Instructions: ↑/↓: Highlight option ←/→/[space]: Toggle selection a: Toggle all enter/return: Complete answer (*) Linting (vite-plugin-checker + ESLint) - recommended ( ) State Management (Pinia) ( ) State Management (Vuex) [DEPRECATED by Vue Team] ( ) axios ( ) vue-i18n -
ESLint preset: Select an ESLint preset for code linting. Prettier is recommended for consistent code formatting.
? Pick an ESLint preset: » - Use arrow-keys. Return to submit.
>   Prettier - https://github.com/prettier/prettier
    Standard
    Airbnb
This generates the necessary files. Refer the below image for references.
Step 3: Install project dependencies:
After configuring your project, the Quasar CLI will scaffold the project structure based on your selections. You will then be prompted to install project dependencies. Choose whether to install project dependencies using npm or handle them manually.

Step 4: Navigate to the project directory
Once the project setup is complete, navigate into the project directory using the cd command:
cd data-appStep 5: Install Syncfusion® package
Install the Syncfusion® package required for data management using the following command:
npm install @syncfusion/ej2-data --saveStep 6: Run the application
To launch the development server, use the following command
npm run devConnection to a data source
Data sources are fundamental for applications that depend on information, serving as repositories that store and manage various types of data. It enables applications to retrieve, manipulate, and present data effectively. Establishing a connection between your application and a data source is Essential® for making the most of the data’s potential
The Syncfusion® DataManager serves as a gateway for both local and remote data sources, utilizing query to interact with the data.
Binding to JSON data
Binding to a local data source involves connecting your application directly to a dataset stored within the application itself. This method is useful for small-scale applications where data does not need to be fetched from external sources.
To bind DataManager to a local data source, you can assign an array of JavaScript objects to the json property or pass them to the constructor during instantiation.
-
Create a [src/datasource.js] file and use the following dataset to provide JSON data:
const data = [ { OrderID: 10248, CustomerID: 'VINET', EmployeeID: 5, OrderDate: new Date(8364186e5), ShipName: 'Vins et alcools Chevalier', ShipCity: 'Reims', ShipAddress: '59 rue de l Abbaye', ShipRegion: 'CJ', ShipPostalCode: '51100', ShipCountry: 'France', Freight: 32.38, Verified: !0 }, { OrderID: 10249, CustomerID: 'TOMSP', EmployeeID: 6, OrderDate: new Date(836505e6), ShipName: 'Toms Spezialitäten', ShipCity: 'Münster', ShipAddress: 'Luisenstr. 48', ShipRegion: 'CJ', ShipPostalCode: '44087', ShipCountry: 'Germany', Freight: 11.61, Verified: !1 }, { OrderID: 10250, CustomerID: 'HANAR', EmployeeID: 4, OrderDate: new Date(8367642e5), ShipName: 'Hanari Carnes', ShipCity: 'Rio de Janeiro', ShipAddress: 'Rua do Paço, 67', ShipRegion: 'RJ', ShipPostalCode: '05454-876', ShipCountry: 'Brazil', Freight: 65.83, Verified: !0 }, { OrderID: 10251, CustomerID: 'VICTE', EmployeeID: 3, OrderDate: new Date(8367642e5), ShipName: 'Victuailles en stock', ShipCity: 'Lyon', ShipAddress: '2, rue du Commerce', ShipRegion: 'CJ', ShipPostalCode: '69004', ShipCountry: 'France', Freight: 41.34, Verified: !0 }, { OrderID: 10252, CustomerID: 'SUPRD', EmployeeID: 4, OrderDate: new Date(8368506e5), ShipName: 'Suprêmes délices', ShipCity: 'Charleroi', ShipAddress: 'Boulevard Tirou, 255', ShipRegion: 'CJ', ShipPostalCode: 'B-6000', ShipCountry: 'Belgium', Freight: 51.3, Verified: !0 }, { OrderID: 10253, CustomerID: 'HANAR', EmployeeID: 3, OrderDate: new Date(836937e6), ShipName: 'Hanari Carnes', ShipCity: 'Rio de Janeiro', ShipAddress: 'Rua do Paço, 67', ShipRegion: 'RJ', ShipPostalCode: '05454-876', ShipCountry: 'Brazil', Freight: 58.17, Verified: !0 }, { OrderID: 10254, CustomerID: 'CHOPS', EmployeeID: 5, OrderDate: new Date(8370234e5), ShipName: 'Chop-suey Chinese', ShipCity: 'Bern', ShipAddress: 'Hauptstr. 31', ShipRegion: 'CJ', ShipPostalCode: '3012', ShipCountry: 'Switzerland', Freight: 22.98, Verified: !1 }, { OrderID: 10255, CustomerID: 'RICSU', EmployeeID: 9, OrderDate: new Date(8371098e5), ShipName: 'Richter Supermarkt', ShipCity: 'Genève', ShipAddress: 'Starenweg 5', ShipRegion: 'CJ', ShipPostalCode: '1204', ShipCountry: 'Switzerland', Freight: 148.33, Verified: !0 }, { OrderID: 10256, CustomerID: 'WELLI', EmployeeID: 3, OrderDate: new Date(837369e6), ShipName: 'Wellington Importadora', ShipCity: 'Resende', ShipAddress: 'Rua do Mercado, 12', ShipRegion: 'SP', ShipPostalCode: '08737-363', ShipCountry: 'Brazil', Freight: 13.97, Verified: !1 }, { OrderID: 10257, CustomerID: 'HILAA', EmployeeID: 4, OrderDate: new Date(8374554e5), ShipName: 'HILARION-Abastos', ShipCity: 'San Cristóbal', ShipAddress: 'Carrera 22 con Ave. Carlos Soublette #8-35', ShipRegion: 'Táchira', ShipPostalCode: '5022', ShipCountry: 'Venezuela', Freight: 81.91, Verified: !0 }, { OrderID: 10258, CustomerID: 'ERNSH', EmployeeID: 1, OrderDate: new Date(8375418e5), ShipName: 'Ernst Handel', ShipCity: 'Graz', ShipAddress: 'Kirchgasse 6', ShipRegion: 'CJ', ShipPostalCode: '8010', ShipCountry: 'Austria', Freight: 140.51, Verified: !0 }, { OrderID: 10259, CustomerID: 'CENTC', EmployeeID: 4, OrderDate: new Date(8376282e5), ShipName: 'Centro comercial Moctezuma', ShipCity: 'México D.F.', ShipAddress: 'Sierras de Granada 9993', ShipRegion: 'CJ', ShipPostalCode: '05022', ShipCountry: 'Mexico', Freight: 3.25, Verified: !1 }, { OrderID: 10260, CustomerID: 'OTTIK', EmployeeID: 4, OrderDate: new Date(8377146e5), ShipName: 'Ottilies Käseladen', ShipCity: 'Köln', ShipAddress: 'Mehrheimerstr. 369', ShipRegion: 'CJ', ShipPostalCode: '50739', ShipCountry: 'Germany', Freight: 55.09, Verified: !0 }, { OrderID: 10261, CustomerID: 'QUEDE', EmployeeID: 4, OrderDate: new Date(8377146e5), ShipName: 'Que Delícia', ShipCity: 'Rio de Janeiro', ShipAddress: 'Rua da Panificadora, 12', ShipRegion: 'RJ', ShipPostalCode: '02389-673', ShipCountry: 'Brazil', Freight: 3.05, Verified: !1 }, { OrderID: 10262, CustomerID: 'RATTC', EmployeeID: 8, OrderDate: new Date(8379738e5), ShipName: 'Rattlesnake Canyon Grocery', ShipCity: 'Albuquerque', ShipAddress: '2817 Milton Dr.', ShipRegion: 'NM', ShipPostalCode: '87110', ShipCountry: 'USA', Freight: 48.29, Verified: !0 }] export default data; -
Import dataset in the src/App.vue file.
-
Add the following CSS to the
<style>section of the src/App.vue file to style the table:<style> .e-table { border: solid 1px #e0e0e0; border-collapse: collapse; font-family: Roboto; } .e-table td, .e-table th { border-style: solid; border-width: 1px 0 0; border-color: #e0e0e0; display: table-cell; font-size: 14px; line-height: 20px; overflow: hidden; padding: 8px 21px; vertical-align: middle; white-space: nowrap; width: auto; } </style>
The following example demonstrates how to bind JSON data using the executeLocal method of DataManager.
<template>
<div id="app">
<table class='e-table'>
<tr><th>Order ID</th><th>Customer ID</th><th>Employee ID</th><th>Ship Country</th></tr>
<tr v-for="(item, index) in items" :key="index">
<td></td>
<td></td>
<td></td>
<td></td>
</tr>
</table>
</div>
</template>
<script setup>
import data from './datasource.js';
import { DataManager, Query } from '@syncfusion/ej2-data';
const items= new DataManager(data).executeLocal(new Query())
</script>
 <style>
     .e-table {
         border: solid 1px #e0e0e0;
         border-collapse: collapse;
         font-family: Roboto;
     }

     .e-table td,
     .e-table th {
         border-style: solid;
         border-width: 1px 0 0;
         border-color: #e0e0e0;
         display: table-cell;
         font-size: 14px;
         line-height: 20px;
         overflow: hidden;
         padding: 8px 21px;
         vertical-align: middle;
         white-space: nowrap;
         width: auto;
     }
</style><template>
<div id="app">
<table class='e-table'>
<tr>
<th>Order ID</th>
<th>Customer ID</th>
<th>Employee ID</th>
<th>Ship Country</th>
</tr>
<tr v-for="(item, index) in items" :key="index">
<td></td>
<td></td>
<td></td>
<td></td>
</tr>
</table>
</div>
</template>
<script>
import data from './datasource.js';
import { DataManager, Query } from '@syncfusion/ej2-data';
export default {
name: "App",
data() {
return {
items: new DataManager(data).executeLocal(new Query())
}
}
}
</script>
<style>
.e-table {
border: solid 1px #e0e0e0;
border-collapse: collapse;
font-family: Roboto;
}
.e-table td,
.e-table th {
border-style: solid;
border-width: 1px 0 0;
border-color: #e0e0e0;
display: table-cell;
font-size: 14px;
line-height: 20px;
overflow: hidden;
padding: 8px 21px;
vertical-align: middle;
white-space: nowrap;
width: auto;
}
</style>Binding to ODataV4
OData (Open Data Protocol) is a standardized protocol for creating and consuming data APIs over the internet, allowing you to access and manipulate data from various sources. Syncfusion’s® DataManager provides seamless integration with OData services, enabling you to bind data from remote sources to your application.
DataManager can also be bound to remote data source by assigning service endpoint URL to the url property. All DataManager operations will address the provided service endpoint.
The following example demonstrates how to bind data to an OData service using the executeQuery method of DataManager.
<template>
  <div id="app">
    <table class='e-table'>
      <tr><th>Order ID</th><th>Customer ID</th><th>Employee ID</th><th>Ship Country</th></tr>
      <tr v-for="(item, index) in items" :key="index">
        <td></td>
        <td></td>
        <td></td>
        <td></td>
      </tr>
    </table>
  </div>
</template>

<script setup>
import { ref } from 'vue';
import { DataManager, Query, ODataV4Adaptor } from '@syncfusion/ej2-data';

let items = ref([]);
let SERVICE_URI = "https://services.odata.org/V4/Northwind/Northwind.svc/Orders"
const dataManager = new DataManager({
  url: SERVICE_URI,
  adaptor: new ODataV4Adaptor()
});

dataManager.executeQuery(new Query().take(12)).then((e) => {
  items.value = e.result;
});
</script>

<style>
  .e-table {
    border: solid 1px #e0e0e0;
    border-collapse: collapse;
    font-family: Roboto;
  }

  .e-table td, .e-table th {
    border-style: solid;
    border-width: 1px 0 0;
    border-color: #e0e0e0;
    display: table-cell;
    font-size: 14px;
    line-height: 20px;
    overflow: hidden;
    padding: 8px 21px;
    vertical-align: middle;
    white-space: nowrap;
    width: auto;
  }
</style><template>
<div id="app">
<table class='e-table'>
<tr>
<th>Order ID</th>
<th>Customer ID</th>
<th>Employee ID</th>
<th>Ship Country</th>
</tr>
<tr v-for="(item, index) in items" :key="index">
<td></td>
<td></td>
<td></td>
<td></td>
</tr>
</table>
</div>
</template>
<script>
import { DataManager, Query, ODataV4Adaptor } from '@syncfusion/ej2-data';
let SERVICE_URI = "https://services.odata.org/V4/Northwind/Northwind.svc/Orders"
export default {
name: "App",
data() {
return {
items: [],
dataManager: new DataManager({
url: SERVICE_URI,
adaptor: new ODataV4Adaptor()
})
}
},
mounted() {
this.dataManager.executeQuery(new Query().take(12)).then((e) => {
this.items = e.result;
});
}
}
</script>
<style>
.e-table {
border: solid 1px #e0e0e0;
border-collapse: collapse;
font-family: Roboto;
}
.e-table td,
.e-table th {
border-style: solid;
border-width: 1px 0 0;
border-color: #e0e0e0;
display: table-cell;
font-size: 14px;
line-height: 20px;
overflow: hidden;
padding: 8px 21px;
vertical-align: middle;
white-space: nowrap;
width: auto;
}
</style>Filter
Data filtering is a fundamental operation that allows to obtain a reduced view of data based on specified filter criteria. This feature is Essential® for efficiently managing and displaying large datasets.
The filter expression can be easily constructed using the where method of the query class. This method allows you to specify filter criteria based on various conditions.
The following example demonstrates how to filter data based on the EmployeeID field equal to 4 using the where method of query class and executeLocal method of DataManager.
<template>
  <div id="app">
    <table class='e-table'>
      <tr><th>Order ID</th><th>Customer ID</th><th>Employee ID</th><th>Ship Country</th></tr>
      <tr v-for="(item, index) in items" :key="index">
        <td></td>
        <td></td>
        <td></td>
        <td></td>
      </tr>
    </table>
  </div>
</template>

<script setup>
import data from './datasource.js';
import { DataManager, Query } from '@syncfusion/ej2-data';

const items= new DataManager(data).executeLocal(new Query().where('EmployeeID', 'equal', 4))
</script>

<style>
  .e-table {
    border: solid 1px #e0e0e0;
    border-collapse: collapse;
    font-family: Roboto;
  }

  .e-table td, .e-table th {
    border-style: solid;
    border-width: 1px 0 0;
    border-color: #e0e0e0;
    display: table-cell;
    font-size: 14px;
    line-height: 20px;
    overflow: hidden;
    padding: 8px 21px;
    vertical-align: middle;
    white-space: nowrap;
    width: auto;
  }
</style><template>
<div id="app">
<table class='e-table'>
<tr>
<th>Order ID</th>
<th>Customer ID</th>
<th>Employee ID</th>
<th>Ship Country</th>
</tr>
<tr v-for="(item, index) in items" :key="index">
<td></td>
<td></td>
<td></td>
<td></td>
</tr>
</table>
</div>
</template>
<script>
import data from './datasource.js';
import { DataManager, Query } from '@syncfusion/ej2-data';
export default {
name: "App",
data() {
return {
items: new DataManager(data).executeLocal(new Query().where('EmployeeID', 'equal', 4))
}
}
}
</script>
<style>
.e-table {
border: solid 1px #e0e0e0;
border-collapse: collapse;
font-family: Roboto;
}
.e-table td,
.e-table th {
border-style: solid;
border-width: 1px 0 0;
border-color: #e0e0e0;
display: table-cell;
font-size: 14px;
line-height: 20px;
overflow: hidden;
padding: 8px 21px;
vertical-align: middle;
white-space: nowrap;
width: auto;
}
</style>Sort
Sorting data allows you to arrange it either in ascending or descending order based on specified criteria.
This can be achieved using the sortBy method of the query class. This method facilitates the sorting of data based on specified fields and order.
The following example demonstrates how to sort data based on the EmployeeID field in ascending order using the sortBy method of query class and executeLocal method of DataManager.
<template>
  <div id="app">
    <table class='e-table'>
      <tr><th>Order ID</th><th>Customer ID</th><th>Employee ID</th><th>Ship Country</th></tr>
      <tr v-for="(item, index) in items" :key="index">
        <td></td>
        <td></td>
        <td></td>
        <td></td>
      </tr>
    </table>
  </div>
</template>

<script setup>
import data from './datasource.js';
import { DataManager, Query } from '@syncfusion/ej2-data';

const items= new DataManager(data).executeLocal(new Query().sortBy('EmployeeID').take(8))
</script>

<style>
  .e-table {
    border: solid 1px #e0e0e0;
    border-collapse: collapse;
    font-family: Roboto;
  }

  .e-table td, .e-table th {
    border-style: solid;
    border-width: 1px 0 0;
    border-color: #e0e0e0;
    display: table-cell;
    font-size: 14px;
    line-height: 20px;
    overflow: hidden;
    padding: 8px 21px;
    vertical-align: middle;
    white-space: nowrap;
    width: auto;
  }
</style><template>
<div id="app">
<table class='e-table'>
<tr>
<th>Order ID</th>
<th>Customer ID</th>
<th>Employee ID</th>
<th>Ship Country</th>
</tr>
<tr v-for="(item, index) in items" :key="index">
<td></td>
<td></td>
<td></td>
<td></td>
</tr>
</table>
</div>
</template>
<script>
import data from './datasource.js';
import { DataManager, Query } from '@syncfusion/ej2-data';
export default {
name: "App",
data() {
return {
items: new DataManager(data).executeLocal(new Query().sortBy('EmployeeID').take(8))
}
}
}
</script>
<style>
.e-table {
border: solid 1px #e0e0e0;
border-collapse: collapse;
font-family: Roboto;
}
.e-table td,
.e-table th {
border-style: solid;
border-width: 1px 0 0;
border-color: #e0e0e0;
display: table-cell;
font-size: 14px;
line-height: 20px;
overflow: hidden;
padding: 8px 21px;
vertical-align: middle;
white-space: nowrap;
width: auto;
}
</style>Page
Paging provides an option to display data in segmented pages, making it easier to navigate through large datasets. This feature is particularly useful when dealing with extensive datasets.
The page method of the query class enables pagination of data by retrieving a specific range of data based on the page index and the page size.
The following example demonstrates how to apply paging to the data using the page method of query class and executeLocal method of DataManager.
<template>
  <div id="app">
    <table class='e-table'>
      <tr><th>Order ID</th><th>Customer ID</th><th>Employee ID</th><th>Ship Country</th></tr>
      <tr v-for="(item, index) in items" :key="index">
        <td></td>
        <td></td>
        <td></td>
        <td></td>
      </tr>
    </table>
  </div>
</template>

<script setup>
import data from './datasource.js';
import { DataManager, Query } from '@syncfusion/ej2-data';

const items= new DataManager(data).executeLocal(new Query().page(1, 8))
</script>

<style>
  .e-table {
    border: solid 1px #e0e0e0;
    border-collapse: collapse;
    font-family: Roboto;
  }

  .e-table td, .e-table th {
    border-style: solid;
    border-width: 1px 0 0;
    border-color: #e0e0e0;
    display: table-cell;
    font-size: 14px;
    line-height: 20px;
    overflow: hidden;
    padding: 8px 21px;
    vertical-align: middle;
    white-space: nowrap;
    width: auto;
  }
</style><template>
<div id="app">
<table class='e-table'>
<tr>
<th>Order ID</th>
<th>Customer ID</th>
<th>Employee ID</th>
<th>Ship Country</th>
</tr>
<tr v-for="(item, index) in items" :key="index">
<td></td>
<td></td>
<td></td>
<td></td>
</tr>
</table>
</div>
</template>
<script>
import data from './datasource.js';
import { DataManager, Query } from '@syncfusion/ej2-data';
export default {
name: "App",
data() {
return {
items: new DataManager(data).executeLocal(new Query().page(1, 8))
}
}
}
</script>
<style>
.e-table {
border: solid 1px #e0e0e0;
border-collapse: collapse;
font-family: Roboto;
}
.e-table td,
.e-table th {
border-style: solid;
border-width: 1px 0 0;
border-color: #e0e0e0;
display: table-cell;
font-size: 14px;
line-height: 20px;
overflow: hidden;
padding: 8px 21px;
vertical-align: middle;
white-space: nowrap;
width: auto;
}
</style>Component binding
The DataManager can be seamlessly integrated with Syncfusion® components that support data binding. However, before utilizing DataManager, you need to register the Syncfusion® Vue component.
In the following samples, the grid component is bound. To render the Grid with the necessary configurations, please refer to the Grid Getting Started documentation.
Local data binding
Local data binding allows you to directly bind data to Syncfusion® components from within your Vue application. This method is useful when you have the data available locally and want to integrate it seamlessly with Syncfusion® components.
To bind local data to a Syncfusion® component, follow these steps:
-
Define your data directly in your Vue component or import it from an external source.
-
Use the DataManager class to create a data source and bind it to your data.
-
Integrate the data source with the Syncfusion® grid component by setting the dataSource property.
The following example shows how to bind local data to the grid component using DataManager.
<template>
  <div id="app">
    <ejs-grid :dataSource="data">
      <e-columns>
        <e-column field='OrderID' headerText='Order ID' width=90></e-column>
        <e-column field='CustomerID' headerText='Customer ID' width=100></e-column>
        <e-column field='Freight' headerText='Freight' format='C2'  width=90></e-column>
        <e-column field='ShipName' headerText='Ship Name' width=100></e-column>
      </e-columns>
    </ejs-grid>
  </div>
</template>

<script setup>
import gridData from './datasource.js';
import { DataManager } from '@syncfusion/ej2-data';
import { GridComponent as EjsGrid, ColumnsDirective as EColumns, ColumnDirective as EColumn } from '@syncfusion/ej2-vue-grids';

const data = new DataManager(gridData);
</script>

<style>
  @import "../node_modules/@syncfusion/ej2-base/styles/tailwind.css";
  @import "../node_modules/@syncfusion/ej2-buttons/styles/tailwind.css";
  @import "../node_modules/@syncfusion/ej2-calendars/styles/tailwind.css";
  @import "../node_modules/@syncfusion/ej2-dropdowns/styles/tailwind.css";
  @import "../node_modules/@syncfusion/ej2-inputs/styles/tailwind.css";
  @import "../node_modules/@syncfusion/ej2-navigations/styles/tailwind.css";
  @import "../node_modules/@syncfusion/ej2-popups/styles/tailwind.css";
  @import "../node_modules/@syncfusion/ej2-splitbuttons/styles/tailwind.css";
  @import "../node_modules/@syncfusion/ej2-vue-grids/styles/tailwind.css";
</style><template>
<div id="app">
<ejs-grid :dataSource="data">
<e-columns>
<e-column field='OrderID' headerText='Order ID' width=90></e-column>
<e-column field='CustomerID' headerText='Customer ID' width=100></e-column>
<e-column field='Freight' headerText='Freight' format='C2' width=90></e-column>
<e-column field='ShipName' headerText='Ship Name' width=100></e-column>
</e-columns>
</ejs-grid>
</div>
</template>
<script>
import gridData from './datasource.js';
import { DataManager } from '@syncfusion/ej2-data';
import { GridComponent, ColumnsDirective, ColumnDirective } from '@syncfusion/ej2-vue-grids';
export default {
name: "App",
components: {
'ejs-grid': GridComponent,
'e-columns': ColumnsDirective,
'e-column': ColumnDirective
},
data() {
return {
data: new DataManager(gridData)
}
}
}
</script>
<style>
@import "../node_modules/@syncfusion/ej2-base/styles/tailwind.css";
@import "../node_modules/@syncfusion/ej2-buttons/styles/tailwind.css";
@import "../node_modules/@syncfusion/ej2-calendars/styles/tailwind.css";
@import "../node_modules/@syncfusion/ej2-dropdowns/styles/tailwind.css";
@import "../node_modules/@syncfusion/ej2-inputs/styles/tailwind.css";
@import "../node_modules/@syncfusion/ej2-navigations/styles/tailwind.css";
@import "../node_modules/@syncfusion/ej2-popups/styles/tailwind.css";
@import "../node_modules/@syncfusion/ej2-splitbuttons/styles/tailwind.css";
@import "../node_modules/@syncfusion/ej2-vue-grids/styles/tailwind.css";
</style>Remote data binding
Remote data binding involves binding external data sources, such as API endpoints, to Syncfusion® components. This allows you to fetch and display data dynamically from a server.
To bind remote data to a Syncfusion® component, follow these steps:
-
Initialize a DataManager object and configure it with the URL of the remote service from which you want to fetch data.
-
Assign the
DataManagerinstance to the dataSource property of the Syncfusion® grid component.
The following example demonstrates how to bind remote data to the grid component using DataManager.
<template>
  <div id="app">
    <ejs-grid :dataSource="data">
      <e-columns>
        <e-column field='OrderID' headerText='Order ID' width=90></e-column>
        <e-column field='CustomerID' headerText='Customer ID' width=100></e-column>
        <e-column field='Freight' headerText='Freight' format='C2' width=90></e-column>
        <e-column field='ShipName' headerText='Ship Name' width=100></e-column>
      </e-columns>
    </ejs-grid>
  </div>
</template>

<script setup>
import { DataManager } from '@syncfusion/ej2-data';
import { GridComponent as EjsGrid, ColumnsDirective as EColumns, ColumnDirective as EColumn } from '@syncfusion/ej2-vue-grids';

let SERVICE_URI = "https://services.syncfusion.com/vue/production/";
const data = new DataManager({ url: SERVICE_URI + 'api/Orders' });
</script>

<style>
@import "../node_modules/@syncfusion/ej2-base/styles/tailwind.css";
@import "../node_modules/@syncfusion/ej2-buttons/styles/tailwind.css";
@import "../node_modules/@syncfusion/ej2-calendars/styles/tailwind.css";
@import "../node_modules/@syncfusion/ej2-dropdowns/styles/tailwind.css";
@import "../node_modules/@syncfusion/ej2-inputs/styles/tailwind.css";
@import "../node_modules/@syncfusion/ej2-navigations/styles/tailwind.css";
@import "../node_modules/@syncfusion/ej2-popups/styles/tailwind.css";
@import "../node_modules/@syncfusion/ej2-splitbuttons/styles/tailwind.css";
@import "../node_modules/@syncfusion/ej2-vue-grids/styles/tailwind.css";
</style><template>
<div id="app">
<ejs-grid :dataSource="data">
<e-columns>
<e-column field='OrderID' headerText='Order ID' width=90></e-column>
<e-column field='CustomerID' headerText='Customer ID' width=100></e-column>
<e-column field='Freight' headerText='Freight' format='C2' width=90></e-column>
<e-column field='ShipName' headerText='Ship Name' width=100></e-column>
</e-columns>
</ejs-grid>
</div>
</template>
<script>
import { DataManager } from '@syncfusion/ej2-data';
import { GridComponent as EjsGrid, ColumnsDirective as EColumns, ColumnDirective as EColumn } from '@syncfusion/ej2-vue-grids';
let SERVICE_URI = "https://services.syncfusion.com/vue/production/";
export default {
name: "App",
components: {
'ejs-grid': GridComponent,
'e-columns': ColumnsDirective,
'e-column': ColumnDirective
},
data() {
return {
data: new DataManager({ url: SERVICE_URI + 'api/Orders' })
}
}
}
</script>
<style>
@import "../node_modules/@syncfusion/ej2-base/styles/tailwind.css";
@import "../node_modules/@syncfusion/ej2-buttons/styles/tailwind.css";
@import "../node_modules/@syncfusion/ej2-calendars/styles/tailwind.css";
@import "../node_modules/@syncfusion/ej2-dropdowns/styles/tailwind.css";
@import "../node_modules/@syncfusion/ej2-inputs/styles/tailwind.css";
@import "../node_modules/@syncfusion/ej2-navigations/styles/tailwind.css";
@import "../node_modules/@syncfusion/ej2-popups/styles/tailwind.css";
@import "../node_modules/@syncfusion/ej2-splitbuttons/styles/tailwind.css";
@import "../node_modules/@syncfusion/ej2-vue-grids/styles/tailwind.css";
</style>