How can I help you?
Working days in Angular Schedule component
1 Oct 202524 minutes to read
The Scheduler can be customized on various aspects as well as it inherits almost all the calendar-specific features such as options,
- To set custom time range display on Scheduler
- To set different working hours
- To set different working days
- To set different first day of the week
- To show or hide weekend days
- To show the week number
Set working days
By default, the Scheduler considers Monday through Friday as working days ([1, 2, 3, 4, 5]), where 1 represents Monday, 2 represents Tuesday, and so on. Days not included in this collection are treated as non-working days. When weekend days are hidden, these non-working days are also hidden from the layout.
The Work week and Timeline Work week views display only the defined working days, whereas other views display all days and visually differentiate non-working days with an inactive cell color.
The working or business hours depiction is valid only on the specified working days.
The following example shows how to configure the Scheduler to use Monday, Wednesday, and Friday as working days.
import { NgModule } from '@angular/core'
import { BrowserModule } from '@angular/platform-browser'
import { ScheduleModule } from '@syncfusion/ej2-angular-schedule'
import { ButtonModule } from '@syncfusion/ej2-angular-buttons'
import { DayService, WeekService, WorkWeekService, MonthService, AgendaService, MonthAgendaService} from '@syncfusion/ej2-angular-schedule'


import { Component } from '@angular/core';
import { EventSettingsModel,TimelineViewsService, View } from '@syncfusion/ej2-angular-schedule';
import { scheduleData } from './datasource';

@Component({
imports: [

        ScheduleModule,
        ButtonModule
    ],

providers: [DayService,
                WeekService,
                WorkWeekService,
                MonthService,
                AgendaService,
                MonthAgendaService,
                TimelineViewsService],
standalone: true,
  selector: 'app-root',
  // specifies the template string for the Schedule component
  template: `<ejs-schedule width='100%' height='550px' currentView='WorkWeek' [views]="scheduleViews" [workDays]='workWeekDays' [selectedDate]="selectedDate" [eventSettings]="eventSettings"></ejs-schedule>`
})
export class AppComponent {
  public selectedDate: Date = new Date(2018, 1, 15);
  public workWeekDays: number[] = [1, 3, 5];
  public scheduleViews: View[] = ['Week', 'WorkWeek', 'Month', 'TimelineWeek', 'TimelineWorkWeek'];
  public eventSettings: EventSettingsModel = { dataSource: scheduleData };
 }
import { bootstrapApplication } from '@angular/platform-browser';
import { AppComponent } from './app.component';
import 'zone.js';
bootstrapApplication(AppComponent).catch((err) => console.error(err));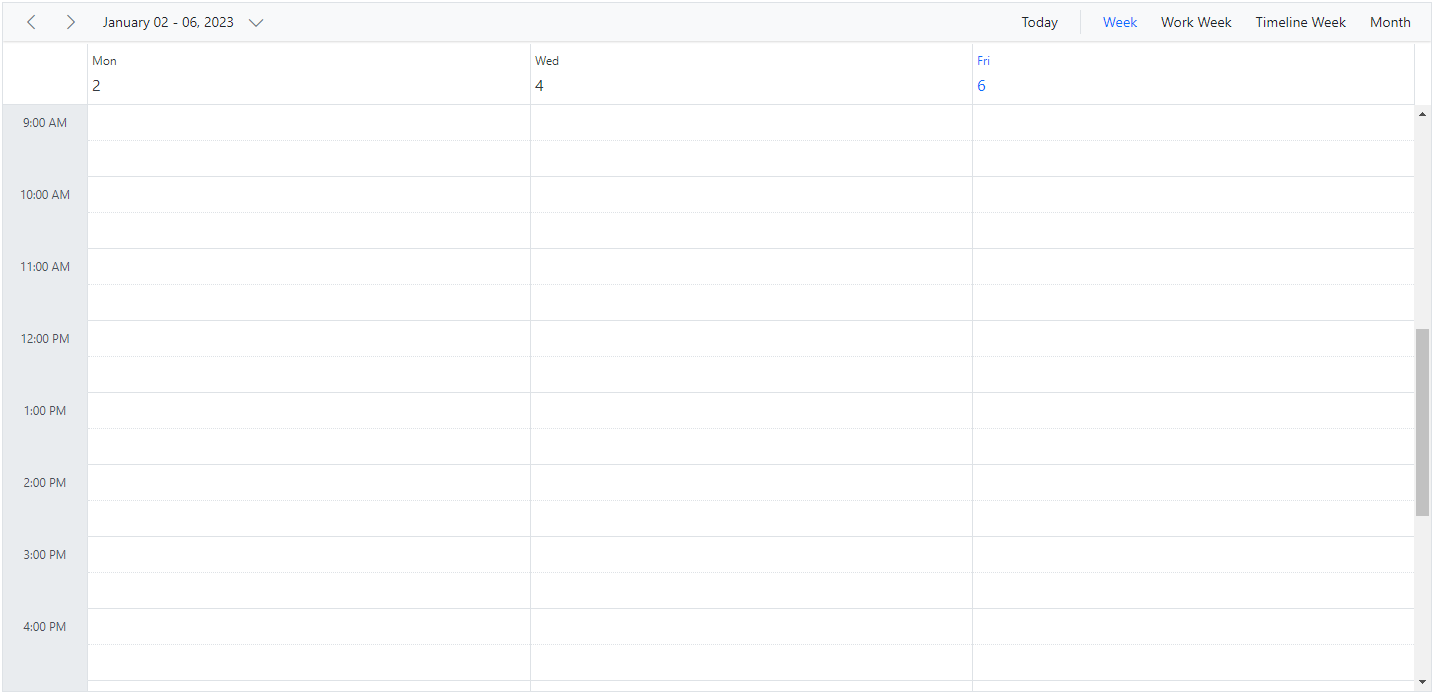
Hiding weekend days
The showWeekend property is used to either show or hide the weekend days of a week and it is not applicable on Work week view (as non-working days are usually not displayed on work week view). By default, it is set to true. The days which are not a part of the working days collection of a Scheduler are usually considered as non-working or weekend days.
Here, the working days are defined as [1, 3, 4, 5] on Scheduler and therefore the remaining days (0, 2, 6 – Sunday, Tuesday and Saturday) are considered as non-working or weekend days and will be hidden from all the views when showWeekend property is set to false.
import { NgModule } from '@angular/core'
import { BrowserModule } from '@angular/platform-browser'
import { ScheduleModule } from '@syncfusion/ej2-angular-schedule'
import { ButtonModule } from '@syncfusion/ej2-angular-buttons'
import { DayService, WeekService, WorkWeekService, MonthService, AgendaService, MonthAgendaService} from '@syncfusion/ej2-angular-schedule'


import { Component } from '@angular/core';
import { EventSettingsModel, TimelineMonthService, View } from '@syncfusion/ej2-angular-schedule';
import { scheduleData } from './datasource';

@Component({
imports: [

        ScheduleModule,
        ButtonModule
    ],

providers: [DayService,
                WeekService,
                WorkWeekService,
                MonthService,
                AgendaService,
                MonthAgendaService,
                TimelineMonthService],
standalone: true,
  selector: 'app-root',
  // specifies the template string for the Schedule component
  template: `<ejs-schedule width='100%' height='550px' [views]="scheduleViews" [showWeekend]="showWeekend" [workDays]='workWeekDays' [selectedDate]="selectedDate" [eventSettings]="eventSettings"></ejs-schedule>`
})
export class AppComponent {
  public selectedDate: Date = new Date(2018, 1, 15);
  public workWeekDays: number[] = [1, 3, 4, 5];
  public showWeekend: boolean = false;
  public scheduleViews: View[] = ['Day', 'Week', 'TimelineMonth'];
  public eventSettings: EventSettingsModel = { dataSource: scheduleData };
 }
import { bootstrapApplication } from '@angular/platform-browser';
import { AppComponent } from './app.component';
import 'zone.js';
bootstrapApplication(AppComponent).catch((err) => console.error(err));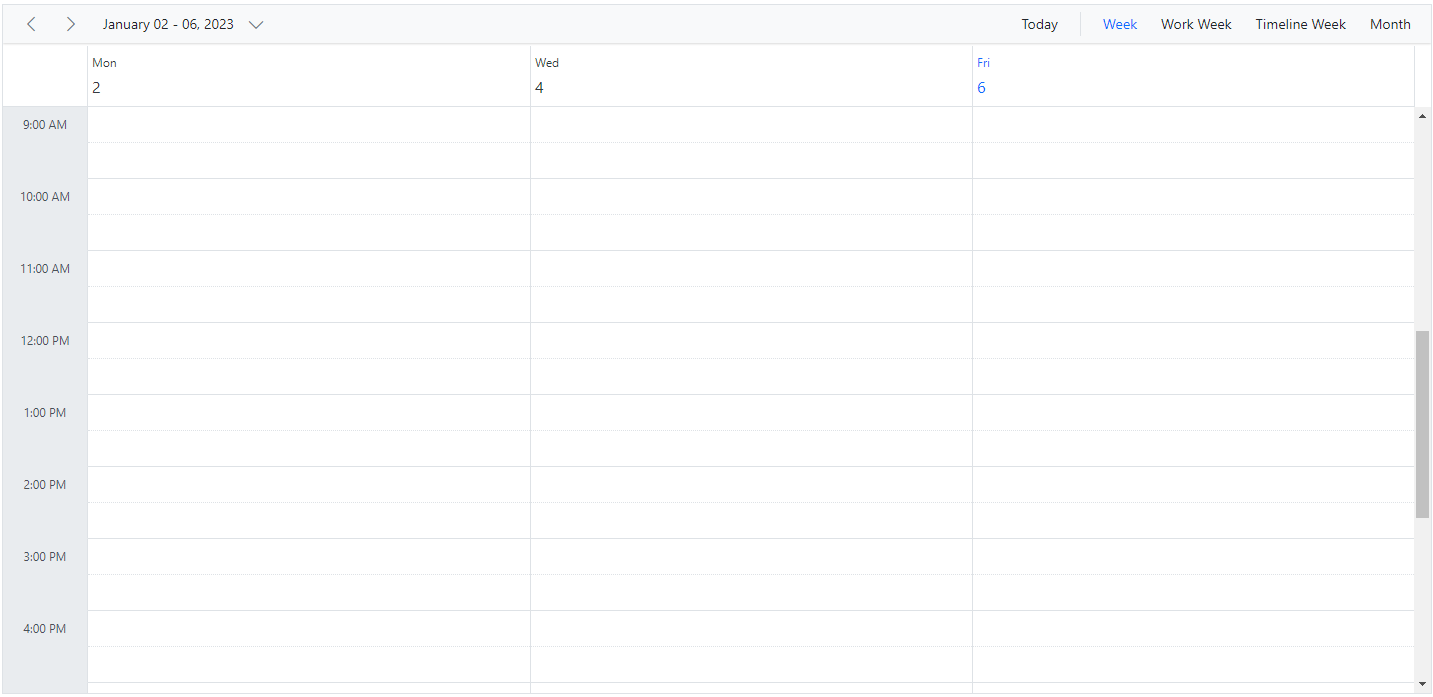
Show week numbers
It is possible to show the week number count of a week in the header bar of the Scheduler by setting true to showWeekNumber property. By default, its default value is false. In Month view, the week numbers are displayed as a first column.
The
showWeekNumberproperty is not applicable on Timeline views, as it has the equivalentheaderRowsproperty to handle such requirement with additional customization.
import { NgModule } from '@angular/core'
import { BrowserModule } from '@angular/platform-browser'
import { ScheduleModule } from '@syncfusion/ej2-angular-schedule'
import { ButtonModule } from '@syncfusion/ej2-angular-buttons'
import { DayService, WeekService, WorkWeekService, MonthService, AgendaService, MonthAgendaService} from '@syncfusion/ej2-angular-schedule'


import { Component } from '@angular/core';
import { EventSettingsModel,View } from '@syncfusion/ej2-angular-schedule';
import { scheduleData } from './datasource';

@Component({
imports: [

        ScheduleModule,
        ButtonModule
    ],

providers: [DayService,
                WeekService,
                WorkWeekService,
                MonthService,
                AgendaService,
                MonthAgendaService],
standalone: true,
  selector: 'app-root',
  // specifies the template string for the Schedule component
  template: `<ejs-schedule width='100%' height='550px' currentView='Month' [views]="scheduleViews" [showWeekNumber]="showWeekNumber" [selectedDate]="selectedDate" [eventSettings]="eventSettings"></ejs-schedule>`
})
export class AppComponent {
  public selectedDate: Date = new Date(2018, 1, 15);
  public workWeekDays: number[] = [1, 3, 4, 5];
  public showWeekNumber: boolean = true;
  public scheduleViews: View[] = ['Day', 'Week', 'Month'];
  public eventSettings: EventSettingsModel = { dataSource: scheduleData };
 }
import { bootstrapApplication } from '@angular/platform-browser';
import { AppComponent } from './app.component';
import 'zone.js';
bootstrapApplication(AppComponent).catch((err) => console.error(err));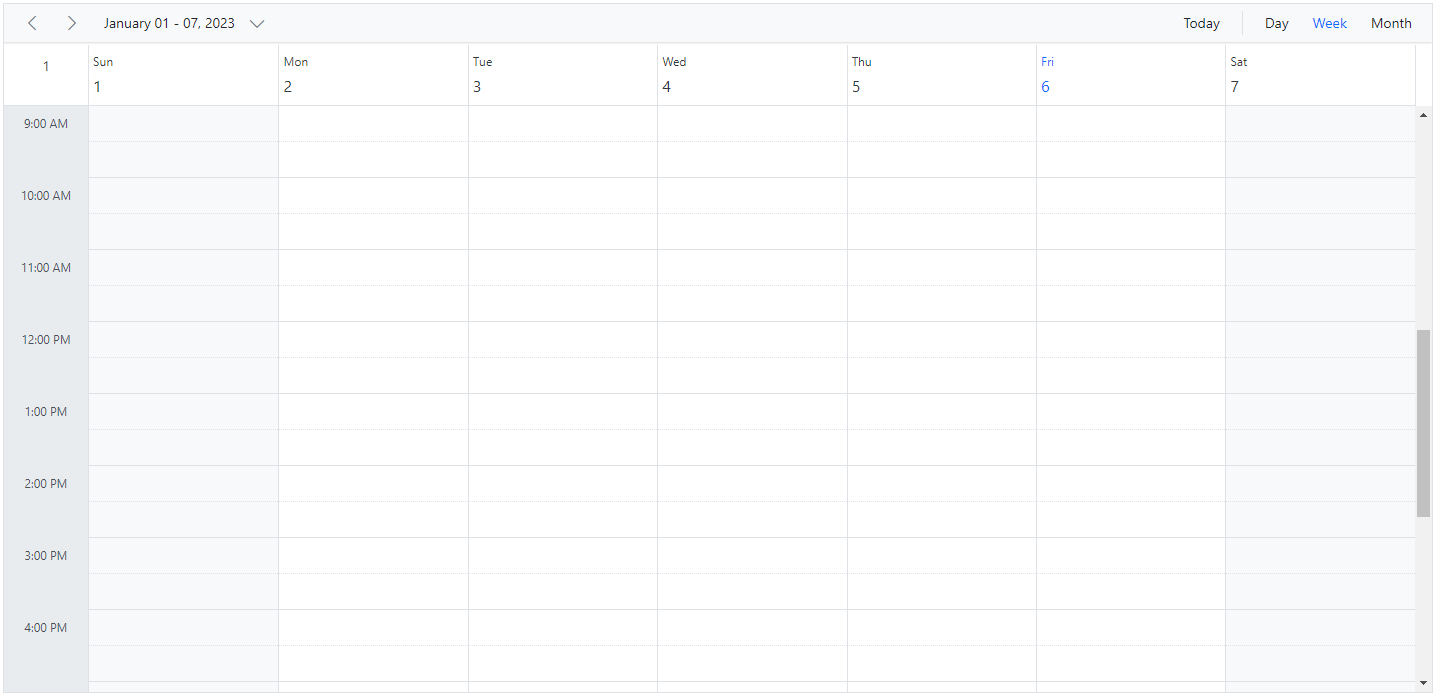
Different options for week numbers
By default, week numbers are shown in the Scheduler based on the first day of the year. However, the week numbers can be determined based on the following criteria.
FirstDay – The first week of the year is calculated based on the first day of the year.
FirstFourDayWeek – The first week of the year begins from the first week with four or more days.
FirstFullWeek – The first week of the year begins when meeting the first day of the week (firstDayOfWeek) and the first day of the year.
For more details refer to CalendarWeekRule remarks
import { NgModule } from '@angular/core'
import { BrowserModule } from '@angular/platform-browser'
import { ScheduleModule } from '@syncfusion/ej2-angular-schedule'
import { ButtonModule } from '@syncfusion/ej2-angular-buttons'
import { DayService, WeekService, WorkWeekService, MonthService, AgendaService, MonthAgendaService} from '@syncfusion/ej2-angular-schedule'


import { Component } from '@angular/core';
import { EventSettingsModel, View ,WeekRule} from '@syncfusion/ej2-angular-schedule';
import { scheduleData } from './datasource';

@Component({
imports: [

        ScheduleModule,
        ButtonModule
    ],

providers: [DayService,
                WeekService,
                WorkWeekService,
                MonthService,
                AgendaService,
                MonthAgendaService,
                MonthService],
standalone: true,
  selector: 'app-root',
  // specifies the template string for the Schedule component
  template: `<ejs-schedule width='100%' height='550px' currentView='Month' [views]="scheduleViews" [showWeekNumber]="showWeekNumber" [weekRule]="weekRule" [selectedDate]="selectedDate" [eventSettings]="eventSettings"></ejs-schedule>`
})
export class AppComponent {
  public selectedDate: Date = new Date(2020, 1, 15);
  public workWeekDays: number[] = [1, 3, 4, 5];
  public showWeekNumber: boolean = true;
  public weekRule: WeekRule = 'FirstFourDayWeek';
  public scheduleViews: View[] = ['Day', 'Week', 'Month'];
  public eventSettings: EventSettingsModel = {
    dataSource: [
      {
        Id: 1,
        Subject: "Explosion of Betelgeuse Star",
        StartTime: new Date(2020, 1, 15, 9, 30),
        EndTime: new Date(2020, 1, 15, 11, 0)
      },
      {
        Id: 2,
        Subject: "Thule Air Crash Report",
        StartTime: new Date(2020, 1, 12, 12, 0),
        EndTime: new Date(2020, 1, 12, 14, 0)
      },
      {
        Id: 3,
        Subject: "Blue Moon Eclipse",
        StartTime: new Date(2020, 1, 13, 9, 30),
        EndTime: new Date(2020, 1, 13, 11, 0)
      },
      {
        Id: 4,
        Subject: "Meteor Showers in 2018",
        StartTime: new Date(2020, 1, 14, 13, 0),
        EndTime: new Date(2020, 1, 14, 14, 30)
      }
    ]
  }
}
import { bootstrapApplication } from '@angular/platform-browser';
import { AppComponent } from './app.component';
import 'zone.js';
bootstrapApplication(AppComponent).catch((err) => console.error(err));Note: Enable the showWeekNumber property to configure the weekRule property. Also, the weekRule property depends on the value of the firstDayOfWeek property.
Set working hours
Working hours indicates the work hour limit within the Scheduler, which is visually highlighted with an active color on work cells. The working hours can be set on Scheduler using the workHours property which is of object type and includes the following sub-options,
-
highlight– enables/disables the highlighting of work hours. -
start- sets the start time of the working/business hour of a day. -
end- sets the end time limit of the working/business hour of a day.
import { NgModule } from '@angular/core'
import { BrowserModule } from '@angular/platform-browser'
import { ScheduleModule } from '@syncfusion/ej2-angular-schedule'
import { ButtonModule } from '@syncfusion/ej2-angular-buttons'
import { MonthService, AgendaService, MonthAgendaService} from '@syncfusion/ej2-angular-schedule'


import { Component } from '@angular/core';
import { EventSettingsModel, DayService, WeekService, WorkWeekService, View, WorkHoursModel } from '@syncfusion/ej2-angular-schedule';
import { scheduleData } from './datasource';

@Component({
imports: [

        ScheduleModule,
        ButtonModule
    ],

providers: [DayService,
                WeekService,
                WorkWeekService,
                MonthService,
                AgendaService,
                MonthAgendaService],
standalone: true,
  selector: 'app-root',
  // specifies the template string for the Schedule component
  template: `<ejs-schedule width='100%' height='550px' [views]="scheduleViews" [workHours]="scheduleHours" [selectedDate]="selectedDate" [eventSettings]="eventSettings"></ejs-schedule>`
})
export class AppComponent {
  public selectedDate: Date = new Date(2018, 1, 15);
  public scheduleHours: WorkHoursModel  = { highlight: true, start: '11:00', end: '20:00' };
  public scheduleViews: View[] = ['Day', 'Week', 'WorkWeek'];
  public eventSettings: EventSettingsModel = { dataSource: scheduleData };
 }
import { bootstrapApplication } from '@angular/platform-browser';
import { AppComponent } from './app.component';
import 'zone.js';
bootstrapApplication(AppComponent).catch((err) => console.error(err));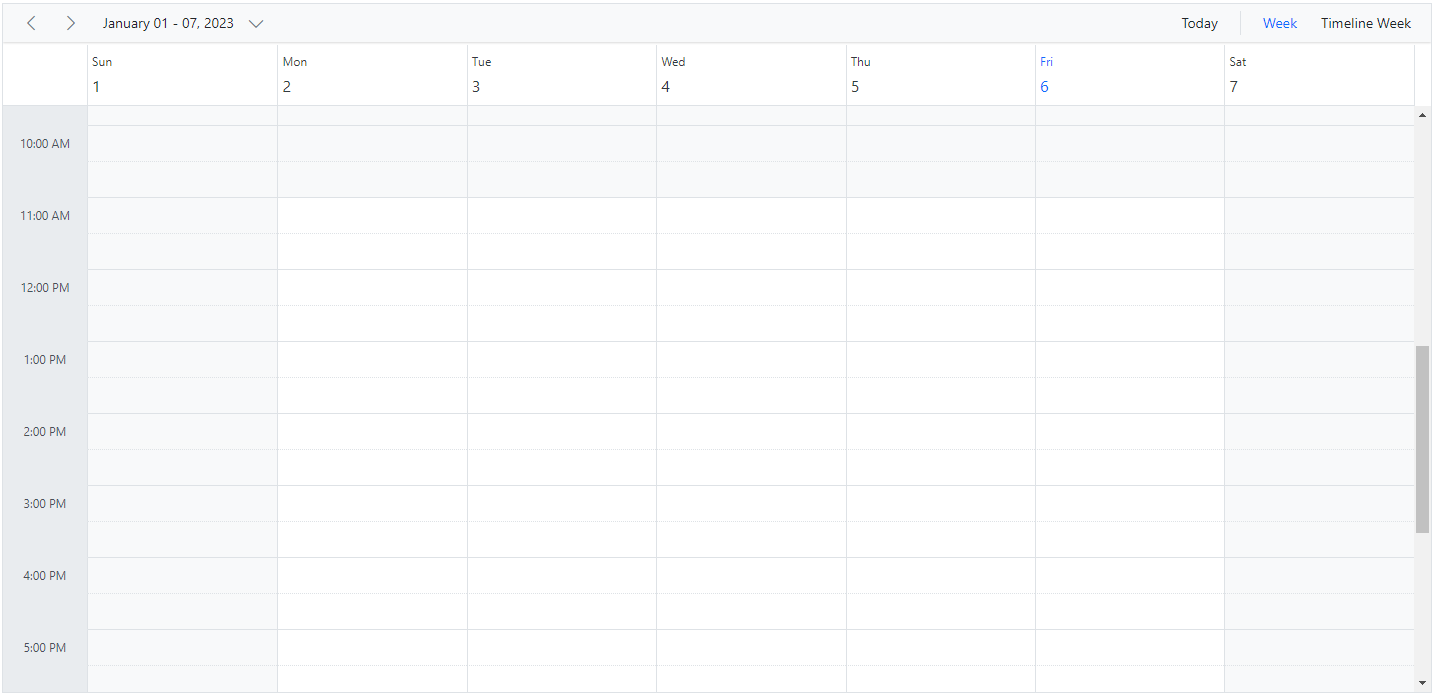
Scheduler displaying custom hours
It is possible to display the event Scheduler layout with specific time durations by hiding the unwanted hours. To do so, set the start and end hour for the Scheduler using the startHour and endHour properties respectively.
The following code example displays the Scheduler starting from the time range 7:00 AM to 6:00 PM and the remaining hours are hidden on the UI.
import { NgModule } from '@angular/core'
import { BrowserModule } from '@angular/platform-browser'
import { ScheduleModule } from '@syncfusion/ej2-angular-schedule'
import { ButtonModule } from '@syncfusion/ej2-angular-buttons'
import { DayService, WeekService, WorkWeekService, MonthService, AgendaService, MonthAgendaService} from '@syncfusion/ej2-angular-schedule'


import { Component } from '@angular/core';
import { EventSettingsModel, View, WorkHoursModel } from '@syncfusion/ej2-angular-schedule';
import { scheduleData } from './datasource';

@Component({
imports: [

        ScheduleModule,
        ButtonModule
    ],

providers: [DayService,
                WeekService,
                WorkWeekService,
                MonthService,
                AgendaService,
                MonthAgendaService],
standalone: true,
  selector: 'app-root',
  // specifies the template string for the Schedule component
  template: `<ejs-schedule width='100%' height='550px' [views]="scheduleViews" startHour='07:00' endHour='18:00' [selectedDate]="selectedDate" [eventSettings]="eventSettings"></ejs-schedule>`
})
export class AppComponent {
  public selectedDate: Date = new Date(2018, 1, 15);
  public scheduleViews: View[] = ['Day', 'Week', 'WorkWeek'];
  public eventSettings: EventSettingsModel = { dataSource: scheduleData };
 }
import { bootstrapApplication } from '@angular/platform-browser';
import { AppComponent } from './app.component';
import 'zone.js';
bootstrapApplication(AppComponent).catch((err) => console.error(err));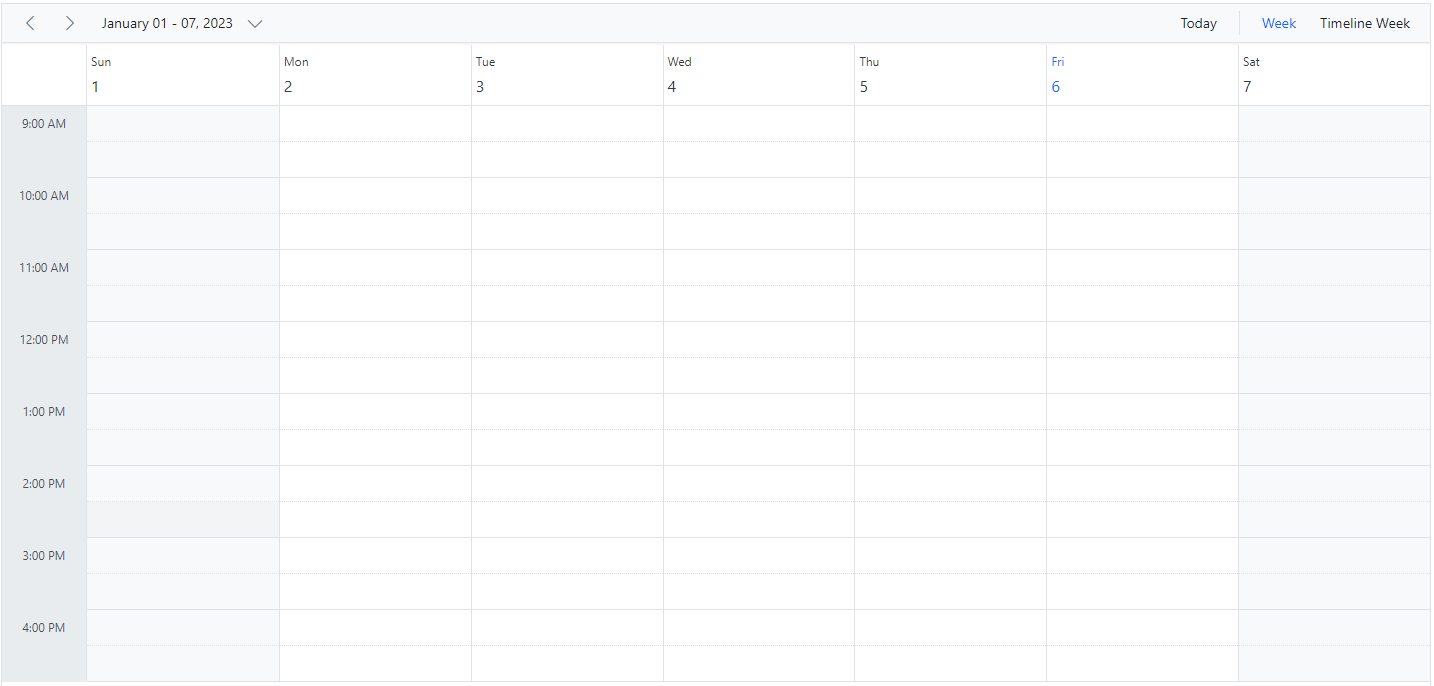
Setting start day of the week
By default, Scheduler defaults to Sunday as its first day of a week. To change the Scheduler’s start day of a week with different day, set the firstDayOfWeek property with the values ranging from 0 to 6.
Here, Sunday is always denoted as
0, Monday as1and so on.
import { NgModule } from '@angular/core'
import { BrowserModule } from '@angular/platform-browser'
import { ScheduleModule } from '@syncfusion/ej2-angular-schedule'
import { ButtonModule } from '@syncfusion/ej2-angular-buttons'
import { DayService, WorkWeekService, MonthService, AgendaService, MonthAgendaService} from '@syncfusion/ej2-angular-schedule'


import { Component } from '@angular/core';
import { EventSettingsModel, WeekService, TimelineMonthService, View } from '@syncfusion/ej2-angular-schedule';
import { scheduleData } from './datasource';

@Component({
imports: [

        ScheduleModule,
        ButtonModule
    ],

providers: [DayService,
                WeekService,
                WorkWeekService,
                MonthService,
                AgendaService,
                MonthAgendaService,
                TimelineMonthService],
standalone: true,
  selector: 'app-root',
  // specifies the template string for the Schedule component
  template: `<ejs-schedule width='100%' height='550px' [views]="scheduleViews" [firstDayOfWeek]="weekFirstDay" [selectedDate]="selectedDate" [eventSettings]="eventSettings"></ejs-schedule>`
})
export class AppComponent {
  public selectedDate: Date = new Date(2018, 1, 15);
  public weekFirstDay: number = 3;
  public scheduleViews: View[] = ['Week', 'TimelineMonth'];
  public eventSettings: EventSettingsModel = { dataSource: scheduleData };
 }
import { bootstrapApplication } from '@angular/platform-browser';
import { AppComponent } from './app.component';
import 'zone.js';
bootstrapApplication(AppComponent).catch((err) => console.error(err));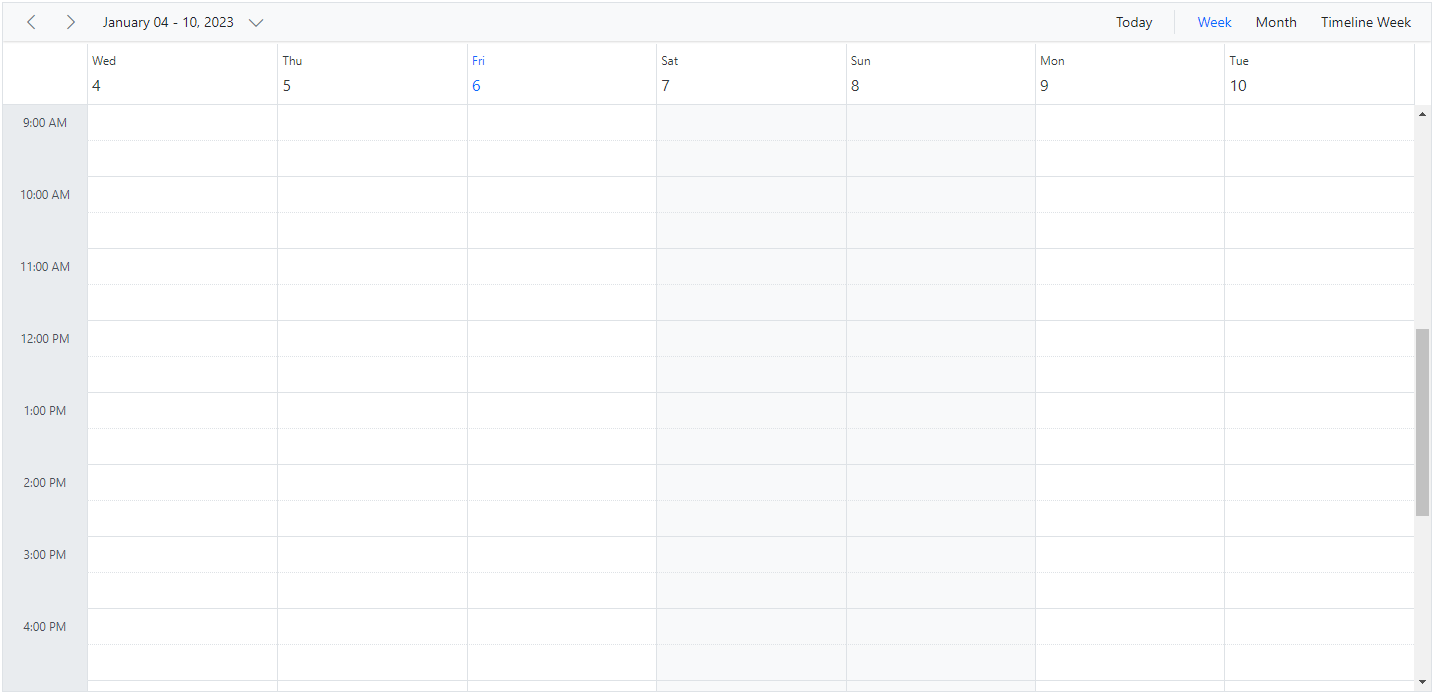
Scroll to specific time and date
You can manually scroll to a specific time on Scheduler by making use of the scrollTo method as depicted in the following code example.
<table id="property" title="Properties" style="width: 100%">
    <tbody>
        <tr style="height: 50px">
            <td>
                <div> Scroll To
                </div>
            </td>
            <td>
                <div>
                    <ejs-timepicker width='100px' [value]="scrollToHour" format='HH:mm' (change)="onChange($event)"> </ejs-timepicker>
                </div>
            </td>
        </tr>
    </tbody>
</table>
<ejs-schedule #scheduleObj width='100%' height='550px' [views]="scheduleViews" [selectedDate]="selectedDate" [eventSettings]="eventSettings"></ejs-schedule>
import { NgModule } from '@angular/core'
import { BrowserModule } from '@angular/platform-browser'
import { ScheduleModule } from '@syncfusion/ej2-angular-schedule'
import { TimePickerModule } from '@syncfusion/ej2-angular-calendars'
import { Component, ViewChild } from '@angular/core';
import { ChangeEventArgs } from '@syncfusion/ej2-angular-calendars';
import { ScheduleComponent, EventSettingsModel, DayService, WeekService, WorkWeekService, View , MonthService, AgendaService, MonthAgendaService} from '@syncfusion/ej2-angular-schedule';
import { scheduleData } from './datasource';
@Component({
imports: [
ScheduleModule,
TimePickerModule
],
standalone: true,
selector: 'app-root',
providers: [DayService, WeekService, WorkWeekService, MonthService,
AgendaService,
MonthAgendaService],
// specifies the template string for the Schedule component
templateUrl: './app.component.html'
})
export class AppComponent {
@ViewChild('scheduleObj')
public scheduleObj?: ScheduleComponent;
public selectedDate: Date = new Date(2018, 1, 15);
public scrollToHour: Date = new Date(2018, 1, 15, 9);
public scheduleViews: View[] = ['Day', 'Week', 'WorkWeek'];
public eventSettings: EventSettingsModel = { dataSource: scheduleData };
onChange(args: ChangeEventArgs): void {
this.scheduleObj!.scrollTo((args as any).text);
}
}import { bootstrapApplication } from '@angular/platform-browser';
import { AppComponent } from './app.component';
import 'zone.js';
bootstrapApplication(AppComponent).catch((err) => console.error(err));How to scroll to current time on initial load
There are scenarios where you may need to load the Scheduler displaying the system’s current time on the currently visible view port area. In such cases, the Scheduler needs to be scrolled to a specific time based on the system’s current time which is depicted in the following code example.
import { NgModule } from '@angular/core'
import { BrowserModule } from '@angular/platform-browser'
import { ScheduleModule } from '@syncfusion/ej2-angular-schedule'
import { ButtonModule } from '@syncfusion/ej2-angular-buttons'
import { DayService, WeekService, WorkWeekService, MonthService, AgendaService, MonthAgendaService} from '@syncfusion/ej2-angular-schedule'


import { Component, ViewChild } from '@angular/core';
import { ScheduleComponent, EventSettingsModel, TimelineViewsService, View } from '@syncfusion/ej2-angular-schedule';
import { scheduleData } from './datasource';

@Component({
imports: [

        ScheduleModule,
        ButtonModule
    ],

providers: [DayService,
                WeekService,
                WorkWeekService,
                MonthService,
                AgendaService,
                MonthAgendaService,
                TimelineViewsService],
standalone: true,
  selector: 'app-root',
  // specifies the template string for the Schedule component
  template: `<ejs-schedule #scheduleObj width='100%' height='550px' [views]="scheduleViews" (created)="onCreated($event)" [selectedDate]="selectedDate" [eventSettings]="eventSettings"></ejs-schedule>`
})
export class AppComponent {
  @ViewChild('scheduleObj')
  public scheduleObj?: ScheduleComponent;
  public selectedDate: Date = new Date(2018, 1, 15);
  public scheduleViews: View[] = ['Day', 'Week', 'TimelineWorkWeek'];
  public eventSettings: EventSettingsModel = { dataSource: scheduleData };
  onCreated(eventData: any): void {
    let currTime: Date = new Date();
    let hours: string = currTime.getHours() < 10 ? '0' +currTime.getHours().toString() : currTime.getHours().toString();
    let minutes: string = currTime.getMinutes().toString();
    let time: string = hours + ':' + minutes;
    this.scheduleObj?.scrollTo(time);
  }
 }
import { bootstrapApplication } from '@angular/platform-browser';
import { AppComponent } from './app.component';
import 'zone.js';
bootstrapApplication(AppComponent).catch((err) => console.error(err));You can refer to our Angular Scheduler feature tour page for its groundbreaking feature representations. You can also explore our Angular Scheduler example to knows how to present and manipulate data.