Getting Started with Syncfusion RadioButton Component in Vue 3
20 Mar 20233 minutes to read
This section explains how to use RadioButton component in Vue 3 application.
Prerequisites
System requirements for Syncfusion Vue UI components
Creating Vue application using Vue CLI
The easiest way to create a Vue application is to use the Vue CLI. Vue CLI versions above 4.5.0 are mandatory for creating applications using Vue 3. Use the following command to uninstall older versions of the Vue CLI.
npm uninstall vue-cli -gUse the following commands to install the latest version of Vue CLI.
npm install -g @vue/cli
npm install -g @vue/cli-init
Create a new project using the command below.
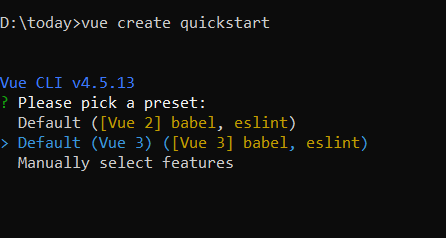
vue create quickstart
cd quickstart
Initiating a new project prompts us to choose the type of project to be used for the current application. Select the option Default (Vue 3) from the menu.
Adding Syncfusion RadioButton package in the application
Syncfusion Vue packages are maintained in the npmjs.com registry. The RadioButton component will be used in this example. To install it use the following command.
npm install @syncfusion/ej2-vue-buttons --saveAdding CSS reference for Syncfusion Vue RadioButton component
Import the needed css styles for the RadioButton component along with dependency styles in the <style> section of the src/App.vue file as follows.
<style>
@import "../node_modules/@syncfusion/ej2-base/styles/material.css";
@import "../node_modules/@syncfusion/ej2-vue-buttons/styles/material.css";
</style>
Adding Syncfusion Vue RadioButton component in the application
You have completed all the necessary configurations needed for rendering the Syncfusion Vue component. Now, you are going to add the RadioButton component using following steps.
-
Import the RadioButton component in the
<script>section of thesrc/App.vuefile.<script> import { RadioButtonComponent } from "@syncfusion/ej2-vue-buttons"; </script> -
Register the RadioButton component which is used in this example.
import { RadioButtonComponent } from "@syncfusion/ej2-vue-buttons"; export default { name: "App", components: { "ejs-radiobutton": RadioButtonComponent } } -
Add the component definition in template section.
<template> <ul> <li><ejs-radiobutton label='Option 1' name='default'></ejs-radiobutton></li> <li><ejs-radiobutton label='Option 2' name='default' checked=true></ejs-radiobutton></li> </ul> </template> -
Summarizing the above steps, update the
src/App.vuefile with following code.<template> <ul> <li><ejs-radiobutton label='Option 1' name='default'></ejs-radiobutton></li> <li><ejs-radiobutton label='Option 2' name='default' checked=true></ejs-radiobutton></li> </ul> </template> <script> import { RadioButtonComponent } from "@syncfusion/ej2-vue-buttons"; export default { name: "App", components: { "ejs-radiobutton": RadioButtonComponent } } </script> <style> @import "../node_modules/@syncfusion/ej2-base/styles/material.css"; @import "../node_modules/@syncfusion/ej2-vue-buttons/styles/material.css"; .e-radio-wrapper { margin-top: 18px; } li { list-style: none; } </style>
Running the application
Run the application using the following command.
npm run serveWeb server will be initiated, Open the quick start app in the browser at port localhost:8080.
