Commands in Vue Diagram component
4 Jul 202624 minutes to read
The commands in Vue Diagram control are used to perform various interactions within the diagram when called. Several commands are available in the diagram, as follows:
- Alignment commands
- Distribute commands
- Sizing commands
- Clipboard commands
- Grouping commands
- Z-order commands
- Zoom commands
- Nudge commands
- FitToPage commands
- Undo/Redo commands
Align commands
The alignment command enables you to align selected or defined objects, such as nodes and connectors, with respect to the selection boundary or the first selected object. The alignmethod parameters are explained below.
Alignment Options
The Alignment Options defines the alignment position of objects to be aligned.
| Alignment | Description |
|---|---|
| Left | Aligns all the selected objects at the left of the selection boundary |
| Right | Aligns all the selected objects at the right of the selection boundary |
| Center | Aligns all the selected objects at the center of the selection boundary |
| Top | Aligns all the selected objects at the top of the selection boundary |
| Bottom | Aligns all the selected objects at the bottom of the selection boundary |
| Middle | Aligns all the selected objects at the middle of the selection boundary |
Objects
Defines the objects to be aligned. This is an optional parameter. By default, all the nodes and connectors in the selected region of the diagram gets aligned.
Alignment Mode
Alignment Mode defines the specific mode, with respect to which the objects to be aligned. This is an optional parameter. The default alignment mode is Object. The accepted values of the argument “alignment mode” are as follows.
The below table shows the alignment as Left for different alignment modes.
| Nodes before alignment | Alignment mode | Description | Output image |
|---|---|---|---|
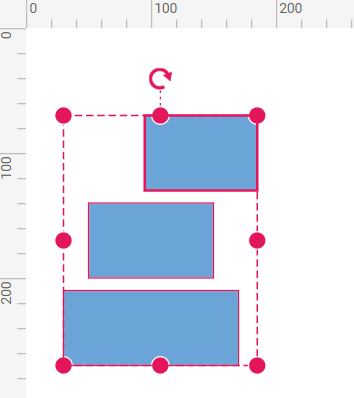 |
Object (Default) | Aligns the objects based on the bounds of first object in the selected list. | 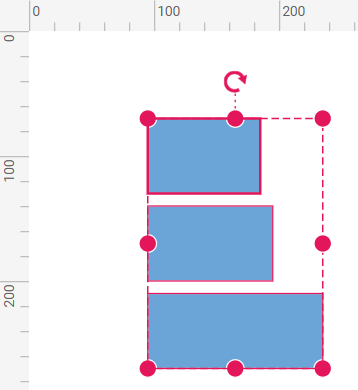 |
|
Selector | Aligns the objects based on the selection boundary. |  |
The following code example illustrates how to align all the selected objects at the left side of the selection boundary.
<template>
    <div id="app">
        <ejs-diagram id="diagram" ref="diagram" :width='width' :height='height' :nodes='nodes'></ejs-diagram>
    </div>
</template>
<script setup>
import { onMounted, ref } from "vue";
import { DiagramComponent as EjsDiagram } from '@syncfusion/ej2-vue-diagrams';

const diagram = ref(null);
const nodes = [
    {
        id: 'node1',
        width: 90,
        height: 60,
        offsetX: 100,
        offsetY: 100,
        style: {
            fill: '#6BA5D7',
            strokeColor: 'white',
            strokeWidth: 1
        },
    },
    {
        id: 'node2',
        width: 100,
        height: 60,
        offsetX: 100,
        offsetY: 170,
        style: {
            fill: '#6BA5D7',
            strokeColor: 'white',
            strokeWidth: 1
        },
    },
    {
        id: 'node3',
        width: 140,
        height: 60,
        offsetX: 100,
        offsetY: 240,
        style: {
            fill: '#6BA5D7',
            strokeColor: 'white',
            strokeWidth: 1
        },
    }
];

const width = "100%";
const height = "350px";

onMounted(function () {
    const diagramInstance = diagram.value.ej2Instances;
    let selArray = [];
    selArray.push(diagramInstance.nodes[0], diagramInstance.nodes[1], diagramInstance.nodes[2]);
    //Selects the nodes
    diagramInstance.select(selArray);
    //Sets direction as left
    diagramInstance.align('Left', diagramInstance.selectedItems.nodes, 'Selector');
    diagramInstance.dataBind();
})
</script>
<style>
@import "../node_modules/@syncfusion/ej2-vue-diagrams/styles/tailwind3.css";
@import "../node_modules/@syncfusion/ej2-base/styles/tailwind3.css";
@import "../node_modules/@syncfusion/ej2-popups/styles/tailwind3.css";
@import "../node_modules/@syncfusion/ej2-splitbuttons/styles/tailwind3.css";
@import "../node_modules/@syncfusion/ej2-navigations/styles/tailwind3.css";
</style><template>
<div id="app">
<ejs-diagram id="diagram" ref="diagram" :width='width' :height='height' :nodes='nodes'></ejs-diagram>
</div>
</template>
<script>
import { DiagramComponent } from '@syncfusion/ej2-vue-diagrams';
let nodes = [
{
id: 'node1',
width: 90,
height: 60,
offsetX: 100,
offsetY: 100,
style: {
fill: '#6BA5D7',
strokeColor: 'white',
strokeWidth: 1
},
},
{
id: 'node2',
width: 100,
height: 60,
offsetX: 100,
offsetY: 170,
style: {
fill: '#6BA5D7',
strokeColor: 'white',
strokeWidth: 1
},
},
{
id: 'node3',
width: 140,
height: 60,
offsetX: 100,
offsetY: 240,
style: {
fill: '#6BA5D7',
strokeColor: 'white',
strokeWidth: 1
},
}
];
export default {
name: "App",
components: {
"ejs-diagram": DiagramComponent
},
data() {
return {
width: "100%",
height: "350px",
nodes: nodes
}
},
mounted: function () {
const diagramInstance = this.$refs.diagram.ej2Instances;
let selArray = [];
selArray.push(diagramInstance.nodes[0], diagramInstance.nodes[1], diagramInstance.nodes[2]);
//Selects the nodes
diagramInstance.select(selArray);
//Sets direction as left
diagramInstance.align('Left', diagramInstance.selectedItems.nodes, 'Selector');
diagramInstance.dataBind();
}
}
</script>
<style>
@import "../node_modules/@syncfusion/ej2-vue-diagrams/styles/tailwind3.css";
@import "../node_modules/@syncfusion/ej2-base/styles/tailwind3.css";
@import "../node_modules/@syncfusion/ej2-popups/styles/tailwind3.css";
@import "../node_modules/@syncfusion/ej2-splitbuttons/styles/tailwind3.css";
@import "../node_modules/@syncfusion/ej2-navigations/styles/tailwind3.css";
</style>
Distribute commands
The Distribute method enable you to place the selected objects on the page at equal intervals from each other. The selected objects are equally spaced within the selection boundary. The distribute method parameters are explained below.
Distribute options
The factor to distribute the shapes using DistributeOptions are listed as follows:
| Distribute option | Description |
|---|---|
| RightToLeft | Distributes the objects based on the distance between the right and left sides of the adjacent objects. |
| Left | Distributes the objects based on the distance between the left sides of the adjacent objects. |
| Right | Distributes the objects based on the distance between the right sides of the adjacent objects. |
| Center | Distributes the objects based on the distance between the center of the adjacent objects. |
| BottomToTop | Distributes the objects based on the distance between the bottom and top sides of the adjacent objects. |
| Top | Distributes the objects based on the distance between the top sides of the adjacent objects. |
| Bottom | Distributes the objects based on the distance between the bottom sides of the adjacent objects. |
| Middle | Distributes the objects based on the distance between the vertical center of the adjacent objects. |
Objects
Defines the objects to be distributed. This is an optional parameter. By default, all the nodes and connectors in the selected region of the diagram gets distributed.
The following code example illustrates how the nodes are distributed using the RightToLeft option.
<template>
    <div id="app">
        <ejs-diagram id="diagram" ref="diagram" :width='width' :height='height' :nodes='nodes'></ejs-diagram>
    </div>
</template>
<script setup>
import { onMounted, ref } from "vue";
import { DiagramComponent as EjsDiagram } from '@syncfusion/ej2-vue-diagrams';

const diagram = ref(null);
const nodes = [
     {
    id: 'node1',
    width: 100,
    height: 60,
    offsetX: 140,
    offsetY: 100,
    style: { fill: '#6BA5D7', strokeColor: 'white', strokeWidth: 1 },
    annotations: [{ content: 'Node1' }],
  },
  {
    id: 'node2',
    width: 100,
    height: 60,
    offsetX: 200,
    offsetY: 170,
    style: { fill: '#6BA5D7', strokeColor: 'white', strokeWidth: 1 },
    annotations: [{ content: 'Node2' }],
  },
  {
    id: 'node3',
    width: 100,
    height: 60,
    offsetX: 400,
    offsetY: 240,
    style: { fill: '#6BA5D7', strokeColor: 'white', strokeWidth: 1 },
    annotations: [{ content: 'Node3' }],
  }
];
const width = "100%";
const height = "600px";

onMounted(function () {
    const diagramInstance = diagram.value.ej2Instances;
    let selArray = [];
    selArray.push(diagramInstance.nodes[0], diagramInstance.nodes[1], diagramInstance.nodes[2]);
    //Selects the nodes
    diagramInstance.select(selArray);
    //Distributes space between the nodes
    diagramInstance.distribute('RightToLeft', diagramInstance.selectedItems.nodes);
})

</script>
<style>
@import "../node_modules/@syncfusion/ej2-vue-diagrams/styles/tailwind3.css";
@import "../node_modules/@syncfusion/ej2-base/styles/tailwind3.css";
@import "../node_modules/@syncfusion/ej2-popups/styles/tailwind3.css";
@import "../node_modules/@syncfusion/ej2-splitbuttons/styles/tailwind3.css";
@import "../node_modules/@syncfusion/ej2-navigations/styles/tailwind3.css";
</style><template>
<div id="app">
<ejs-diagram id="diagram" ref="diagram" :width='width' :height='height' :nodes='nodes'></ejs-diagram>
</div>
</template>
<script>
import { DiagramComponent } from '@syncfusion/ej2-vue-diagrams';
let nodes = [
{
id: 'node1',
width: 100,
height: 60,
offsetX: 140,
offsetY: 100,
style: { fill: '#6BA5D7', strokeColor: 'white', strokeWidth: 1 },
annotations: [{ content: 'Node1' }],
},
{
id: 'node2',
width: 100,
height: 60,
offsetX: 200,
offsetY: 170,
style: { fill: '#6BA5D7', strokeColor: 'white', strokeWidth: 1 },
annotations: [{ content: 'Node2' }],
},
{
id: 'node3',
width: 100,
height: 60,
offsetX: 400,
offsetY: 240,
style: { fill: '#6BA5D7', strokeColor: 'white', strokeWidth: 1 },
annotations: [{ content: 'Node3' }],
}
];
export default {
name: "App",
components: {
"ejs-diagram": DiagramComponent
},
data() {
return {
width: "100%",
height: "600px",
nodes: nodes
}
},
mounted: function () {
const diagramInstance = this.$refs.diagram.ej2Instances;
let selArray = [];
selArray.push(diagramInstance.nodes[0], diagramInstance.nodes[1], diagramInstance.nodes[2]);
//Selects the nodes
diagramInstance.select(selArray);
//Distributes space between the nodes
diagramInstance.distribute('RightToLeft', diagramInstance.selectedItems.nodes);
}
}
</script>
<style>
@import "../node_modules/@syncfusion/ej2-vue-diagrams/styles/tailwind3.css";
@import "../node_modules/@syncfusion/ej2-base/styles/tailwind3.css";
@import "../node_modules/@syncfusion/ej2-popups/styles/tailwind3.css";
@import "../node_modules/@syncfusion/ej2-splitbuttons/styles/tailwind3.css";
@import "../node_modules/@syncfusion/ej2-navigations/styles/tailwind3.css";
</style>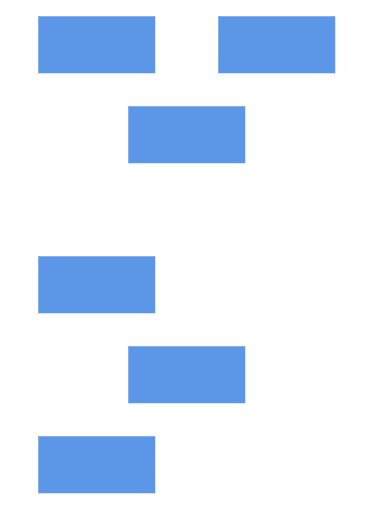
Sizing commands
Sizing sameSize command enables you to size all selected nodes to match the size of the first selected object or the first node in the objects collection you provide as the second parameter. The parameters for the sameSize method are explained below.
Sizing options
SizingOptions include:
| Sizing options | Description |
|---|---|
| Width | Adjusts the width of all objects to match the width of the first node in the objects collection. |
| Height | Adjusts the height of all objects to match the height of the first node in the objects collection. |
| Size | Adjusts both the width and height of all objects to match the size of the first node in the objects collection. |
Objects
This optional parameter defines which objects should be scaled. By default, all nodes and connectors within the selected region of the diagram are scaled.
The following code example illustrates how to execute the size commands.
<template>
    <div id="app">

        <label >Size Option </label>
        <select id="sizeChange" ref="sizeChange" v-on:change="sizeChangeFunction">
            <option value="Width">Width</option>
            <option value="Height">Height</option>
            <option value="Size">Size</option>
        </select>

        <ejs-diagram id="diagram" ref="diagramObj" :width='width' :height='height' :nodes="nodes"
          ></ejs-diagram>

    </div>
</template>

<script setup>
import {ref } from "vue";
import { DiagramComponent as EjsDiagram, SnapConstraints, PrintAndExport, Rect } from '@syncfusion/ej2-vue-diagrams';

const diagramObj = ref(null);
const sizeChange = ref(null);

//Initialize nodes
let nodes = [
    {
    id: "node1",
    width: 100,
    height: 80,
    offsetX: 140,
    offsetY: 100,
    annotations: [{ content: "Node1" }],
  },
  {
    id: "node2",
    width: 100,
    height: 60,
    offsetX: 140,
    offsetY: 200,
    annotations: [{ content: "Node2" }],
  },
  {
    id: "node3",
    width: 200,
    height: 30,
    offsetX: 140,
    offsetY: 300,
    annotations: [{ content: "Node3" }],
  },
];

const width = "1000px";
const height = "590px";
const snapSettings = { constraints: SnapConstraints.None };

const sizeChangeFunction = function () {
  debugger;
  let diagramInstance = diagramObj.value.ej2Instances;
  let objects = diagramInstance.nodes;
  var size = sizeChange.value.value;
  diagramInstance.sameSize(size, objects);
};
</script>

<style>
@import "../node_modules/@syncfusion/ej2-vue-diagrams/styles/tailwind3.css";
@import "../node_modules/@syncfusion/ej2-base/styles/tailwind3.css";
@import "../node_modules/@syncfusion/ej2-popups/styles/tailwind3.css";
@import "../node_modules/@syncfusion/ej2-splitbuttons/styles/tailwind3.css";
@import "../node_modules/@syncfusion/ej2-navigations/styles/tailwind3.css";
</style><template>
<div id="app">
<label>Size Option</label><select id="sizeChange" ref="sizeChange" v-on:change="onSizeChange()">
<option value="Width">Width</option>
<option value="Height">Height</option>
<option value="Size">size</option>
</select>
<ejs-diagram
id="diagram"
ref="diagramObj"
:width="width"
:height="height"
:nodes="nodes"
></ejs-diagram>
</div>
</template>
<script>
import { DiagramComponent } from "@syncfusion/ej2-vue-diagrams";
let nodes = [
{
id: "node1",
width: 100,
height: 80,
offsetX: 140,
offsetY: 100,
annotations: [{ content: "Node1" }],
},
{
id: "node2",
width: 100,
height: 60,
offsetX: 140,
offsetY: 200,
annotations: [{ content: "Node2" }],
},
{
id: "node3",
width: 200,
height: 30,
offsetX: 140,
offsetY: 300,
annotations: [{ content: "Node3" }],
},
];
export default {
name: "App",
components: {
"ejs-diagram": DiagramComponent,
},
data() {
return {
width: "1000px",
height: "350px",
nodes: nodes,
};
},
methods: {
onSizeChange: function () {
let diagramInstance = this.$refs.diagramObj.ej2Instances;
let objects = diagramInstance.nodes;
var size = this.$refs.sizeChange.value;
diagramInstance.sameSize(size, objects);
},
},
};
</script>
<style>
@import "../node_modules/@syncfusion/ej2-vue-diagrams/styles/tailwind3.css";
@import "../node_modules/@syncfusion/ej2-base/styles/tailwind3.css";
@import "../node_modules/@syncfusion/ej2-popups/styles/tailwind3.css";
@import "../node_modules/@syncfusion/ej2-splitbuttons/styles/tailwind3.css";
@import "../node_modules/@syncfusion/ej2-navigations/styles/tailwind3.css";
</style>
Clipboard commands
Clipboard commands are used to cut, copy, or paste selected elements in the diagram using the cut, copy, paste methods. You can also use keyboard shortcuts for these actions. For detailed information on using these methods refer the below table.
| Command (Shortcut key) | Description |
|---|---|
Cut (CTRL+X) |
Removes the selected elements from the diagram and places them onto the diagram’s clipboard. This operation is performed using the cut. method. |
Copy(CTRL+C) |
Duplicates the selected elements and places them onto the diagram’s clipboard without removing them from their original location. Use the copy method for this operation. |
Paste(CTRL+V) |
Inserts the elements stored on the diagram’s clipboard (nodes and connectors) into the diagram. This can be done using the paste method. |
The paste method optionally accepts a collection of nodes or connectors to be added to the diagram.
The following code illustrates how to execute the clipboard commands.
<template>
  <div id="app">
    <label>Ctrl + X</label><button @click="cut">Cut</button>
    <label>Ctrl + C</label><button @click="copy">Copy</button>
    <label>Ctrl + V</label><button @click="paste">Paste</button>
    <button @click="pasteObject">Paste Defined Object</button>

    <ejs-diagram
      id="diagram"
      ref="diagramObj"
      :width="width"
      :height="height"
      :nodes="nodes"
      :connectors="connectors"
    ></ejs-diagram>
  </div>
</template>
<script setup>
import { onMounted, ref } from "vue";
import { DiagramComponent as EjsDiagram } from "@syncfusion/ej2-vue-diagrams";
const diagramObj = ref(null);
const nodes = [
  {
    id: "node1",
    width: 100,
    height: 80,
    offsetX: 140,
    offsetY: 100,
    annotations: [{ content: "Node1" }],
  },
  {
    id: "node2",
    width: 100,
    height: 60,
    offsetX: 140,
    offsetY: 200,
    annotations: [{ content: "Node2" }],
  },
  {
    id: "node3",
    width: 200,
    height: 30,
    offsetX: 140,
    offsetY: 300,
    annotations: [{ content: "Node3" }],
  },
];

const width = "100%";
const height = "350px";

const cut = function () {
  let diagramInstance = diagramObj.value.ej2Instances;
  diagramInstance.cut();
};
const copy = function () {
  let diagramInstance = diagramObj.value.ej2Instances;
  diagramInstance.copy();
};

const paste = function () {
  let diagramInstance = diagramObj.value.ej2Instances;
  diagramInstance.paste();
};
const pasteObject = function () {
  let diagramInstance = diagramObj.value.ej2Instances;
  let nodes = [
    {
      id: "n1",
      offsetX: 400,
      offsetY: 100,
      width: 100,
    },
    {
      id: "n2",
      offsetX: 400,
      offsetY: 200,
      width: 100,
    },
  ];
  diagramInstance.paste(nodes);
};
</script>
<style>
@import "../node_modules/@syncfusion/ej2-vue-diagrams/styles/tailwind3.css";
@import "../node_modules/@syncfusion/ej2-base/styles/tailwind3.css";
@import "../node_modules/@syncfusion/ej2-popups/styles/tailwind3.css";
@import "../node_modules/@syncfusion/ej2-splitbuttons/styles/tailwind3.css";
@import "../node_modules/@syncfusion/ej2-navigations/styles/tailwind3.css";
</style><template>
<div id="app">
<label>Ctrl + X</label><ejs-button v-on:click="cut">Cut </ejs-button>
<label>Ctrl + C</label><ejs-button v-on:click="copy">Copy </ejs-button>
<label>Ctrl + V</label><ejs-button v-on:click="paste">Paste </ejs-button>
<ejs-button v-on:click="pasteDefinedObject">Paste defined Object </ejs-button>
<ejs-diagram
id="diagram"
ref="diagram"
:width="width"
:height="height"
:nodes="nodes"
:connectors="connectors"
></ejs-diagram>
</div>
</template>
<script>
import { DiagramComponent } from '@syncfusion/ej2-vue-diagrams';
import { ButtonComponent } from '@syncfusion/ej2-vue-buttons';
let nodes = [
{
id: 'node1',
width: 100,
height: 80,
offsetX: 140,
offsetY: 100,
annotations: [{ content: 'Node1' }],
},
{
id: 'node2',
width: 100,
height: 60,
offsetX: 140,
offsetY: 200,
annotations: [{ content: 'Node2' }],
},
{
id: 'node3',
width: 200,
height: 30,
offsetX: 140,
offsetY: 300,
annotations: [{ content: 'Node3' }],
},
];
export default {
name: 'App',
components: {
'ejs-diagram': DiagramComponent,
'ejs-button': ButtonComponent,
},
data() {
return {
width: '100%',
height: '600px',
nodes: nodes,
};
},
methods: {
cut: function () {
var diagramInstance = this.$refs.diagram.ej2Instances;
diagramInstance.cut();
},
copy: function () {
var diagramInstance = this.$refs.diagram.ej2Instances;
diagramInstance.copy();
},
paste: function () {
var diagramInstance = this.$refs.diagram.ej2Instances;
diagramInstance.paste();
},
pasteDefinedObject: function () {
var diagramInstance = this.$refs.diagram.ej2Instances;
let nodes = [
{
id: 'n1',
offsetX: 400,
offsetY: 100,
width: 100,
},
{
id: 'n2',
offsetX: 400,
offsetY: 200,
width: 100,
},
];
diagramInstance.paste(nodes);
},
},
};
</script>
<style>
@import "../node_modules/@syncfusion/ej2-vue-diagrams/styles/tailwind3.css";
@import "../node_modules/@syncfusion/ej2-base/styles/tailwind3.css";
@import "../node_modules/@syncfusion/ej2-popups/styles/tailwind3.css";
@import "../node_modules/@syncfusion/ej2-splitbuttons/styles/tailwind3.css";
@import "../node_modules/@syncfusion/ej2-navigations/styles/tailwind3.css";
</style>Grouping commands
Grouping Commands are used to group or ungroup selected elements in the diagram. Grouping commands help in managing and organizing multiple elements by combining them into a single group or separating them into individual elements. You can also use keyboard shortcuts for these actions. The following table provides more details on these commands:
| Commands (Shortcut key) | Description |
|---|---|
Group (CTRL+G) |
Combines the selected nodes and connectors into a single group, allowing you to move, resize, or apply other operations to all grouped elements as a unit. |
Ungroup (CTRL+Shift+U) |
Splits a previously grouped set of nodes and connectors into individual elements, enabling you to modify or manipulate them separately. |
The following code examples demonstrate how to use the grouping commands in diagram:
<template>
  <div id="app">
    <label>Ctrl + G </label><button @click="group">Group</button>
    <label>Ctrl + Shift + U </label><button @click="unGroup">Un Group</button>
    <ejs-diagram
      id="diagram"
      ref="diagramObj"
      :width="width"
      :height="height"
      :nodes="nodes"
      :connectors="connectors"
    ></ejs-diagram>
  </div>
</template>
<script setup>
import { onMounted, ref } from "vue";
import { DiagramComponent as EjsDiagram } from "@syncfusion/ej2-vue-diagrams";

const diagramObj = ref(null);
const nodes = [
  {
    id: "node1",
    width: 100,
    height: 70,
    offsetX: 100,
    offsetY: 100,
  },
  {
    id: "node2",
    width: 100,
    height: 70,
    offsetX: 300,
    offsetY: 100,
  },
  {
    id: "node3",
    width: 100,
    height: 70,
    offsetX: 200,
    offsetY: 200,
  },
  {
    id: "group",
    children: ["node1", "node2", "node3", "connector1"],
  },
];
const connectors = [
  {
    id: "connector1",
    sourceID: "node1",
    targetID: "node2",
  },
];

const width = "100%";
const height = "350px";

const group = function () {
  let diagramInstance = diagramObj.value.ej2Instances;
  diagramInstance.group();
};
const unGroup = function () {
  let diagramInstance = diagramObj.value.ej2Instances;
  diagramInstance.unGroup();
};
</script>
<style>
@import "../node_modules/@syncfusion/ej2-vue-diagrams/styles/tailwind3.css";
@import "../node_modules/@syncfusion/ej2-base/styles/tailwind3.css";
@import "../node_modules/@syncfusion/ej2-popups/styles/tailwind3.css";
@import "../node_modules/@syncfusion/ej2-splitbuttons/styles/tailwind3.css";
@import "../node_modules/@syncfusion/ej2-navigations/styles/tailwind3.css";
</style><template>
<div id="app">
<label>(CTRL +G)</label><ejs-button v-on:click="group">Group </ejs-button>
<label>(CTRL + Shift +U)</label><ejs-button v-on:click="unGroup">Un Group </ejs-button>
<ejs-diagram id="diagram" ref="diagram" :width='width' :height='height' :nodes='nodes'
:connectors='connectors'></ejs-diagram>
</div>
</template>
<script>
import { DiagramComponent } from '@syncfusion/ej2-vue-diagrams';
import { ButtonComponent } from '@syncfusion/ej2-vue-buttons';
let nodes = [ {
id: 'node1',
width: 100,
height: 70,
offsetX: 100,
offsetY: 100,
},
{
id: 'node2',
width: 100,
height: 70,
offsetX: 300,
offsetY: 100,
},
{
id: 'node3',
width: 100,
height: 70,
offsetX: 200,
offsetY: 200,
},
{
id: 'group',
children: ['node1', 'node2', 'node3', 'connector1'],
},
];
let connectors = [{
id: 'connector1',
sourceID: 'node1',
targetID: 'node2',
}]
export default {
name: "App",
components: {
"ejs-diagram": DiagramComponent,
'ejs-button': ButtonComponent,
},
data() {
return {
width: "100%",
height: "600px",
nodes: nodes,
connectors: connectors
}
},
methods: {
group: function () {
var diagramInstance = this.$refs.diagram.ej2Instances;
diagramInstance.group();
},
unGroup: function () {
var diagramInstance = this.$refs.diagram.ej2Instances;
diagramInstance.unGroup();
},
}
}
</script>
<style>
@import "../node_modules/@syncfusion/ej2-vue-diagrams/styles/tailwind3.css";
@import "../node_modules/@syncfusion/ej2-base/styles/tailwind3.css";
@import "../node_modules/@syncfusion/ej2-popups/styles/tailwind3.css";
@import "../node_modules/@syncfusion/ej2-splitbuttons/styles/tailwind3.css";
@import "../node_modules/@syncfusion/ej2-navigations/styles/tailwind3.css";
</style>Rotate commands
The rotate commands in the diagram allow users to rotate selected elements by specified angles. These commands are useful for adjusting the rotate angle of nodes or shapes within the diagram.
| Parameter | Type | Description |
|---|---|---|
| obj | NodeModel / ConnectorModel/ SelectorModel | The objects to be rotated. |
| angle | number | The angle by which the objects should be rotated (in degrees). |
| pivot (optional) | PointModel | The reference point with respect to which the objects will be rotated. |
| rotateUsingHandle (optional) | boolean | Whether to rotate using the handle. |
You can also use CTRL+R to rotate clockwise and CTRL+L to rotate anti-clockwise. The following example shows how to rotate nodes in clockwise and anti-clockwise direction.
<template>
    <div id="app">
       <button @click="clock">Rotate Clock Wise</button>
        <button @click="antiClock">Rotate AntiClock Wise</button>
        <ejs-diagram id="diagram" ref="diagramObj" :width='width' :height='height' :nodes='nodes'></ejs-diagram>
    </div>
</template>
<script setup>
import { onMounted, ref } from "vue";
import { DiagramComponent as EjsDiagram } from '@syncfusion/ej2-vue-diagrams';

const diagramObj = ref(null);
const nodes = [{
    id: 'node1',
    offsetX: 100,
    offsetY: 100,
    width: 70,
    height: 40,
    annotations: [{ content: 'Node 1' }],
  },];

const width = "100%";
const height = "350px";

const clock = function () {
  let diagramInstance = diagramObj.value.ej2Instances;
  let node = diagramInstance.nodes[0];
      /**
       * paramter 1 - Rotate item
       * paramter 2 - angle to be rotated
       */
      diagramInstance.rotate(node, 45);
};
const antiClock = function () {
  let diagramInstance = diagramObj.value.ej2Instances;
  let node = diagramInstance.nodes[0];
      /**
       * paramter 1 - Rotate item
       * paramter 2 - angle to be rotated
       */
      diagramInstance.rotate(node, -45);
};
</script>
<style>
@import "../node_modules/@syncfusion/ej2-vue-diagrams/styles/tailwind3.css";
@import "../node_modules/@syncfusion/ej2-base/styles/tailwind3.css";
@import "../node_modules/@syncfusion/ej2-popups/styles/tailwind3.css";
@import "../node_modules/@syncfusion/ej2-splitbuttons/styles/tailwind3.css";
@import "../node_modules/@syncfusion/ej2-navigations/styles/tailwind3.css";
</style><template>
<div id="app">
<ejs-button v-on:click="clock">Rotate ClockWise </ejs-button>
<ejs-button v-on:click="antiClock">Rotate AntiClockWise </ejs-button>
<ejs-diagram
id="diagram"
ref="diagram"
:width="width"
:height="height"
:nodes="nodes"
></ejs-diagram>
</div>
</template>
<script>
import { DiagramComponent } from '@syncfusion/ej2-vue-diagrams';
import { ButtonComponent } from '@syncfusion/ej2-vue-buttons';
let nodes = [
{
id: 'node1',
offsetX: 100,
offsetY: 100,
width: 70,
height: 40,
annotations: [{ content: 'Node 1' }],
},
];
export default {
name: 'App',
components: {
'ejs-diagram': DiagramComponent,
'ejs-button': ButtonComponent,
},
data() {
return {
width: '100%',
height: '600px',
nodes: nodes,
};
},
methods: {
clock: function () {
var diagramInstance = this.$refs.diagram.ej2Instances;
let node = diagramInstance.nodes[0];
/**
* paramter 1 - Rotate item
* paramter 2 - angle to be rotated
*/
diagramInstance.rotate(node, 45);
},
antiClock: function () {
var diagramInstance = this.$refs.diagram.ej2Instances;
let node = diagramInstance.nodes[0];
/**
* paramter 1 - Rotate item
* paramter 2 - angle to be rotated
*/
diagramInstance.rotate(node, -45);
},
},
};
</script>
<style>
@import "../node_modules/@syncfusion/ej2-vue-diagrams/styles/tailwind3.css";
@import "../node_modules/@syncfusion/ej2-base/styles/tailwind3.css";
@import "../node_modules/@syncfusion/ej2-popups/styles/tailwind3.css";
@import "../node_modules/@syncfusion/ej2-splitbuttons/styles/tailwind3.css";
@import "../node_modules/@syncfusion/ej2-navigations/styles/tailwind3.css";
</style>Z-Order command
Z-Order commands allow you to control the stacking order of selected objects, such as nodes and connectors, on the diagram page.
Bring to front command
The bringToFront command moves the selected element to the front, placing it above all other elements in the diagram. The following code illustrates how to use the bringToFront command.
<template>
  <div id="app">
    <button @click="bringToFront">Bring To Front</button>
    <ejs-diagram
      id="diagram"
      ref="diagramObj"
      :width="width"
      :height="height"
      :nodes="nodes"
    ></ejs-diagram>
  </div>
</template>
<script setup>
import { ref } from "vue";
import { DiagramComponent as EjsDiagram } from "@syncfusion/ej2-vue-diagrams";

const diagramObj = ref(null);

const nodes = [
  {
    id: "node1",
    width: 90,
    height: 70,
    offsetX: 120,
    offsetY: 100,
  },
  {
    id: "node2",
    width: 90,
    height: 70,
    offsetX: 150,
    offsetY: 120,
  },
  {
    id: "node3",
    width: 90,
    height: 70,
    offsetX: 170,
    offsetY: 150,
  },
];

const width = "100%";
const height = "600px";

const bringToFront = function () {
  let diagramInstance = diagramObj.value.ej2Instances;
  diagramInstance.bringToFront();
};
</script>
<style>
@import "../node_modules/@syncfusion/ej2-vue-diagrams/styles/tailwind3.css";
@import "../node_modules/@syncfusion/ej2-base/styles/tailwind3.css";
@import "../node_modules/@syncfusion/ej2-popups/styles/tailwind3.css";
@import "../node_modules/@syncfusion/ej2-splitbuttons/styles/tailwind3.css";
@import "../node_modules/@syncfusion/ej2-navigations/styles/tailwind3.css";
</style><template>
<div id="app">
<ejs-button v-on:click="bringToFront">Bring To Front </ejs-button>
<ejs-diagram
id="diagram"
ref="diagram"
:width="width"
:height="height"
:nodes="nodes"
></ejs-diagram>
</div>
</template>
<script>
import { DiagramComponent } from '@syncfusion/ej2-vue-diagrams';
import { ButtonComponent } from '@syncfusion/ej2-vue-buttons';
let nodes = [
{
id: 'node1',
width: 90,
height: 70,
offsetX: 120,
offsetY: 100,
},
{
id: 'node2',
width: 90,
height: 70,
offsetX: 150,
offsetY: 120,
},
{
id: 'node3',
width: 90,
height: 70,
offsetX: 170,
offsetY: 150,
},
];
export default {
name: 'App',
components: {
'ejs-diagram': DiagramComponent,
'ejs-button': ButtonComponent,
},
data() {
return {
width: '100%',
height: '600px',
nodes: nodes,
};
},
methods: {
bringToFront: function () {
var diagramInstance = this.$refs.diagram.ej2Instances;
diagramInstance.bringToFront();
},
},
};
</script>
<style>
@import "../node_modules/@syncfusion/ej2-vue-diagrams/styles/tailwind3.css";
@import "../node_modules/@syncfusion/ej2-base/styles/tailwind3.css";
@import "../node_modules/@syncfusion/ej2-popups/styles/tailwind3.css";
@import "../node_modules/@syncfusion/ej2-splitbuttons/styles/tailwind3.css";
@import "../node_modules/@syncfusion/ej2-navigations/styles/tailwind3.css";
</style>Send to back command
The sendToBackcommand moves the selected element to the back, placing it behind all other elements in the diagram. The following code illustrates how to use the sendToBack command.
<template>
  <div id="app">
    <button @click="sendToBack">Send To Back</button>
    <ejs-diagram
      id="diagram"
      ref="diagramObj"
      :width="width"
      :height="height"
      :nodes="nodes"
    ></ejs-diagram>
  </div>
</template>
<script setup>
import { ref } from "vue";
import { DiagramComponent as EjsDiagram } from "@syncfusion/ej2-vue-diagrams";

const diagramObj = ref(null);

const nodes = [
  {
    id: "node1",
    width: 90,
    height: 70,
    offsetX: 120,
    offsetY: 100,
  },
  {
    id: "node2",
    width: 90,
    height: 70,
    offsetX: 150,
    offsetY: 120,
  },
  {
    id: "node3",
    width: 90,
    height: 70,
    offsetX: 170,
    offsetY: 150,
  },
];

const width = "100%";
const height = "600px";

const sendToBack = function () {
  let diagramInstance = diagramObj.value.ej2Instances;
  diagramInstance.sendToBack();
};
</script>
<style>
@import "../node_modules/@syncfusion/ej2-vue-diagrams/styles/tailwind3.css";
@import "../node_modules/@syncfusion/ej2-base/styles/tailwind3.css";
@import "../node_modules/@syncfusion/ej2-popups/styles/tailwind3.css";
@import "../node_modules/@syncfusion/ej2-splitbuttons/styles/tailwind3.css";
@import "../node_modules/@syncfusion/ej2-navigations/styles/tailwind3.css";
</style><template>
<div id="app">
<ejs-button v-on:click="sendToBack">Send To Back </ejs-button>
<ejs-diagram
id="diagram"
ref="diagram"
:width="width"
:height="height"
:nodes="nodes"
></ejs-diagram>
</div>
</template>
<script>
import { DiagramComponent } from '@syncfusion/ej2-vue-diagrams';
import { ButtonComponent } from '@syncfusion/ej2-vue-buttons';
let nodes = [
{
id: 'node1',
width: 90,
height: 70,
offsetX: 120,
offsetY: 100,
},
{
id: 'node2',
width: 90,
height: 70,
offsetX: 150,
offsetY: 120,
},
{
id: 'node3',
width: 90,
height: 70,
offsetX: 170,
offsetY: 150,
},
];
export default {
name: 'App',
components: {
'ejs-diagram': DiagramComponent,
'ejs-button': ButtonComponent,
},
data() {
return {
width: '100%',
height: '600px',
nodes: nodes,
};
},
methods: {
sendToBack: function () {
var diagramInstance = this.$refs.diagram.ej2Instances;
diagramInstance.sendToBack();
},
},
};
</script>
<style>
@import "../node_modules/@syncfusion/ej2-vue-diagrams/styles/tailwind3.css";
@import "../node_modules/@syncfusion/ej2-base/styles/tailwind3.css";
@import "../node_modules/@syncfusion/ej2-popups/styles/tailwind3.css";
@import "../node_modules/@syncfusion/ej2-splitbuttons/styles/tailwind3.css";
@import "../node_modules/@syncfusion/ej2-navigations/styles/tailwind3.css";
</style>Move forward command
The moveForward command moves the selected element one step forward in the stack, placing it above the nearest overlapping element. The following code illustrates how to use the moveForward command.
<template>
  <div id="app">
    <button @click="moveForward">Move  Forward</button>
    <ejs-diagram
      id="diagram"
      ref="diagramObj"
      :width="width"
      :height="height"
      :nodes="nodes"
    ></ejs-diagram>
  </div>
</template>
<script setup>
import { ref } from "vue";
import { DiagramComponent as EjsDiagram } from "@syncfusion/ej2-vue-diagrams";

const diagramObj = ref(null);

const nodes = [
  {
    id: "node1",
    width: 90,
    height: 70,
    offsetX: 120,
    offsetY: 100,
  },
  {
    id: "node2",
    width: 90,
    height: 70,
    offsetX: 150,
    offsetY: 120,
  },
  {
    id: "node3",
    width: 90,
    height: 70,
    offsetX: 170,
    offsetY: 150,
  },
];

const width = "100%";
const height = "600px";

const moveForward = function () {
  let diagramInstance = diagramObj.value.ej2Instances;
  diagramInstance.moveForward();
};
</script>
<style>
@import "../node_modules/@syncfusion/ej2-vue-diagrams/styles/tailwind3.css";
@import "../node_modules/@syncfusion/ej2-base/styles/tailwind3.css";
@import "../node_modules/@syncfusion/ej2-popups/styles/tailwind3.css";
@import "../node_modules/@syncfusion/ej2-splitbuttons/styles/tailwind3.css";
@import "../node_modules/@syncfusion/ej2-navigations/styles/tailwind3.css";
</style><template>
<div id="app">
<ejs-button v-on:click="moveForward">Move Forward </ejs-button>
<ejs-diagram
id="diagram"
ref="diagram"
:width="width"
:height="height"
:nodes="nodes"
></ejs-diagram>
</div>
</template>
<script>
import { DiagramComponent } from '@syncfusion/ej2-vue-diagrams';
import { ButtonComponent } from '@syncfusion/ej2-vue-buttons';
let nodes = [
{
id: 'node1',
width: 90,
height: 70,
offsetX: 120,
offsetY: 100,
},
{
id: 'node2',
width: 90,
height: 70,
offsetX: 150,
offsetY: 120,
},
{
id: 'node3',
width: 90,
height: 70,
offsetX: 170,
offsetY: 150,
},
];
export default {
name: 'App',
components: {
'ejs-diagram': DiagramComponent,
'ejs-button': ButtonComponent,
},
data() {
return {
width: '100%',
height: '600px',
nodes: nodes,
};
},
methods: {
moveForward: function () {
var diagramInstance = this.$refs.diagram.ej2Instances;
diagramInstance.moveForward();
},
},
};
</script>
<style>
@import "../node_modules/@syncfusion/ej2-vue-diagrams/styles/tailwind3.css";
@import "../node_modules/@syncfusion/ej2-base/styles/tailwind3.css";
@import "../node_modules/@syncfusion/ej2-popups/styles/tailwind3.css";
@import "../node_modules/@syncfusion/ej2-splitbuttons/styles/tailwind3.css";
@import "../node_modules/@syncfusion/ej2-navigations/styles/tailwind3.css";
</style>send backward command
The sendBackward command moves the selected element one step backward in the stack, placing it behind the underlying element. The following code illustrates how to use the sendBackward command.
<template>
  <div id="app">
    <button @click="sendBackward">Send BackWard</button>
    <ejs-diagram
      id="diagram"
      ref="diagramObj"
      :width="width"
      :height="height"
      :nodes="nodes"
    ></ejs-diagram>
  </div>
</template>
<script setup>
import { ref } from "vue";
import { DiagramComponent as EjsDiagram } from "@syncfusion/ej2-vue-diagrams";

const diagramObj = ref(null);

const nodes = [
  {
    id: "node1",
    width: 90,
    height: 70,
    offsetX: 120,
    offsetY: 100,
  },
  {
    id: "node2",
    width: 90,
    height: 70,
    offsetX: 150,
    offsetY: 120,
  },
  {
    id: "node3",
    width: 90,
    height: 70,
    offsetX: 170,
    offsetY: 150,
  },
];

const width = "100%";
const height = "600px";

const sendBackward = function () {
  let diagramInstance = diagramObj.value.ej2Instances;
  diagramInstance.sendBackward();
};
</script>
<style>
@import "../node_modules/@syncfusion/ej2-vue-diagrams/styles/tailwind3.css";
@import "../node_modules/@syncfusion/ej2-base/styles/tailwind3.css";
@import "../node_modules/@syncfusion/ej2-popups/styles/tailwind3.css";
@import "../node_modules/@syncfusion/ej2-splitbuttons/styles/tailwind3.css";
@import "../node_modules/@syncfusion/ej2-navigations/styles/tailwind3.css";
</style><template>
<div id="app">
<ejs-button v-on:click="sendBackward">Send BackWard </ejs-button>
<ejs-diagram
id="diagram"
ref="diagram"
:width="width"
:height="height"
:nodes="nodes"
></ejs-diagram>
</div>
</template>
<script>
import { DiagramComponent } from '@syncfusion/ej2-vue-diagrams';
import { ButtonComponent } from '@syncfusion/ej2-vue-buttons';
let nodes = [
{
id: 'node1',
width: 90,
height: 70,
offsetX: 120,
offsetY: 100,
},
{
id: 'node2',
width: 90,
height: 70,
offsetX: 150,
offsetY: 120,
},
{
id: 'node3',
width: 90,
height: 70,
offsetX: 170,
offsetY: 150,
},
];
export default {
name: 'App',
components: {
'ejs-diagram': DiagramComponent,
'ejs-button': ButtonComponent,
},
data() {
return {
width: '100%',
height: '600px',
nodes: nodes,
};
},
methods: {
sendBackward: function () {
var diagramInstance = this.$refs.diagram.ej2Instances;
diagramInstance.sendBackward();
},
},
};
</script>
<style>
@import "../node_modules/@syncfusion/ej2-vue-diagrams/styles/tailwind3.css";
@import "../node_modules/@syncfusion/ej2-base/styles/tailwind3.css";
@import "../node_modules/@syncfusion/ej2-popups/styles/tailwind3.css";
@import "../node_modules/@syncfusion/ej2-splitbuttons/styles/tailwind3.css";
@import "../node_modules/@syncfusion/ej2-navigations/styles/tailwind3.css";
</style>Zoom
The zoom command is used to zoom-in and zoom-out the diagram view.
The following code illustrates how to zoom-in/zoom out the diagram.
<template>
    <div id="app">
        <ejs-diagram id="diagram" ref="diagram" :width='width' :height='height'></ejs-diagram>
    </div>
</template>
<script setup>
import { onMounted, ref } from "vue";
import { DiagramComponent as EjsDiagram } from '@syncfusion/ej2-vue-diagrams';

const diagram = ref(null);
const width = "100%";
const height = "350px";

onMounted(function() {
    const diagramInstance = diagram.value.ej2Instances;
    diagramInstance.zoom(1.2, {
        x: 100,
        y: 100
    });
})
</script>
<style>
@import "../node_modules/@syncfusion/ej2-vue-diagrams/styles/tailwind3.css";
</style><template>
<div id="app">
<ejs-diagram id="diagram" ref="diagram" :width='width' :height='height' ></ejs-diagram>
</div>
</template>
<script>
import { DiagramComponent } from '@syncfusion/ej2-vue-diagrams';
export default {
name: 'App',
components: {
'ejs-diagram': DiagramComponent
},
data() {
return {
width: "100%",
height: "350px",
}
},
mounted: function() {
const diagramInstance = this.$refs.diagram.ej2Instances;
diagramInstance.zoom(1.2, {
x: 100,
y: 100
});
}
}
</script>
<style>
@import "../node_modules/@syncfusion/ej2-vue-diagrams/styles/tailwind3.css";
</style>Nudge command
The nudge command moves the selected elements up, down, left, or right by 1 pixel. The parameters of nudge method is explained below.
| Parameter | Type | Description |
|---|---|---|
| direction | NudgeDirection |
Defines the direction in which the objects should be moved. |
| x (optional) | number | The horizontal distance by which the selected objects should be moved. |
| y (optional) | number | The vertical distance by which the selected objects should be moved. |
| type (optional) | string | A string that defines the type of nudge action. |
The accepted values for the “direction” argument are as follows:
- Up: Moves the selected elements up by the specified delta value.
- Down: Moves the selected elements down by the specified delta value.
- Left: Moves the selected elements left by the specified delta value.
- Right: Moves the selected elements right by the specified delta value.
The following code illustrates how to execute the nudge command.
<template>
    <div id="app">
      <button @click="right">Right</button>
      <button @click="left">Left</button>
      <button @click="up">Up</button>
      <button @click="down">Down</button>
        <ejs-diagram id="diagram" ref="diagramObj" :width='width' :height='height' :nodes='nodes'></ejs-diagram>
    </div>
</template>
<script setup>
import { onMounted, ref } from "vue";
import { DiagramComponent as EjsDiagram } from '@syncfusion/ej2-vue-diagrams';

const diagramObj = ref(null);
const nodes = [ {
    id: 'node1',
    offsetX: 100,
    offsetY: 100,
    width: 70,
    height: 40,
  },];

const width = "100%";
const height = "350px";

const right = function () {
  let diagramInstance = diagramObj.value.ej2Instances;
  diagramInstance.nudge('Right');
}
const left = function () {
  let diagramInstance = diagramObj.value.ej2Instances;
  diagramInstance.nudge('Left');
};
const up = function () {
  let diagramInstance = diagramObj.value.ej2Instances;
  diagramInstance.nudge('Up');
};
const down = function () {
  let diagramInstance = diagramObj.value.ej2Instances;
  diagramInstance.nudge('Down');
};

</script>
<style>
@import "../node_modules/@syncfusion/ej2-vue-diagrams/styles/tailwind3.css";
@import "../node_modules/@syncfusion/ej2-base/styles/tailwind3.css";
@import "../node_modules/@syncfusion/ej2-popups/styles/tailwind3.css";
@import "../node_modules/@syncfusion/ej2-splitbuttons/styles/tailwind3.css";
@import "../node_modules/@syncfusion/ej2-navigations/styles/tailwind3.css";
</style><template>
<div id="app">
<ejs-button v-on:click="right">Right </ejs-button>
<ejs-button v-on:click="left">Left </ejs-button>
<ejs-button v-on:click="up">Up </ejs-button>
<ejs-button v-on:click="down">Down </ejs-button>
<ejs-diagram
id="diagram"
ref="diagram"
:width="width"
:height="height"
:nodes="nodes"
></ejs-diagram>
</div>
</template>
<script>
import { DiagramComponent } from '@syncfusion/ej2-vue-diagrams';
import { ButtonComponent } from '@syncfusion/ej2-vue-buttons';
let nodes = [
{
id: 'node1',
offsetX: 100,
offsetY: 100,
width: 70,
height: 40,
},
];
export default {
name: 'App',
components: {
'ejs-diagram': DiagramComponent,
'ejs-button': ButtonComponent,
},
data() {
return {
width: '100%',
height: '600px',
nodes: nodes,
};
},
methods: {
right: function () {
var diagramInstance = this.$refs.diagram.ej2Instances;
diagramInstance.nudge('Right');
},
left: function () {
var diagramInstance = this.$refs.diagram.ej2Instances;
diagramInstance.nudge('Left');
},
up: function () {
var diagramInstance = this.$refs.diagram.ej2Instances;
diagramInstance.nudge('Up');
},
down: function () {
var diagramInstance = this.$refs.diagram.ej2Instances;
diagramInstance.nudge('Down');
},
},
};
</script>
<style>
@import "../node_modules/@syncfusion/ej2-vue-diagrams/styles/tailwind3.css";
@import "../node_modules/@syncfusion/ej2-base/styles/tailwind3.css";
@import "../node_modules/@syncfusion/ej2-popups/styles/tailwind3.css";
@import "../node_modules/@syncfusion/ej2-splitbuttons/styles/tailwind3.css";
@import "../node_modules/@syncfusion/ej2-navigations/styles/tailwind3.css";
</style>Nudge by using arrow keys
The arrow keys can be used to move the selected elements up, down, left, or right by 1 pixel.

Nudge commands are particularly useful for accurate placement of elements.
NOTE
The position change event will not trigger when using keyboard keys to move a node or connector.
BringIntoView
The bringIntoView command brings the specified rectangular region into the viewport of the diagram, ensuring that it is visible within the current view.
The bringIntoView method takes a single parameter, an object that defines the rectangular region to bring into view. This object should include properties such as x, y, width, and height to specify the exact region to be made visible.
The following code illustrates how to execute the bringIntoView command:
<template>
  <div id="app">
    <button @click="bringIntoView">Bring into View</button>
    <ejs-diagram
      id="diagram"
      ref="diagramObj"
      :width="width"
      :height="height"
      :nodes="nodes"
      :scrollSettings="scrollSettings"
    ></ejs-diagram>
  </div>
</template>
<script setup>
import { onMounted, ref } from "vue";
import { DiagramComponent as EjsDiagram,Rect } from "@syncfusion/ej2-vue-diagrams";

const diagramObj = ref(null);
const nodes = [
  {
    id: "node1",
    offsetX: 1000,
    offsetY: 100,
    width: 70,
    height: 40,
  },
];

const width = "700px";
const height = "350px";
const scrollSettings = {
  scrollLimit: "Infinity",
};

const bringIntoView = function () {
  let diagramInstance = diagramObj.value.ej2Instances;
  let nodeBounds = diagramInstance.nodes[0].wrapper.bounds;
  let bounds = new Rect(
    nodeBounds.x,
    nodeBounds.y,
    nodeBounds.width,
    nodeBounds.height
  );
  /**
   * parameter - bounds of region to bring into view
   */
  diagramInstance.bringIntoView(bounds);
};
</script>
<style>
@import "../node_modules/@syncfusion/ej2-vue-diagrams/styles/tailwind3.css";
@import "../node_modules/@syncfusion/ej2-base/styles/tailwind3.css";
@import "../node_modules/@syncfusion/ej2-popups/styles/tailwind3.css";
@import "../node_modules/@syncfusion/ej2-splitbuttons/styles/tailwind3.css";
@import "../node_modules/@syncfusion/ej2-navigations/styles/tailwind3.css";
</style><template>
<div id="app">
<ejs-button v-on:click="clock">Bring Into View </ejs-button>
<ejs-diagram
id="diagram"
ref="diagram"
:width="width"
:height="height"
:nodes="nodes"
:scrollSettings="scrollSettings"
></ejs-diagram>
</div>
</template>
<script>
import {
DiagramComponent,
Rect,
} from '@syncfusion/ej2-vue-diagrams';
import { ButtonComponent } from '@syncfusion/ej2-vue-buttons';
let nodes = [
{
id: 'node1',
offsetX: 1000,
offsetY: 100,
width: 70,
height: 40,
},
];
export default {
name: 'App',
components: {
'ejs-diagram': DiagramComponent,
'ejs-button': ButtonComponent,
},
data() {
return {
width: '100%',
height: '600px',
nodes: nodes,
scrollSettings: {
scrollLimit: 'Infinity',
},
};
},
methods: {
clock: function () {
var diagramInstance = this.$refs.diagram.ej2Instances;
let nodeBounds = diagramInstance.nodes[0].wrapper.bounds;
let bounds = new Rect(
nodeBounds.x,
nodeBounds.y,
nodeBounds.width,
nodeBounds.height
);
/**
* parameter - bounds of region to bring into view
*/
diagramInstance.bringIntoView(bounds);
},
},
};
</script>
<style>
@import "../node_modules/@syncfusion/ej2-vue-diagrams/styles/tailwind3.css";
@import "../node_modules/@syncfusion/ej2-base/styles/tailwind3.css";
@import "../node_modules/@syncfusion/ej2-popups/styles/tailwind3.css";
@import "../node_modules/@syncfusion/ej2-splitbuttons/styles/tailwind3.css";
@import "../node_modules/@syncfusion/ej2-navigations/styles/tailwind3.css";
</style>BringToCenter
The bringToCenter command centers the specified rectangular region of the diagram content within the viewport.
The bringToCenter method takes a single parameter, an object that defines the rectangular region to be centered. This object should include properties such as x, y, width, and height to specify the exact region to be brought to the center.
The following code illustrates how to execute the bringToCenter command.
<template>
  <div id="app">
    <button @click="bringToCenter">Bring to Center</button>
    <ejs-diagram
      id="diagram"
      ref="diagramObj"
      :width="width"
      :height="height"
      :nodes="nodes"
      :scrollSettings="scrollSettings"
    ></ejs-diagram>
  </div>
</template>
<script setup>
import { onMounted, ref } from "vue";
import { DiagramComponent as EjsDiagram,Rect } from "@syncfusion/ej2-vue-diagrams";

const diagramObj = ref(null);
const nodes = [
  {
    id: "node1",
    offsetX: 1000,
    offsetY: 100,
    width: 70,
    height: 40,
  },
];

const width = "700px";
const height = "350px";
const scrollSettings = {
  scrollLimit: "Infinity",
};

const bringToCenter = function () {
  let diagramInstance = diagramObj.value.ej2Instances;
  let nodeBounds = diagramInstance.nodes[0].wrapper.bounds;
  let bounds = new Rect(
    nodeBounds.x,
    nodeBounds.y,
    nodeBounds.width,
    nodeBounds.height
  );
  /**
   * parameter - bounds of region to bring into view
   */
  diagramInstance.bringToCenter(bounds);
};
</script>
<style>
@import "../node_modules/@syncfusion/ej2-vue-diagrams/styles/tailwind3.css";
@import "../node_modules/@syncfusion/ej2-base/styles/tailwind3.css";
@import "../node_modules/@syncfusion/ej2-popups/styles/tailwind3.css";
@import "../node_modules/@syncfusion/ej2-splitbuttons/styles/tailwind3.css";
@import "../node_modules/@syncfusion/ej2-navigations/styles/tailwind3.css";
</style><template>
<div id="app">
<ejs-button v-on:click="center">Bring to Center </ejs-button>
<ejs-diagram
id="diagram"
ref="diagram"
:width="width"
:height="height"
:nodes="nodes"
:scrollSettings="scrollSettings"
></ejs-diagram>
</div>
</template>
<script>
import {
DiagramComponent,
DiagramTools,
Rect,
} from '@syncfusion/ej2-vue-diagrams';
import { ButtonComponent } from '@syncfusion/ej2-vue-buttons';
let nodes = [
{
id: 'node1',
offsetX: 1000,
offsetY: 100,
width: 70,
height: 40,
},
];
export default {
name: 'App',
components: {
'ejs-diagram': DiagramComponent,
'ejs-button': ButtonComponent,
},
data() {
return {
width: '700px',
height: '600px',
nodes: nodes,
scrollSettings: {
scrollLimit: 'Infinity',
},
};
},
methods: {
center: function () {
var diagramInstance = this.$refs.diagram.ej2Instances;
let nodeBounds = diagramInstance.nodes[0].wrapper.bounds;
let bounds = new Rect(
nodeBounds.x,
nodeBounds.y,
nodeBounds.width,
nodeBounds.height
);
/**
* parameter - bounds of region to bring into view
*/
diagramInstance.bringToCenter(bounds);
},
},
};
</script>
<style>
@import "../node_modules/@syncfusion/ej2-vue-diagrams/styles/tailwind3.css";
@import "../node_modules/@syncfusion/ej2-base/styles/tailwind3.css";
@import "../node_modules/@syncfusion/ej2-popups/styles/tailwind3.css";
@import "../node_modules/@syncfusion/ej2-splitbuttons/styles/tailwind3.css";
@import "../node_modules/@syncfusion/ej2-navigations/styles/tailwind3.css";
</style>FitToPage
The fitToPage command adjusts the diagram content to fit within the viewport, considering either width, height, or the entire content. The fitToPage method takes one parameter, fitOptions, which specifies the options for fitting the diagram to the page.
FitOptions
The mode parameter defines how the diagram should fit into the viewport—horizontally, vertically, or based on the entire bounds of the diagram.
The region parameter specifies the region of the diagram that should be fit within viewport.
The margin parameter sets the margin around the diagram content that should be included in the view.
The canZoomIn parameter enables or disables zooming in to fit smaller content into a larger viewport.
The canZoomOut parameter enables or disables zooming out to fit larger content into a smaller viewport.
The customBounds parameter defines a custom region that should be fit into the viewport.
The following code illustrates how to execute FitToPage command.
<template>
  <div id="app">
    <button @click="page">Fit to Page</button>
    <button @click="fitTowidth">Fit to Width</button>
    <button @click="fitToheight">Fit to Height</button>
    <ejs-diagram
      id="diagram"
      ref="diagramObj"
      :width="width"
      :height="height"
      :dataSourceSettings="dataSourceSettings"
      :getNodeDefaults="getNodeDefaults"
      :getConnectorDefaults="getConnectorDefaults"
      :layout="layout"
    ></ejs-diagram>
  </div>
</template>

<script setup>
import { provide, ref } from "vue";
import {
  DiagramComponent as EjsDiagram,
  HierarchicalTree,
  DataBinding,
} from "@syncfusion/ej2-vue-diagrams";
import { DataManager, Query } from "@syncfusion/ej2-data";

const diagramObj = ref(null);

//Initialize data
let data = [
  {
    Id: "parent",
    Name: "Maria Anders",
    Designation: "Managing Director",
    ImageUrl: "../content/images/orgchart/Clayton.png",
    IsExpand: "true",
    RatingColor: "#C34444",
  },
  {
    Id: 1,
    Name: "Ana Trujillo",
    Designation: "Project Manager",
    ImageUrl: "../content/images/orgchart/Thomas.PNG",
    IsExpand: "false",
    RatingColor: "#68C2DE",
    ReportingPerson: "parent",
  },
  {
    Id: 2,
    Name: "Anto Moreno",
    Designation: "Project Lead",
    ImageUrl: "../content/images/orgchart/image53.png",
    IsExpand: "false",
    RatingColor: "#93B85A",
    ReportingPerson: 1,
  },
  {
    Id: 3,
    Name: "Thomas Hardy",
    Designation: "Senior S/w Engg",
    ImageUrl: "../content/images/orgchart/image57.png",
    IsExpand: "false",
    RatingColor: "#68C2DE",
    ReportingPerson: 2,
  },
  {
    Id: 4,
    Name: "Christina kaff",
    Designation: "S/w Engg",
    ImageUrl: "../content/images/orgchart/Robin.png",
    IsExpand: "false",
    RatingColor: "#93B85A",
    ReportingPerson: 3,
  },
  {
    Id: 5,
    Name: "Hanna Moos",
    Designation: "Project Trainee",
    ImageUrl: "../content/images/orgchart/image57.png",
    IsExpand: "true",
    RatingColor: "#D46E89",
    ReportingPerson: 4,
  },
  {
    Id: 6,
    Name: "Peter Citeaux",
    Designation: "Project Trainee",
    ImageUrl: "../content/images/orgchart/Robin.png",
    IsExpand: "true",
    RatingColor: "#68C2DE",
    ReportingPerson: 4,
  },
  {
    Id: 7,
    Name: "Martín Kloss",
    Designation: "Senior S/w Engg",
    ImageUrl: "../content/images/orgchart/Robin.png",
    IsExpand: "false",
    RatingColor: "#93B85A",
    ReportingPerson: 1,
  },
  {
    Id: 9,
    Name: "Elizabeth Mary",
    Designation: "Project Trainee",
    ImageUrl: "../content/images/orgchart/Robin.png",
    IsExpand: "None",
    RatingColor: "#93B85A",
    ReportingPerson: 8,
  },
  {
    Id: 10,
    Name: "Victoria Ash",
    Designation: "Project Trainee",
    ImageUrl: "../content/images/orgchart/Robin.png",
    IsExpand: "None",
    RatingColor: "#D46E89",
    ReportingPerson: 8,
  },
  {
    Id: 12,
    Name: "Francisco Yang",
    Designation: "CSR",
    ImageUrl: "../content/images/orgchart/image55.png",
    IsExpand: "None",
    RatingColor: "#93B85A",
    ReportingPerson: 7,
  },
  {
    Id: 13,
    Name: "Yang Wang",
    Designation: "CSR",
    ImageUrl: "../content/images/orgchart/image57.png",
    IsExpand: "None",
    RatingColor: "#EBB92E",
    ReportingPerson: 6,
  },
  {
    Id: 27,
    Name: "Lino Rodri",
    Designation: "Project Manager",
    ImageUrl: "../content/images/orgchart/Robin.PNG",
    IsExpand: "true",
    RatingColor: "#68C2DE",
    ReportingPerson: "parent",
  },
  {
    Id: 38,
    Name: "Philip Cramer",
    Designation: "Project Manager",
    ImageUrl: "../content/images/orgchart/Robin.PNG",
    IsExpand: "true",
    RatingColor: "#68C2DE",
    ReportingPerson: "parent",
  },
  {
    Id: 14,
    Name: "Pedro Afonso",
    Designation: "Project Manager",
    ImageUrl: "../content/images/orgchart/Paul.png",
    IsExpand: "true",
    RatingColor: "#68C2DE",
    ReportingPerson: "parent",
  },
  {
    Id: 15,
    Name: "Elizabeth Roel",
    Designation: "Project Lead",
    ImageUrl: "../content/images/orgchart/Maria.png",
    IsExpand: "false",
    RatingColor: "#93B85A",
    ReportingPerson: 38,
  },
  {
    Id: 17,
    Name: "Janine Labrune",
    Designation: "Project Trainee",
    ImageUrl: "../content/images/orgchart/image55.png",
    IsExpand: "None",
    RatingColor: "#D46E89",
    ReportingPerson: 48,
  },
  {
    Id: 18,
    Name: "Ann Devon",
    Designation: "CSR",
    ImageUrl: "../content/images/orgchart/Robin.png",
    IsExpand: "false",
    RatingColor: "#68C2DE",
    ReportingPerson: 31,
  },
  {
    Id: 19,
    Name: "Roland Mendel",
    Designation: "CSR",
    ImageUrl: "../content/images/orgchart/image57.png",
    IsExpand: "true",
    RatingColor: "#68C2DE",
    ReportingPerson: 31,
  },
  {
    Id: 20,
    Name: "Aria Cruz",
    Designation: "Project Lead",
    ImageUrl: "../content/images/orgchart/Jenny.png",
    IsExpand: "false",
    RatingColor: "#93B85A",
    ReportingPerson: 14,
  },
  {
    Id: 22,
    Name: "Martine Rancé",
    Designation: "Project Trainee",
    ImageUrl: "../content/images/orgchart/image53.png",
    IsExpand: "None",
    RatingColor: "#93B85A",
    ReportingPerson: 21,
  },
  {
    Id: 23,
    Name: "Maria Larsson",
    Designation: "Senior S/w Engg",
    ImageUrl: "../content/images/orgchart/image51.png",
    IsExpand: "false",
    RatingColor: "#EBB92E",
    ReportingPerson: 20,
  },
  {
    Id: 21,
    Name: "Diego Roel",
    Designation: "Senior S/w Engg",
    ImageUrl: "../content/images/orgchart/image55.png",
    IsExpand: "false",
    RatingColor: "#D46E89",
    ReportingPerson: 20,
  },
  {
    Id: 24,
    Name: "Peter Franken",
    Designation: "S/w Engg",
    ImageUrl: "../content/images/orgchart/image55.png",
    IsExpand: "None",
    RatingColor: "#D46E89",
    ReportingPerson: 23,
  },
  {
    Id: 25,
    Name: "Carine Schmitt",
    Designation: "Project Trainee",
    ImageUrl: "../content/images/orgchart/Clayton.png",
    IsExpand: "None",
    RatingColor: "#EBB92E",
    ReportingPerson: 21,
  },
  {
    Id: 26,
    Name: "Paolo Accorti",
    Designation: "Project Trainee",
    ImageUrl: "../content/images/orgchart/Thomas.png",
    IsExpand: "None",
    RatingColor: "#D46E89",
    ReportingPerson: 21,
  },
  {
    Id: 28,
    Name: "Eduardo Roel",
    Designation: "Project Lead",
    ImageUrl: "../content/images/orgchart/image55.png",
    IsExpand: "true",
    RatingColor: "#93B85A",
    ReportingPerson: 38,
  },
  {
    Id: 29,
    Name: "José Pedro ",
    Designation: "Senior S/w Engg",
    ImageUrl: "../content/images/orgchart/Thomas.png",
    IsExpand: "true",
    RatingColor: "#D46E89",
    ReportingPerson: 28,
  },
  {
    Id: 30,
    Name: "André Fonseca",
    Designation: "Project Trainee",
    ImageUrl: "../content/images/orgchart/John.png",
    IsExpand: "true",
    RatingColor: "#EBB92E",
    ReportingPerson: 29,
  },
  {
    Id: 31,
    Name: "Howard Snyd",
    Designation: "Project Lead",
    ImageUrl: "../content/images/orgchart/Jenny.png",
    IsExpand: "false",
    RatingColor: "#68C2DE",
    ReportingPerson: 14,
  },
  {
    Id: 32,
    Name: "Manu Pereira",
    Designation: "Senior S/w Engg",
    ImageUrl: "../content/images/orgchart/image56.png",
    IsExpand: "None",
    RatingColor: "#D46E89",
    ReportingPerson: 8,
  },
  {
    Id: 33,
    Name: "Mario Pontes",
    Designation: "Project Trainee",
    ImageUrl: "../content/images/orgchart/Robin.png",
    IsExpand: "None",
    RatingColor: "#D46E89",
    ReportingPerson: 19,
  },
  {
    Id: 34,
    Name: "Carlos Schmitt",
    Designation: "S/w Engg",
    ImageUrl: "../content/images/orgchart/Clayton.png",
    IsExpand: "None",
    RatingColor: "#D46E89",
    ReportingPerson: 19,
  },
  {
    Id: 35,
    Name: "Yoshi Latimer",
    Designation: "SR",
    ImageUrl: "../content/images/orgchart/eric.png",
    IsExpand: "true",
    RatingColor: "#D46E89",
    ReportingPerson: 18,
  },
  {
    Id: 36,
    Name: "Patricia Kenna",
    Designation: "SR",
    ImageUrl: "../content/images/orgchart/Maria.png",
    IsExpand: "true",
    RatingColor: "#EBB92E",
    ReportingPerson: 55,
  },
  {
    Id: 37,
    Name: "Helen Bennett",
    Designation: "SR",
    ImageUrl: "../content/images/orgchart/image51.png",
    IsExpand: "None",
    RatingColor: "#D46E89",
    ReportingPerson: 15,
  },
  {
    Id: 39,
    Name: "Daniel Tonini",
    Designation: "Project Lead",
    ImageUrl: "../content/images/orgchart/Thomas.png",
    IsExpand: "true",
    RatingColor: "#93B85A",
    ReportingPerson: 27,
  },
  {
    Id: 40,
    Name: "Annette Roel",
    Designation: "Senior S/w Engg",
    ImageUrl: "../content/images/orgchart/image55.png",
    IsExpand: "false",
    RatingColor: "#93B85A",
    ReportingPerson: 39,
  },
  {
    Id: 41,
    Name: "Yoshi Wilson",
    Designation: "S/w Engg",
    ImageUrl: "../content/images/orgchart/image57.png",
    IsExpand: "false",
    RatingColor: "#EBB92E",
    ReportingPerson: 40,
  },
  {
    Id: 42,
    Name: "John Steel",
    Designation: "Project Trainee",
    ImageUrl: "../content/images/orgchart/Maria.png",
    IsExpand: "false",
    RatingColor: "#93B85A",
    ReportingPerson: 41,
  },
  {
    Id: 43,
    Name: "Renate Jose",
    Designation: "Project Trainee",
    ImageUrl: "../content/images/orgchart/image51.png",
    IsExpand: "None",
    RatingColor: "#D46E89",
    ReportingPerson: 42,
  },
  {
    Id: 44,
    Name: "Jaime Yorres",
    Designation: "Project Trainee",
    ImageUrl: "../content/images/orgchart/Robin.png",
    IsExpand: "None",
    RatingColor: "#93B85A",
    ReportingPerson: 42,
  },
  {
    Id: 45,
    Name: "Carlos Nagy",
    Designation: "SR",
    ImageUrl: "../content/images/orgchart/Clayton.png",
    IsExpand: "None",
    RatingColor: "#93B85A",
    ReportingPerson: 40,
  },
  {
    Id: 46,
    Name: "Felipe Kloss",
    Designation: "SR",
    ImageUrl: "../content/images/orgchart/Thomas.png",
    IsExpand: "false",
    RatingColor: "#EBB92E",
    ReportingPerson: 17,
  },
  {
    Id: 47,
    Name: "Fran Wilson",
    Designation: "SR",
    ImageUrl: "../content/images/orgchart/image53.png",
    IsExpand: "None",
    RatingColor: "#93B85A",
    ReportingPerson: 46,
  },
  {
    Id: 48,
    Name: "John Rovelli",
    Designation: "SR",
    ImageUrl: "../content/images/orgchart/Jenny.png",
    IsExpand: "None",
    RatingColor: "#93B85A",
    ReportingPerson: 46,
  },
  {
    Id: 49,
    Name: "Catherine Kaff",
    Designation: "Senior S/w Engg",
    ImageUrl: "../content/images/orgchart/image57.png",
    IsExpand: "false",
    RatingColor: "#93B85A",
    ReportingPerson: 51,
  },
  {
    Id: 50,
    Name: "Jean Fresnière",
    Designation: "S/w Engg",
    ImageUrl: "../content/images/orgchart/Robin.png",
    IsExpand: "false",
    RatingColor: "#D46E89",
    ReportingPerson: 49,
  },
  {
    Id: 51,
    Name: "Alex Feuer",
    Designation: "Project Trainee",
    ImageUrl: "../content/images/orgchart/Clayton.png",
    IsExpand: "None",
    RatingColor: "#93B85A",
    ReportingPerson: 50,
  },
  {
    Id: 52,
    Name: "Simon Roel",
    Designation: "S/w Engg",
    ImageUrl: "../content/images/orgchart/Thomas.png",
    IsExpand: "None",
    RatingColor: "#EBB92E",
    ReportingPerson: 50,
  },
  {
    Id: 53,
    Name: "Yvonne Wong",
    Designation: "Project Trainee",
    ImageUrl: "../content/images/orgchart/image53.png",
    IsExpand: "None",
    RatingColor: "#93B85A",
    ReportingPerson: 50,
  },
  {
    Id: 54,
    Name: "Rene Phillips",
    Designation: "S/w Engg",
    ImageUrl: "../content/images/orgchart/Jenny.png",
    IsExpand: "None",
    RatingColor: "#D46E89",
    ReportingPerson: 7,
  },
  {
    Id: 55,
    Name: "Yoshi Kenna",
    Designation: "Project Trainee",
    ImageUrl: "../content/images/orgchart/image55.png",
    IsExpand: "false",
    RatingColor: "#EBB92E",
    ReportingPerson: 15,
  },
  {
    Id: 56,
    Name: "Helen Marie",
    Designation: "Project Trainee",
    ImageUrl: "../content/images/orgchart/image51.png",
    IsExpand: "true",
    RatingColor: "#EBB92E",
    ReportingPerson: 55,
  },
  {
    Id: 57,
    Name: "Joseph Kaff",
    Designation: "Project Trainee",
    ImageUrl: "../content/images/orgchart/image53.png",
    IsExpand: "None",
    RatingColor: "#EBB92E",
    ReportingPerson: 7,
  },
  {
    Id: 58,
    Name: "Georg Pipps",
    Designation: "SR",
    ImageUrl: "../content/images/orgchart/Thomas.png",
    IsExpand: "None",
    RatingColor: "#EBB92E",
    ReportingPerson: 5,
  },
  {
    Id: 60,
    Name: "Nardo Batista",
    Designation: "Project Lead",
    ImageUrl: "../content/images/orgchart/Maria.PNG",
    IsExpand: "true",
    RatingColor: "#68C2DE",
    ReportingPerson: 59,
  },
  {
    Id: 61,
    Name: "Lúcia Carvalho",
    Designation: "Senior S/w Engg",
    ImageUrl: "../content/images/orgchart/Robin.PNG",
    IsExpand: "false",
    RatingColor: "#93B85A",
    ReportingPerson: 60,
  },
  {
    Id: 62,
    Name: "Horst Kloss",
    Designation: "Project Trainee",
    ImageUrl: "../content/images/orgchart/Clayton.PNG",
    IsExpand: "None",
    RatingColor: "#68C2DE",
    ReportingPerson: 74,
  },
  {
    Id: 63,
    Name: "Sergio roel",
    Designation: "Project Trainee",
    ImageUrl: "../content/images/orgchart/image55.PNG",
    IsExpand: "None",
    RatingColor: "#EBB92E",
    ReportingPerson: 61,
  },
  {
    Id: 64,
    Name: "Paula Wilson",
    Designation: "S/w Engg",
    ImageUrl: "../content/images/orgchart/eric.PNG",
    IsExpand: "None",
    RatingColor: "#68C2DE",
    ReportingPerson: 7,
  },
  {
    Id: 65,
    Name: "Mauri Moroni",
    Designation: "Project Trainee",
    ImageUrl: "../content/images/orgchart/image53.PNG",
    IsExpand: "None",
    RatingColor: "#93B85A",
    ReportingPerson: 6,
  },
  {
    Id: 66,
    Name: "Janete Limeira",
    Designation: "Project Trainee",
    ImageUrl: "../content/images/orgchart/image51.PNG",
    IsExpand: "None",
    RatingColor: "#93B85A",
    ReportingPerson: 7,
  },
  {
    Id: 67,
    Name: "Michael Holz",
    Designation: "Project Lead",
    ImageUrl: "../content/images/orgchart/Thomas.PNG",
    IsExpand: "true",
    RatingColor: "#68C2DE",
    ReportingPerson: 59,
  },
  {
    Id: 68,
    Name: "Alej Camino",
    Designation: "Senior S/w Engg",
    ImageUrl: "../content/images/orgchart/Thomas.PNG",
    IsExpand: "false",
    RatingColor: "#93B85A",
    ReportingPerson: 67,
  },
  {
    Id: 69,
    Name: "Jonas Bergsen",
    Designation: "Project Trainee",
    ImageUrl: "../content/images/orgchart/image53.PNG",
    IsExpand: "None",
    RatingColor: "#68C2DE",
    ReportingPerson: 19,
  },
  {
    Id: 70,
    Name: "Jose Pavarotti",
    Designation: "S/w Engg",
    ImageUrl: "../content/images/orgchart/Maria.PNG",
    IsExpand: "None",
    RatingColor: "#D46E89",
    ReportingPerson: 56,
  },
  {
    Id: 71,
    Name: "Miguel Angel",
    Designation: "Project Trainee",
    ImageUrl: "../content/images/orgchart/eric.PNG",
    IsExpand: "None",
    RatingColor: "#D46E89",
    ReportingPerson: 16,
  },
  {
    Id: 72,
    Name: "Jytte Petersen",
    Designation: "Project Manager",
    ImageUrl: "../content/images/orgchart/image55.PNG",
    IsExpand: "true",
    RatingColor: "#68C2DE",
    ReportingPerson: 59,
  },
  {
    Id: 73,
    Name: "Kloss Perrier",
    Designation: "Project Lead",
    ImageUrl: "../content/images/orgchart/Clayton.png",
    IsExpand: "None",
    RatingColor: "#93B85A",
    ReportingPerson: 23,
  },
  {
    Id: 74,
    Name: "Art Nancy",
    Designation: "Project Trainee",
    ImageUrl: "../content/images/orgchart/Thomas.png",
    IsExpand: "true",
    RatingColor: "#D46E89",
    ReportingPerson: 29,
  },
  {
    Id: 75,
    Name: "Pascal Cartrain",
    Designation: "Project Trainee",
    ImageUrl: "../content/images/orgchart/John.png",
    IsExpand: "true",
    RatingColor: "#EBB92E",
    ReportingPerson: 36,
  },
  {
    Id: 76,
    Name: "Liz Nixon",
    Designation: "Project Lead",
    ImageUrl: "../content/images/orgchart/Jenny.png",
    IsExpand: "false",
    RatingColor: "#68C2DE",
    ReportingPerson: 72,
  },
  {
    Id: 77,
    Name: "Liu Wong",
    Designation: "Senior S/w Engg",
    ImageUrl: "../content/images/orgchart/image57.png",
    IsExpand: "None",
    RatingColor: "#D46E89",
    ReportingPerson: 75,
  },
  {
    Id: 78,
    Name: "Karin Josephs",
    Designation: "Senior S/w Engg",
    ImageUrl: "../content/images/orgchart/image55.png",
    IsExpand: "None",
    RatingColor: "#D46E89",
    ReportingPerson: 76,
  },
  {
    Id: 79,
    Name: "Ruby Anabela ",
    Designation: "Senior S/w Engg",
    ImageUrl: "../content/images/orgchart/Thomas.png",
    IsExpand: "None",
    RatingColor: "#D46E89",
    ReportingPerson: 23,
  },
  {
    Id: 80,
    Name: "Helvetis Nagy",
    Designation: "Project Trainee",
    ImageUrl: "../content/images/orgchart/image53.png",
    IsExpand: "None",
    RatingColor: "#D46E89",
    ReportingPerson: 75,
  },
  {
    Id: 81,
    Name: "Palle Ibsen",
    Designation: "S/w Engg",
    ImageUrl: "../content/images/orgchart/image51.png",
    IsExpand: "None",
    RatingColor: "#D46E89",
    ReportingPerson: 35,
  },
  {
    Id: 82,
    Name: "Mary Saveley",
    Designation: "Project Manager",
    ImageUrl: "../content/images/orgchart/Clayton.png",
    IsExpand: "false",
    RatingColor: "#93B85A",
    ReportingPerson: 59,
  },
  {
    Id: 83,
    Name: "Paul Henriot",
    Designation: "Project Lead",
    ImageUrl: "../content/images/orgchart/Thomas.png",
    IsExpand: "false",
    RatingColor: "#D46E89",
    ReportingPerson: 30,
  },
  {
    Id: 84,
    Name: "Rita Müller",
    Designation: "Project Trainee",
    ImageUrl: "../content/images/orgchart/Paul.png",
    IsExpand: "None",
    RatingColor: "#68C2DE",
    ReportingPerson: 83,
  },
  {
    Id: 85,
    Name: "Pirkko King",
    Designation: "Senior S/w Engg",
    ImageUrl: "../content/images/orgchart/Robin.png",
    IsExpand: "None",
    RatingColor: "#D46E89",
    ReportingPerson: 83,
  },
  {
    Id: 86,
    Name: "Paula Parente",
    Designation: "Project Lead",
    ImageUrl: "../content/images/orgchart/John.png",
    IsExpand: "None",
    RatingColor: "#EBB92E",
    ReportingPerson: 74,
  },
  {
    Id: 87,
    Name: "Karl Jablonski",
    Designation: "Senior S/w Engg",
    ImageUrl: "../content/images/orgchart/image53.png",
    IsExpand: "None",
    RatingColor: "#D46E89",
    ReportingPerson: 23,
  },
  {
    Id: 88,
    Name: "Matti Kenna",
    Designation: "Project Lead",
    ImageUrl: "../content/images/orgchart/Jenny.png",
    IsExpand: "None",
    RatingColor: "#93B85A",
    ReportingPerson: 23,
  },
  {
    Id: 89,
    Name: "Zbyszek Yang",
    Designation: "Senior S/w Engg",
    ImageUrl: "../content/images/orgchart/Thomas.png",
    IsExpand: "None",
    RatingColor: "#93B85A",
    ReportingPerson: 23,
  },
  {
    Id: 90,
    Name: "Nancy",
    Designation: "Senior S/w Engg",
    ImageUrl: "../content/images/orgchart/image56.png",
    IsExpand: "None",
    RatingColor: "#93B85A",
    ReportingPerson: 23,
  },
  {
    Id: 91,
    Name: "Robert King",
    Designation: "Project Manager",
    ImageUrl: "../content/images/orgchart/Thomas.png",
    IsExpand: "true",
    RatingColor: "#D46E89",
    ReportingPerson: 59,
  },
  {
    Id: 92,
    Name: "Laura Callahan",
    Designation: "Project Lead",
    ImageUrl: "../content/images/orgchart/Robin.png",
    IsExpand: "false",
    RatingColor: "#D46E89",
    ReportingPerson: 91,
  },
  {
    Id: 93,
    Name: "Anne",
    Designation: "Senior S/w Engg",
    ImageUrl: "../content/images/orgchart/Clayton.png",
    IsExpand: "false",
    RatingColor: "#68C2DE",
    ReportingPerson: 92,
  },
  {
    Id: 94,
    Name: "Georg Pipps",
    Designation: "Project Trainee",
    ImageUrl: "../content/images/orgchart/image53.png",
    IsExpand: "None",
    RatingColor: "#EBB92E",
    ReportingPerson: 5,
  },
  {
    Id: 95,
    Name: "Isabel Castro",
    Designation: "Senior S/w Engg",
    ImageUrl: "../content/images/orgchart/image55.png",
    IsExpand: "None",
    RatingColor: "#D46E89",
    ReportingPerson: 93,
  },
  {
    Id: 96,
    Name: "Nardo Batista",
    Designation: "Senior S/w Engg",
    ImageUrl: "../content/images/orgchart/image57.png",
    IsExpand: "None",
    RatingColor: "#EBB92E",
    ReportingPerson: 93,
  },
  {
    Id: 97,
    Name: "Rene Phillips",
    Designation: "Senior S/w Engg",
    ImageUrl: "../content/images/orgchart/image55.png",
    IsExpand: "false",
    RatingColor: "#68C2DE",
    ReportingPerson: 92,
  },
  {
    Id: 98,
    Name: "Lúcia Carvalho",
    Designation: "S/w Engg",
    ImageUrl: "../content/images/orgchart/Thomas.png",
    IsExpand: "None",
    RatingColor: "#93B85A",
    ReportingPerson: 97,
  },
  {
    Id: 99,
    Name: "Horst Kloss",
    Designation: "Project Trainee",
    ImageUrl: "../content/images/orgchart/Paul.png",
    IsExpand: "None",
    RatingColor: "#D46E89",
    ReportingPerson: 56,
  },
  {
    Id: 101,
    Name: "Simon Roel",
    Designation: "Project Lead",
    ImageUrl: "../content/images/orgchart/Clayton.png",
    IsExpand: "true",
    RatingColor: "#93B85A",
    ReportingPerson: 91,
  },
  {
    Id: 102,
    Name: "Rita Pfalzheim",
    Designation: "Senior S/w Engg",
    ImageUrl: "../content/images/orgchart/Thomas.png",
    IsExpand: "false",
    RatingColor: "#D46E89",
    ReportingPerson: 101,
  },
  {
    Id: 103,
    Name: "Paula Wilson",
    Designation: "Project Trainee",
    ImageUrl: "../content/images/orgchart/Jenny.png",
    IsExpand: "None",
    RatingColor: "#D46E89",
    ReportingPerson: 750,
  },
  {
    Id: 104,
    Name: " Jose Michael",
    Designation: "Project Trainee",
    ImageUrl: "../content/images/orgchart/eric.png",
    IsExpand: "None",
    RatingColor: "#93B85A",
    ReportingPerson: 102,
  },
  {
    Id: 105,
    Name: "Mauri Moroni",
    Designation: "Project Trainee",
    ImageUrl: "../content/images/orgchart/image55.png",
    IsExpand: "None",
    RatingColor: "#D46E89",
    ReportingPerson: 35,
  },
  {
    Id: 106,
    Name: "Janete Limeira",
    Designation: "Senior S/w Engg",
    ImageUrl: "../content/images/orgchart/image57.png",
    IsExpand: "None",
    RatingColor: "#D46E89",
    ReportingPerson: 35,
  },
  {
    Id: 107,
    Name: "Michael Holz",
    Designation: "Project Trainee",
    ImageUrl: "../content/images/orgchart/image53.png",
    IsExpand: "None",
    RatingColor: "#D46E89",
    ReportingPerson: 35,
  },
  {
    Id: 108,
    Name: "Alej Camino",
    Designation: "Project Trainee",
    ImageUrl: "../content/images/orgchart/image51.png",
    IsExpand: "None",
    RatingColor: "#93B85A",
    ReportingPerson: 35,
  },
];
let items = new DataManager(data, new Query().take(7));

const width = "100%";
const height = "590px";

//Configures data source for Diagram
const dataSourceSettings = {
  id: "Id",
  parentId: "ReportingPerson",
  dataSource: items,
};
//Uses layout to auto-arrange nodes on the Diagram page
const layout = {
  type: "OrganizationalChart",
  margin: { top: 20 },
  getLayoutInfo: (node, tree) => {
    if (!tree.hasSubTree) {
      tree.orientation = "Vertical";
      tree.type = "Alternate";
    }
  },
};

//Sets the default properties for nodes and connectors
const getNodeDefaults = (node) => {
  node.height = 50;
  node.backgroundColor = "lightgrey";
  node.style = { fill: "transparent", strokeWidth: 2 };
  return node;
};
const getConnectorDefaults = (connector) => {
  connector.targetDecorator.shape = "None";
  connector.type = "Orthogonal";
  return connector;
};

provide("diagram", [HierarchicalTree, DataBinding]);

const page = function () {
  var diagramInstance = diagramObj.value.ej2Instances;
  diagramInstance.fitToPage({
    mode: "Page",
    region: "Content",
    margin: {},
    canZoomIn: false,
  });
};
const fitTowidth = function () {
  var diagramInstance = diagramObj.value.ej2Instances;
  diagramInstance.fitToPage({
    mode: "Width",
    region: "Content",
    margin: {},
    canZoomIn: false,
  });
};
const fitToheight = function () {
  var diagramInstance = diagramObj.value.ej2Instances;
  diagramInstance.fitToPage({
    mode: "Height",
    region: "Content",
    margin: {},
    canZoomIn: false,
  });
};
</script>

<style>
@import "../node_modules/@syncfusion/ej2-vue-diagrams/styles/tailwind3.css";
@import "../node_modules/@syncfusion/ej2-base/styles/tailwind3.css";
@import "../node_modules/@syncfusion/ej2-popups/styles/tailwind3.css";
@import "../node_modules/@syncfusion/ej2-splitbuttons/styles/tailwind3.css";
@import "../node_modules/@syncfusion/ej2-navigations/styles/tailwind3.css";
</style><template>
<div id="app">
<ejs-button v-on:click="page">Fit To Page </ejs-button>
<ejs-button v-on:click="fitToWidth">Fit To Width </ejs-button>
<ejs-button v-on:click="fitToHeight">Fit To Height </ejs-button>
<ejs-diagram id="diagram" ref="diagram" :width='width' :height='height' :getNodeDefaults='getNodeDefaults'
:getConnectorDefaults='getConnectorDefaults' :layout='layout'
:dataSourceSettings='dataSourceSettings'></ejs-diagram>
</div>
</template>
<script>
import { DiagramComponent, HierarchicalTree, DataBinding } from '@syncfusion/ej2-vue-diagrams';
import { DataManager, Query } from "@syncfusion/ej2-data";
import { ButtonComponent } from '@syncfusion/ej2-vue-buttons';
let data = [
{
Id: 'parent',
Name: 'Maria Anders',
Designation: 'Managing Director',
ImageUrl: '../content/images/orgchart/Clayton.png',
IsExpand: 'true',
RatingColor: '#C34444',
},
{
Id: 1,
Name: 'Ana Trujillo',
Designation: 'Project Manager',
ImageUrl: '../content/images/orgchart/Thomas.PNG',
IsExpand: 'false',
RatingColor: '#68C2DE',
ReportingPerson: 'parent',
},
{
Id: 2,
Name: 'Anto Moreno',
Designation: 'Project Lead',
ImageUrl: '../content/images/orgchart/image53.png',
IsExpand: 'false',
RatingColor: '#93B85A',
ReportingPerson: 1,
},
{
Id: 3,
Name: 'Thomas Hardy',
Designation: 'Senior S/w Engg',
ImageUrl: '../content/images/orgchart/image57.png',
IsExpand: 'false',
RatingColor: '#68C2DE',
ReportingPerson: 2,
},
{
Id: 4,
Name: 'Christina kaff',
Designation: 'S/w Engg',
ImageUrl: '../content/images/orgchart/Robin.png',
IsExpand: 'false',
RatingColor: '#93B85A',
ReportingPerson: 3,
},
{
Id: 5,
Name: 'Hanna Moos',
Designation: 'Project Trainee',
ImageUrl: '../content/images/orgchart/image57.png',
IsExpand: 'true',
RatingColor: '#D46E89',
ReportingPerson: 4,
},
{
Id: 6,
Name: 'Peter Citeaux',
Designation: 'Project Trainee',
ImageUrl: '../content/images/orgchart/Robin.png',
IsExpand: 'true',
RatingColor: '#68C2DE',
ReportingPerson: 4,
},
{
Id: 7,
Name: 'Martín Kloss',
Designation: 'Senior S/w Engg',
ImageUrl: '../content/images/orgchart/Robin.png',
IsExpand: 'false',
RatingColor: '#93B85A',
ReportingPerson: 1,
},
{
Id: 9,
Name: 'Elizabeth Mary',
Designation: 'Project Trainee',
ImageUrl: '../content/images/orgchart/Robin.png',
IsExpand: 'None',
RatingColor: '#93B85A',
ReportingPerson: 8,
},
{
Id: 10,
Name: 'Victoria Ash',
Designation: 'Project Trainee',
ImageUrl: '../content/images/orgchart/Robin.png',
IsExpand: 'None',
RatingColor: '#D46E89',
ReportingPerson: 8,
},
{
Id: 12,
Name: 'Francisco Yang',
Designation: 'CSR',
ImageUrl: '../content/images/orgchart/image55.png',
IsExpand: 'None',
RatingColor: '#93B85A',
ReportingPerson: 7,
},
{
Id: 13,
Name: 'Yang Wang',
Designation: 'CSR',
ImageUrl: '../content/images/orgchart/image57.png',
IsExpand: 'None',
RatingColor: '#EBB92E',
ReportingPerson: 6,
},
{
Id: 27,
Name: 'Lino Rodri',
Designation: 'Project Manager',
ImageUrl: '../content/images/orgchart/Robin.PNG',
IsExpand: 'true',
RatingColor: '#68C2DE',
ReportingPerson: 'parent',
},
{
Id: 38,
Name: 'Philip Cramer',
Designation: 'Project Manager',
ImageUrl: '../content/images/orgchart/Robin.PNG',
IsExpand: 'true',
RatingColor: '#68C2DE',
ReportingPerson: 'parent',
},
{
Id: 14,
Name: 'Pedro Afonso',
Designation: 'Project Manager',
ImageUrl: '../content/images/orgchart/Paul.png',
IsExpand: 'true',
RatingColor: '#68C2DE',
ReportingPerson: 'parent',
},
{
Id: 15,
Name: 'Elizabeth Roel',
Designation: 'Project Lead',
ImageUrl: '../content/images/orgchart/Maria.png',
IsExpand: 'false',
RatingColor: '#93B85A',
ReportingPerson: 38,
},
{
Id: 17,
Name: 'Janine Labrune',
Designation: 'Project Trainee',
ImageUrl: '../content/images/orgchart/image55.png',
IsExpand: 'None',
RatingColor: '#D46E89',
ReportingPerson: 48,
},
{
Id: 18,
Name: 'Ann Devon',
Designation: 'CSR',
ImageUrl: '../content/images/orgchart/Robin.png',
IsExpand: 'false',
RatingColor: '#68C2DE',
ReportingPerson: 31,
},
{
Id: 19,
Name: 'Roland Mendel',
Designation: 'CSR',
ImageUrl: '../content/images/orgchart/image57.png',
IsExpand: 'true',
RatingColor: '#68C2DE',
ReportingPerson: 31,
},
{
Id: 20,
Name: 'Aria Cruz',
Designation: 'Project Lead',
ImageUrl: '../content/images/orgchart/Jenny.png',
IsExpand: 'false',
RatingColor: '#93B85A',
ReportingPerson: 14,
},
{
Id: 22,
Name: 'Martine Rancé',
Designation: 'Project Trainee',
ImageUrl: '../content/images/orgchart/image53.png',
IsExpand: 'None',
RatingColor: '#93B85A',
ReportingPerson: 21,
},
{
Id: 23,
Name: 'Maria Larsson',
Designation: 'Senior S/w Engg',
ImageUrl: '../content/images/orgchart/image51.png',
IsExpand: 'false',
RatingColor: '#EBB92E',
ReportingPerson: 20,
},
{
Id: 21,
Name: 'Diego Roel',
Designation: 'Senior S/w Engg',
ImageUrl: '../content/images/orgchart/image55.png',
IsExpand: 'false',
RatingColor: '#D46E89',
ReportingPerson: 20,
},
{
Id: 24,
Name: 'Peter Franken',
Designation: 'S/w Engg',
ImageUrl: '../content/images/orgchart/image55.png',
IsExpand: 'None',
RatingColor: '#D46E89',
ReportingPerson: 23,
},
{
Id: 25,
Name: 'Carine Schmitt',
Designation: 'Project Trainee',
ImageUrl: '../content/images/orgchart/Clayton.png',
IsExpand: 'None',
RatingColor: '#EBB92E',
ReportingPerson: 21,
},
{
Id: 26,
Name: 'Paolo Accorti',
Designation: 'Project Trainee',
ImageUrl: '../content/images/orgchart/Thomas.png',
IsExpand: 'None',
RatingColor: '#D46E89',
ReportingPerson: 21,
},
{
Id: 28,
Name: 'Eduardo Roel',
Designation: 'Project Lead',
ImageUrl: '../content/images/orgchart/image55.png',
IsExpand: 'true',
RatingColor: '#93B85A',
ReportingPerson: 38,
},
{
Id: 29,
Name: 'José Pedro ',
Designation: 'Senior S/w Engg',
ImageUrl: '../content/images/orgchart/Thomas.png',
IsExpand: 'true',
RatingColor: '#D46E89',
ReportingPerson: 28,
},
{
Id: 30,
Name: 'André Fonseca',
Designation: 'Project Trainee',
ImageUrl: '../content/images/orgchart/John.png',
IsExpand: 'true',
RatingColor: '#EBB92E',
ReportingPerson: 29,
},
{
Id: 31,
Name: 'Howard Snyd',
Designation: 'Project Lead',
ImageUrl: '../content/images/orgchart/Jenny.png',
IsExpand: 'false',
RatingColor: '#68C2DE',
ReportingPerson: 14,
},
{
Id: 32,
Name: 'Manu Pereira',
Designation: 'Senior S/w Engg',
ImageUrl: '../content/images/orgchart/image56.png',
IsExpand: 'None',
RatingColor: '#D46E89',
ReportingPerson: 8,
},
{
Id: 33,
Name: 'Mario Pontes',
Designation: 'Project Trainee',
ImageUrl: '../content/images/orgchart/Robin.png',
IsExpand: 'None',
RatingColor: '#D46E89',
ReportingPerson: 19,
},
{
Id: 34,
Name: 'Carlos Schmitt',
Designation: 'S/w Engg',
ImageUrl: '../content/images/orgchart/Clayton.png',
IsExpand: 'None',
RatingColor: '#D46E89',
ReportingPerson: 19,
},
{
Id: 35,
Name: 'Yoshi Latimer',
Designation: 'SR',
ImageUrl: '../content/images/orgchart/eric.png',
IsExpand: 'true',
RatingColor: '#D46E89',
ReportingPerson: 18,
},
{
Id: 36,
Name: 'Patricia Kenna',
Designation: 'SR',
ImageUrl: '../content/images/orgchart/Maria.png',
IsExpand: 'true',
RatingColor: '#EBB92E',
ReportingPerson: 55,
},
{
Id: 37,
Name: 'Helen Bennett',
Designation: 'SR',
ImageUrl: '../content/images/orgchart/image51.png',
IsExpand: 'None',
RatingColor: '#D46E89',
ReportingPerson: 15,
},
{
Id: 39,
Name: 'Daniel Tonini',
Designation: 'Project Lead',
ImageUrl: '../content/images/orgchart/Thomas.png',
IsExpand: 'true',
RatingColor: '#93B85A',
ReportingPerson: 27,
},
{
Id: 40,
Name: 'Annette Roel',
Designation: 'Senior S/w Engg',
ImageUrl: '../content/images/orgchart/image55.png',
IsExpand: 'false',
RatingColor: '#93B85A',
ReportingPerson: 39,
},
{
Id: 41,
Name: 'Yoshi Wilson',
Designation: 'S/w Engg',
ImageUrl: '../content/images/orgchart/image57.png',
IsExpand: 'false',
RatingColor: '#EBB92E',
ReportingPerson: 40,
},
{
Id: 42,
Name: 'John Steel',
Designation: 'Project Trainee',
ImageUrl: '../content/images/orgchart/Maria.png',
IsExpand: 'false',
RatingColor: '#93B85A',
ReportingPerson: 41,
},
{
Id: 43,
Name: 'Renate Jose',
Designation: 'Project Trainee',
ImageUrl: '../content/images/orgchart/image51.png',
IsExpand: 'None',
RatingColor: '#D46E89',
ReportingPerson: 42,
},
{
Id: 44,
Name: 'Jaime Yorres',
Designation: 'Project Trainee',
ImageUrl: '../content/images/orgchart/Robin.png',
IsExpand: 'None',
RatingColor: '#93B85A',
ReportingPerson: 42,
},
{
Id: 45,
Name: 'Carlos Nagy',
Designation: 'SR',
ImageUrl: '../content/images/orgchart/Clayton.png',
IsExpand: 'None',
RatingColor: '#93B85A',
ReportingPerson: 40,
},
{
Id: 46,
Name: 'Felipe Kloss',
Designation: 'SR',
ImageUrl: '../content/images/orgchart/Thomas.png',
IsExpand: 'false',
RatingColor: '#EBB92E',
ReportingPerson: 17,
},
{
Id: 47,
Name: 'Fran Wilson',
Designation: 'SR',
ImageUrl: '../content/images/orgchart/image53.png',
IsExpand: 'None',
RatingColor: '#93B85A',
ReportingPerson: 46,
},
{
Id: 48,
Name: 'John Rovelli',
Designation: 'SR',
ImageUrl: '../content/images/orgchart/Jenny.png',
IsExpand: 'None',
RatingColor: '#93B85A',
ReportingPerson: 46,
},
{
Id: 49,
Name: 'Catherine Kaff',
Designation: 'Senior S/w Engg',
ImageUrl: '../content/images/orgchart/image57.png',
IsExpand: 'false',
RatingColor: '#93B85A',
ReportingPerson: 51,
},
{
Id: 50,
Name: 'Jean Fresnière',
Designation: 'S/w Engg',
ImageUrl: '../content/images/orgchart/Robin.png',
IsExpand: 'false',
RatingColor: '#D46E89',
ReportingPerson: 49,
},
{
Id: 51,
Name: 'Alex Feuer',
Designation: 'Project Trainee',
ImageUrl: '../content/images/orgchart/Clayton.png',
IsExpand: 'None',
RatingColor: '#93B85A',
ReportingPerson: 50,
},
{
Id: 52,
Name: 'Simon Roel',
Designation: 'S/w Engg',
ImageUrl: '../content/images/orgchart/Thomas.png',
IsExpand: 'None',
RatingColor: '#EBB92E',
ReportingPerson: 50,
},
{
Id: 53,
Name: 'Yvonne Wong',
Designation: 'Project Trainee',
ImageUrl: '../content/images/orgchart/image53.png',
IsExpand: 'None',
RatingColor: '#93B85A',
ReportingPerson: 50,
},
{
Id: 54,
Name: 'Rene Phillips',
Designation: 'S/w Engg',
ImageUrl: '../content/images/orgchart/Jenny.png',
IsExpand: 'None',
RatingColor: '#D46E89',
ReportingPerson: 7,
},
{
Id: 55,
Name: 'Yoshi Kenna',
Designation: 'Project Trainee',
ImageUrl: '../content/images/orgchart/image55.png',
IsExpand: 'false',
RatingColor: '#EBB92E',
ReportingPerson: 15,
},
{
Id: 56,
Name: 'Helen Marie',
Designation: 'Project Trainee',
ImageUrl: '../content/images/orgchart/image51.png',
IsExpand: 'true',
RatingColor: '#EBB92E',
ReportingPerson: 55,
},
{
Id: 57,
Name: 'Joseph Kaff',
Designation: 'Project Trainee',
ImageUrl: '../content/images/orgchart/image53.png',
IsExpand: 'None',
RatingColor: '#EBB92E',
ReportingPerson: 7,
},
{
Id: 58,
Name: 'Georg Pipps',
Designation: 'SR',
ImageUrl: '../content/images/orgchart/Thomas.png',
IsExpand: 'None',
RatingColor: '#EBB92E',
ReportingPerson: 5,
},
{
Id: 60,
Name: 'Nardo Batista',
Designation: 'Project Lead',
ImageUrl: '../content/images/orgchart/Maria.PNG',
IsExpand: 'true',
RatingColor: '#68C2DE',
ReportingPerson: 59,
},
{
Id: 61,
Name: 'Lúcia Carvalho',
Designation: 'Senior S/w Engg',
ImageUrl: '../content/images/orgchart/Robin.PNG',
IsExpand: 'false',
RatingColor: '#93B85A',
ReportingPerson: 60,
},
{
Id: 62,
Name: 'Horst Kloss',
Designation: 'Project Trainee',
ImageUrl: '../content/images/orgchart/Clayton.PNG',
IsExpand: 'None',
RatingColor: '#68C2DE',
ReportingPerson: 74,
},
{
Id: 63,
Name: 'Sergio roel',
Designation: 'Project Trainee',
ImageUrl: '../content/images/orgchart/image55.PNG',
IsExpand: 'None',
RatingColor: '#EBB92E',
ReportingPerson: 61,
},
{
Id: 64,
Name: 'Paula Wilson',
Designation: 'S/w Engg',
ImageUrl: '../content/images/orgchart/eric.PNG',
IsExpand: 'None',
RatingColor: '#68C2DE',
ReportingPerson: 7,
},
{
Id: 65,
Name: 'Mauri Moroni',
Designation: 'Project Trainee',
ImageUrl: '../content/images/orgchart/image53.PNG',
IsExpand: 'None',
RatingColor: '#93B85A',
ReportingPerson: 6,
},
{
Id: 66,
Name: 'Janete Limeira',
Designation: 'Project Trainee',
ImageUrl: '../content/images/orgchart/image51.PNG',
IsExpand: 'None',
RatingColor: '#93B85A',
ReportingPerson: 7,
},
{
Id: 67,
Name: 'Michael Holz',
Designation: 'Project Lead',
ImageUrl: '../content/images/orgchart/Thomas.PNG',
IsExpand: 'true',
RatingColor: '#68C2DE',
ReportingPerson: 59,
},
{
Id: 68,
Name: 'Alej Camino',
Designation: 'Senior S/w Engg',
ImageUrl: '../content/images/orgchart/Thomas.PNG',
IsExpand: 'false',
RatingColor: '#93B85A',
ReportingPerson: 67,
},
{
Id: 69,
Name: 'Jonas Bergsen',
Designation: 'Project Trainee',
ImageUrl: '../content/images/orgchart/image53.PNG',
IsExpand: 'None',
RatingColor: '#68C2DE',
ReportingPerson: 19,
},
{
Id: 70,
Name: 'Jose Pavarotti',
Designation: 'S/w Engg',
ImageUrl: '../content/images/orgchart/Maria.PNG',
IsExpand: 'None',
RatingColor: '#D46E89',
ReportingPerson: 56,
},
{
Id: 71,
Name: 'Miguel Angel',
Designation: 'Project Trainee',
ImageUrl: '../content/images/orgchart/eric.PNG',
IsExpand: 'None',
RatingColor: '#D46E89',
ReportingPerson: 16,
},
{
Id: 72,
Name: 'Jytte Petersen',
Designation: 'Project Manager',
ImageUrl: '../content/images/orgchart/image55.PNG',
IsExpand: 'true',
RatingColor: '#68C2DE',
ReportingPerson: 59,
},
{
Id: 73,
Name: 'Kloss Perrier',
Designation: 'Project Lead',
ImageUrl: '../content/images/orgchart/Clayton.png',
IsExpand: 'None',
RatingColor: '#93B85A',
ReportingPerson: 23,
},
{
Id: 74,
Name: 'Art Nancy',
Designation: 'Project Trainee',
ImageUrl: '../content/images/orgchart/Thomas.png',
IsExpand: 'true',
RatingColor: '#D46E89',
ReportingPerson: 29,
},
{
Id: 75,
Name: 'Pascal Cartrain',
Designation: 'Project Trainee',
ImageUrl: '../content/images/orgchart/John.png',
IsExpand: 'true',
RatingColor: '#EBB92E',
ReportingPerson: 36,
},
{
Id: 76,
Name: 'Liz Nixon',
Designation: 'Project Lead',
ImageUrl: '../content/images/orgchart/Jenny.png',
IsExpand: 'false',
RatingColor: '#68C2DE',
ReportingPerson: 72,
},
{
Id: 77,
Name: 'Liu Wong',
Designation: 'Senior S/w Engg',
ImageUrl: '../content/images/orgchart/image57.png',
IsExpand: 'None',
RatingColor: '#D46E89',
ReportingPerson: 75,
},
{
Id: 78,
Name: 'Karin Josephs',
Designation: 'Senior S/w Engg',
ImageUrl: '../content/images/orgchart/image55.png',
IsExpand: 'None',
RatingColor: '#D46E89',
ReportingPerson: 76,
},
{
Id: 79,
Name: 'Ruby Anabela ',
Designation: 'Senior S/w Engg',
ImageUrl: '../content/images/orgchart/Thomas.png',
IsExpand: 'None',
RatingColor: '#D46E89',
ReportingPerson: 23,
},
{
Id: 80,
Name: 'Helvetis Nagy',
Designation: 'Project Trainee',
ImageUrl: '../content/images/orgchart/image53.png',
IsExpand: 'None',
RatingColor: '#D46E89',
ReportingPerson: 75,
},
{
Id: 81,
Name: 'Palle Ibsen',
Designation: 'S/w Engg',
ImageUrl: '../content/images/orgchart/image51.png',
IsExpand: 'None',
RatingColor: '#D46E89',
ReportingPerson: 35,
},
{
Id: 82,
Name: 'Mary Saveley',
Designation: 'Project Manager',
ImageUrl: '../content/images/orgchart/Clayton.png',
IsExpand: 'false',
RatingColor: '#93B85A',
ReportingPerson: 59,
},
{
Id: 83,
Name: 'Paul Henriot',
Designation: 'Project Lead',
ImageUrl: '../content/images/orgchart/Thomas.png',
IsExpand: 'false',
RatingColor: '#D46E89',
ReportingPerson: 30,
},
{
Id: 84,
Name: 'Rita Müller',
Designation: 'Project Trainee',
ImageUrl: '../content/images/orgchart/Paul.png',
IsExpand: 'None',
RatingColor: '#68C2DE',
ReportingPerson: 83,
},
{
Id: 85,
Name: 'Pirkko King',
Designation: 'Senior S/w Engg',
ImageUrl: '../content/images/orgchart/Robin.png',
IsExpand: 'None',
RatingColor: '#D46E89',
ReportingPerson: 83,
},
{
Id: 86,
Name: 'Paula Parente',
Designation: 'Project Lead',
ImageUrl: '../content/images/orgchart/John.png',
IsExpand: 'None',
RatingColor: '#EBB92E',
ReportingPerson: 74,
},
{
Id: 87,
Name: 'Karl Jablonski',
Designation: 'Senior S/w Engg',
ImageUrl: '../content/images/orgchart/image53.png',
IsExpand: 'None',
RatingColor: '#D46E89',
ReportingPerson: 23,
},
{
Id: 88,
Name: 'Matti Kenna',
Designation: 'Project Lead',
ImageUrl: '../content/images/orgchart/Jenny.png',
IsExpand: 'None',
RatingColor: '#93B85A',
ReportingPerson: 23,
},
{
Id: 89,
Name: 'Zbyszek Yang',
Designation: 'Senior S/w Engg',
ImageUrl: '../content/images/orgchart/Thomas.png',
IsExpand: 'None',
RatingColor: '#93B85A',
ReportingPerson: 23,
},
{
Id: 90,
Name: 'Nancy',
Designation: 'Senior S/w Engg',
ImageUrl: '../content/images/orgchart/image56.png',
IsExpand: 'None',
RatingColor: '#93B85A',
ReportingPerson: 23,
},
{
Id: 91,
Name: 'Robert King',
Designation: 'Project Manager',
ImageUrl: '../content/images/orgchart/Thomas.png',
IsExpand: 'true',
RatingColor: '#D46E89',
ReportingPerson: 59,
},
{
Id: 92,
Name: 'Laura Callahan',
Designation: 'Project Lead',
ImageUrl: '../content/images/orgchart/Robin.png',
IsExpand: 'false',
RatingColor: '#D46E89',
ReportingPerson: 91,
},
{
Id: 93,
Name: 'Anne',
Designation: 'Senior S/w Engg',
ImageUrl: '../content/images/orgchart/Clayton.png',
IsExpand: 'false',
RatingColor: '#68C2DE',
ReportingPerson: 92,
},
{
Id: 94,
Name: 'Georg Pipps',
Designation: 'Project Trainee',
ImageUrl: '../content/images/orgchart/image53.png',
IsExpand: 'None',
RatingColor: '#EBB92E',
ReportingPerson: 5,
},
{
Id: 95,
Name: 'Isabel Castro',
Designation: 'Senior S/w Engg',
ImageUrl: '../content/images/orgchart/image55.png',
IsExpand: 'None',
RatingColor: '#D46E89',
ReportingPerson: 93,
},
{
Id: 96,
Name: 'Nardo Batista',
Designation: 'Senior S/w Engg',
ImageUrl: '../content/images/orgchart/image57.png',
IsExpand: 'None',
RatingColor: '#EBB92E',
ReportingPerson: 93,
},
{
Id: 97,
Name: 'Rene Phillips',
Designation: 'Senior S/w Engg',
ImageUrl: '../content/images/orgchart/image55.png',
IsExpand: 'false',
RatingColor: '#68C2DE',
ReportingPerson: 92,
},
{
Id: 98,
Name: 'Lúcia Carvalho',
Designation: 'S/w Engg',
ImageUrl: '../content/images/orgchart/Thomas.png',
IsExpand: 'None',
RatingColor: '#93B85A',
ReportingPerson: 97,
},
{
Id: 99,
Name: 'Horst Kloss',
Designation: 'Project Trainee',
ImageUrl: '../content/images/orgchart/Paul.png',
IsExpand: 'None',
RatingColor: '#D46E89',
ReportingPerson: 56,
},
{
Id: 101,
Name: 'Simon Roel',
Designation: 'Project Lead',
ImageUrl: '../content/images/orgchart/Clayton.png',
IsExpand: 'true',
RatingColor: '#93B85A',
ReportingPerson: 91,
},
{
Id: 102,
Name: 'Rita Pfalzheim',
Designation: 'Senior S/w Engg',
ImageUrl: '../content/images/orgchart/Thomas.png',
IsExpand: 'false',
RatingColor: '#D46E89',
ReportingPerson: 101,
},
{
Id: 103,
Name: 'Paula Wilson',
Designation: 'Project Trainee',
ImageUrl: '../content/images/orgchart/Jenny.png',
IsExpand: 'None',
RatingColor: '#D46E89',
ReportingPerson: 750,
},
{
Id: 104,
Name: ' Jose Michael',
Designation: 'Project Trainee',
ImageUrl: '../content/images/orgchart/eric.png',
IsExpand: 'None',
RatingColor: '#93B85A',
ReportingPerson: 102,
},
{
Id: 105,
Name: 'Mauri Moroni',
Designation: 'Project Trainee',
ImageUrl: '../content/images/orgchart/image55.png',
IsExpand: 'None',
RatingColor: '#D46E89',
ReportingPerson: 35,
},
{
Id: 106,
Name: 'Janete Limeira',
Designation: 'Senior S/w Engg',
ImageUrl: '../content/images/orgchart/image57.png',
IsExpand: 'None',
RatingColor: '#D46E89',
ReportingPerson: 35,
},
{
Id: 107,
Name: 'Michael Holz',
Designation: 'Project Trainee',
ImageUrl: '../content/images/orgchart/image53.png',
IsExpand: 'None',
RatingColor: '#D46E89',
ReportingPerson: 35,
},
{
Id: 108,
Name: 'Alej Camino',
Designation: 'Project Trainee',
ImageUrl: '../content/images/orgchart/image51.png',
IsExpand: 'None',
RatingColor: '#93B85A',
ReportingPerson: 35,
}
];
let items = new DataManager(data, new Query().take(7));
export default {
name: "App",
components: {
"ejs-diagram": DiagramComponent,
'ejs-button': ButtonComponent,
},
data() {
return {
width: "100%",
height: "690px",
//Uses layout to auto-arrange nodes on the Diagram page
layout: {
type: 'OrganizationalChart',
margin: { top: 20 },
getLayoutInfo: (node , tree) => {
if (!tree.hasSubTree) {
tree.orientation = 'Vertical';
tree.type = 'Alternate';
}
},
},
//Configures data source for Diagram
dataSourceSettings: {
id: 'Id',
parentId: 'ReportingPerson',
dataSource: items,
},
//Sets the default properties for nodes and connectors
getNodeDefaults: (obj) => {
obj.height = 50;
obj.backgroundColor = 'lightgrey';
obj.style = { fill: 'transparent', strokeWidth: 2 };
return obj;
},
getConnectorDefaults: (connector) => {
connector.targetDecorator.shape = 'None';
connector.type = 'Orthogonal';
return connector;
},
}
},
provide: {
diagram: [HierarchicalTree, DataBinding]
},
methods: {
page: function () {
var diagramInstance = this.$refs.diagram.ej2Instances;
diagramInstance.fitToPage({
mode: 'Page',
region: 'Content',
margin: {},
canZoomIn: false,
});
},
fitToWidth: function () {
var diagramInstance = this.$refs.diagram.ej2Instances;
diagramInstance.fitToPage({
mode: 'Width',
region: 'Content',
margin: {},
canZoomIn: false,
});
},
fitToHeight: function () {
var diagramInstance = this.$refs.diagram.ej2Instances;
diagramInstance.fitToPage({
mode: 'Height',
region: 'Content',
margin: {},
canZoomIn: false,
});
},
},
}
</script>
<style>
@import "../node_modules/@syncfusion/ej2-vue-diagrams/styles/tailwind3.css";
@import "../node_modules/@syncfusion/ej2-base/styles/tailwind3.css";
@import "../node_modules/@syncfusion/ej2-popups/styles/tailwind3.css";
@import "../node_modules/@syncfusion/ej2-splitbuttons/styles/tailwind3.css";
@import "../node_modules/@syncfusion/ej2-navigations/styles/tailwind3.css";
</style>Command manager
The Diagram provides support for mapping or binding command execution to specific key gestures. It includes built-in commands and allows for the definition of custom commands through the
CommandManager. Custom commands are executed when the specified key gesture is recognized.
Custom command
To define a custom command, specify the following properties:
-
execute: A method to be executed. -
canExecute: A method to define whether the command can be executed at the moment. -
gesture: A combination ofkeysandKeyModifiers. -
parameter: Defines any additional parameters that are required at runtime. -
name: Defines the name of the command.
To explore the properties of custom commands, refer to Commands.
The following code example illustrates how to use the command manager to clone a node and change the fill color of a node while pressing G and Shift+G or Alt+G, respectively:
<template>
  <div id="app">
    <ejs-diagram
      id="diagram"
      ref="diagram"
      :width="width"
      :height="height"
      :scrollSettings="scrollSettings"
      :nodes="nodes"
      :commandManager="commandManager"
    />
  </div>
</template>

<script setup>
import { onMounted, ref } from "vue";
import { DiagramComponent as EjsDiagram, Keys, KeyModifiers } from '@syncfusion/ej2-vue-diagrams';

// Refs for the diagram component and instances
const diagram = ref(null);
let diagramInstance;

// Reactive properties
const width = "700px";
const height = "350px";
const scrollSettings = { scrollLimit: 'Infinity' };

const nodes = ref([
  {
    id: 'node1',
    offsetX: 100,
    offsetY: 100,
    width: 70,
    height: 40,
    style: { fill: '#64abbb' },
  }
]);

const commandManager = ref({
  commands: [
    {
      name: 'clone',
      canExecute: () => {
        return diagramInstance.selectedItems.nodes.length > 0;
      },
      execute: () => {
        diagramInstance.copy();
        diagramInstance.paste();
      },
      gesture: {
        key: Keys.G,
        keyModifiers: null,
      },
    },
    {
      name: 'color',
      canExecute: () => {
        return diagramInstance.selectedItems.nodes.length > 0;
      },
      execute: () => {
        const selectedNode = diagramInstance.selectedItems.nodes[0];
        // Toggle the node color
        selectedNode.style.fill =
          selectedNode.style.fill === '#64abbb' ? 'yellow' : '#64abbb';
        diagramInstance.dataBind();
      },
      gesture: {
        key: Keys.G,
        keyModifiers: KeyModifiers.Shift | KeyModifiers.Alt,
      },
    }
  ]
});

onMounted(() => {
  // Assign the Diagram instance when the component is mounted
  diagramInstance = diagram.value.ej2Instances;
});
</script>
<style>
@import "../node_modules/@syncfusion/ej2-vue-diagrams/styles/tailwind3.css";
@import "../node_modules/@syncfusion/ej2-base/styles/tailwind3.css";
@import "../node_modules/@syncfusion/ej2-popups/styles/tailwind3.css";
@import "../node_modules/@syncfusion/ej2-splitbuttons/styles/tailwind3.css";
@import "../node_modules/@syncfusion/ej2-navigations/styles/tailwind3.css";
</style><template>
<div id="app">
<ejs-diagram
id="diagram"
ref="diagram"
:width="width"
:height="height"
:scrollSettings="scrollSettings"
:nodes="nodes"
:commandManager="commandManager"
></ejs-diagram>
</div>
</template>
<script>
import {
DiagramComponent,
Keys,
KeyModifiers,
} from '@syncfusion/ej2-vue-diagrams';
export default {
name: 'App',
components: {
'ejs-diagram': DiagramComponent,
},
data() {
return {
width: '700px',
height: '350px',
scrollSettings: { scrollLimit: 'Infinity' },
nodes: [
{
id: 'node1',
offsetX: 100,
offsetY: 100,
width: 70,
height: 40,
style: { fill: '#64abbb' },
},
],
commandManager: {
commands: [
{
name: 'clone',
canExecute: () => {
return this.diagramInstance.selectedItems.nodes.length > 0;
},
execute: () => {
this.diagramInstance.copy();
this.diagramInstance.paste();
},
gesture: {
// Press G to clone node
key: Keys.G,
keyModifiers: null,
},
},
{
name: 'color',
canExecute: () => {
return this.diagramInstance.selectedItems.nodes.length > 0;
},
execute: () => {
const selectedNode = this.diagramInstance.selectedItems.nodes[0];
// Toggle the node color
selectedNode.style.fill =
selectedNode.style.fill === '#64abbb' ? 'yellow' : '#64abbb';
this.diagramInstance.dataBind();
},
gesture: {
// Press Shift+G or Alt+G to change node color
key: Keys.G,
keyModifiers: KeyModifiers.Shift | KeyModifiers.Alt,
},
},
],
},
};
},
mounted() {
this.diagramInstance = this.$refs.diagram.ej2Instances;
},
};
</script>
<style>
@import "../node_modules/@syncfusion/ej2-vue-diagrams/styles/tailwind3.css";
@import "../node_modules/@syncfusion/ej2-base/styles/tailwind3.css";
@import "../node_modules/@syncfusion/ej2-popups/styles/tailwind3.css";
@import "../node_modules/@syncfusion/ej2-splitbuttons/styles/tailwind3.css";
@import "../node_modules/@syncfusion/ej2-navigations/styles/tailwind3.css";
</style>Disable/Modify the existing command
When any of the default commands are not desired, they can be disabled. Additionally, if you need to change the functionality of a specific command, it can be completely modified.
The following code example illustrates how to disable the default cut and delete commands using CTRL+X and Delete keys, and how to modify the copy command to clone a node using CTRL+C:
<template>
  <div id="app">
    <ejs-diagram
      id="diagram"
      ref="diagram"
      :width="width"
      :height="height"
      :scrollSettings="scrollSettings"
      :nodes="nodes"
      :commandManager="commandManager"
    />
  </div>
</template>

<script setup>
import { onMounted, ref } from "vue";
import {
  DiagramComponent as EjsDiagram,
  Keys,
  KeyModifiers,
} from "@syncfusion/ej2-vue-diagrams";

// Refs for the diagram component and instances
const diagram = ref(null);
let diagramInstance;

// Reactive properties
const width = "700px";
const height = "350px";
const scrollSettings = { scrollLimit: "Infinity" };

const nodes = ref([
  {
    id: "node1",
    offsetX: 100,
    offsetY: 100,
    width: 70,
    height: 40,
    style: { fill: "#64abbb" },
  },
]);

const commandManager = ref({
  commands: [
    {
      //Preventing default cut command
      name: "cut",
      canExecute: function () {
        return false;
      },
      execute: null,
      gesture: {
        key: Keys.X,
        keyModifiers: KeyModifiers.Control,
      },
    },
    {
      //Preventing default delete command
      name: "delete",
      canExecute: function () {
        return false;
      },
      execute: null,
      gesture: {
        key: Keys.Delete,
      },
    },
    {
      //Modifying copy command to clone node
      name: "clone",
      canExecute: function () {
        let execute = diagramInstance.selectedItems.nodes.length > 0;
        return execute;
      },
      execute: function () {
        diagramInstance.copy();
        diagramInstance.paste();
      },
      gesture: {
        //Press CTRL+C to clone node
        key: Keys.C,
        keyModifiers: KeyModifiers.Control,
      },
    },
  ],
});

onMounted(() => {
  // Assign the Diagram instance when the component is mounted
  diagramInstance = diagram.value.ej2Instances;
});
</script>
<style>
@import "../node_modules/@syncfusion/ej2-vue-diagrams/styles/tailwind3.css";
@import "../node_modules/@syncfusion/ej2-base/styles/tailwind3.css";
@import "../node_modules/@syncfusion/ej2-popups/styles/tailwind3.css";
@import "../node_modules/@syncfusion/ej2-splitbuttons/styles/tailwind3.css";
@import "../node_modules/@syncfusion/ej2-navigations/styles/tailwind3.css";
</style><template>
<div id="app">
<ejs-diagram
id="diagram"
ref="diagram"
:width="width"
:height="height"
:scrollSettings="scrollSettings"
:nodes="nodes"
:commandManager="commandManager"
></ejs-diagram>
</div>
</template>
<script>
import {
DiagramComponent,
Keys,
KeyModifiers,
} from '@syncfusion/ej2-vue-diagrams';
let diagramInstance;
export default {
name: 'App',
components: {
'ejs-diagram': DiagramComponent,
},
data() {
return {
width: '700px',
height: '350px',
scrollSettings: { scrollLimit: 'Infinity' },
nodes: [
{
id: 'node1',
offsetX: 100,
offsetY: 100,
width: 70,
height: 40,
style: { fill: '#64abbb' },
},
],
commandManager: {
commands: [
{
//Preventing default cut command
name: 'cut',
canExecute: function () {
return false;
},
execute: null,
gesture: {
key: Keys.X,
keyModifiers: KeyModifiers.Control,
},
},
{
//Preventing default delete command
name: 'delete',
canExecute: function () {
return false;
},
execute: null,
gesture: {
key: Keys.Delete,
},
},
{
//Modifying copy command to clone node
name: 'clone',
canExecute: function () {
let execute =
diagramInstance.selectedItems.nodes.length > 0;
return execute;
},
execute: function () {
diagramInstance.copy();
diagramInstance.paste();
},
gesture: {
//Press CTRL+C to clone node
key: Keys.C,
keyModifiers: KeyModifiers.Control,
},
},
],
},
};
},
mounted() {
diagramInstance = this.$refs.diagram.ej2Instances;
},
};
</script>
<style>
@import "../node_modules/@syncfusion/ej2-vue-diagrams/styles/tailwind3.css";
@import "../node_modules/@syncfusion/ej2-base/styles/tailwind3.css";
@import "../node_modules/@syncfusion/ej2-popups/styles/tailwind3.css";
@import "../node_modules/@syncfusion/ej2-splitbuttons/styles/tailwind3.css";
@import "../node_modules/@syncfusion/ej2-navigations/styles/tailwind3.css";
</style>Undo-redo
Undo/redo commands can be executed through shortcut keys. Shortcut key for undo is Ctrl+z and shortcut key for redo is Ctrl+y. For more information refer to the undo-redo