Getting Started with React Markdown Editor Component
29 Jul 20265 minutes to read
The Syncfusion React Markdown Editor is a web-based editor that enables users to create, edit, and format Markdown content with features such as table support and structured content formatting. This section explains you the steps required to create a simple Markdown Editor and demonstrate the basic usage of the Markdown Editor component in a React environment.
Ready to streamline your Syncfusion® React development? Discover the full potential of Syncfusion® React components with Syncfusion® AI Coding Assistant. Effortlessly integrate, configure, and enhance your projects with intelligent, context-aware code suggestions, streamlined setups, and real-time insights—all seamlessly integrated into your preferred AI-powered IDEs like VS Code, Cursor, Syncfusion® CodeStudio and more. Explore Syncfusion® AI Coding Assistant
To get started quickly with the React Markdown Editor, refer to this video tutorial:
Prerequisites
This guide uses Vite as the bundler and development environment. Install Node.js 24.13.0 or higher before proceeding. For detailed information about Vite’s capabilities and configuration options, refer to the Vite documentation.
NOTE
For information about supported React versions and Syncfusion package compatibility, refer to the Version Compatibility documentation.
Create a React Application
Run the following command to set up a React application:
npm create vite@latest my-app -- --template react-tsThis command prompts you to configure the React application. When prompted to choose a linter, select an option based on your preference.
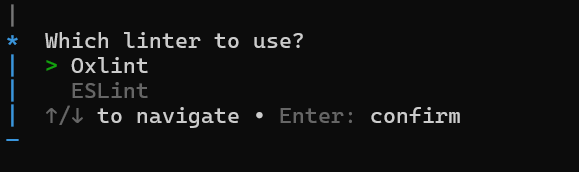
Continue with the project setup and select the options as shown below.
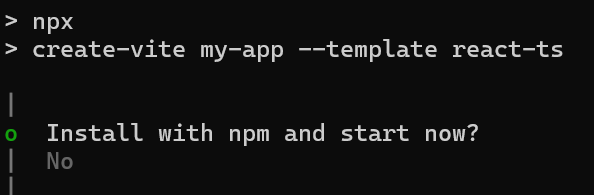
As Syncfusion packages are not installed yet, currently, the No option will be selected. Then, navigate to the project directory and install the dependencies using the following commands:
cd my-app
npm install
Note: To set up a React application with Nextjs or Remix, refer to this documentation for more details.
Adding Syncfusion Rich Text Editor packages
All the available Essential JS 2 packages are published in the npmjs.com public registry.
To install the Rich Text Editor component, use the following command
npm install @syncfusion/ej2-react-richtexteditorAdding CSS reference
Syncfusion provides multiple themes for the Rich Text Editor component. For a complete list of available themes, refer to the themes packages.
To apply the Tailwind 3 theme, install the corresponding theme package by using the following command:
npm install @syncfusion/ej2-tailwind3-themeIn this package, the Rich Text Editor component includes an index.css file that automatically loads all the required dependency styles. Add the following import to src/App.css:
@import '../node_modules/@syncfusion/ej2-tailwind3-theme/styles/rich-text-editor/index.css';IMPORTANT
To apply the application-specific styles correctly, import App.css into src/App.tsx and remove all the default styles from src/index.css.
Module Injection
The following modules provide the basic features of the Markdown Editor.
- MarkdownEditor - Inject this module to use the Rich Text Editor as Markdown Editor.
- Image - Inject this module to use the image feature in Markdown Editor.
- Link - Inject this module to use the link feature in Markdown Editor.
- Toolbar - Inject this module to use the Toolbar feature.
These modules can be injected into the services prop of the <Inject> component, as demonstrated in the following example.
import { MarkdownEditor, Inject, RichTextEditorComponent, Toolbar, Link, Image, Table } from '@syncfusion/ej2-react-richtexteditor';
import './App.css';

function App() {
  return (<RichTextEditorComponent editorMode={'Markdown'}>
    <Inject services={[Toolbar, MarkdownEditor, Link, Image, Table]} />
  </RichTextEditorComponent>
  );
}

export default App;
import { MarkdownEditor, Inject, RichTextEditorComponent, Toolbar, Link, Image, Table } from '@syncfusion/ej2-react-richtexteditor';
import './App.css';
function App() {
return (<RichTextEditorComponent editorMode={'Markdown'}>
<Inject services={[Toolbar, MarkdownEditor, Link, Image, Table ]}/>
</RichTextEditorComponent>);
}
export default App;TIPS
Additional feature modules are available here.
Adding Markdown Editor component
Now, you can start adding React Markdown Editor component to the application. For getting started, add the Markdown Editor component to the src/App.tsx file using following code.
import { MarkdownEditor, Inject, RichTextEditorComponent, Toolbar, Link, Image, Table } from '@syncfusion/ej2-react-richtexteditor';
import './App.css';

function App() {
  return (<RichTextEditorComponent editorMode={'Markdown'}>
    <Inject services={[Toolbar, MarkdownEditor, Link, Image, Table]} />
  </RichTextEditorComponent>
  );
}

export default App;
import { MarkdownEditor, Inject, RichTextEditorComponent, Toolbar, Link, Image, Table } from '@syncfusion/ej2-react-richtexteditor';
import './App.css';
function App() {
return (<RichTextEditorComponent editorMode={'Markdown'}>
<Inject services={[Toolbar, MarkdownEditor, Link, Image, Table ]}/>
</RichTextEditorComponent>);
}
export default App;@import '../node_modules/@syncfusion/ej2-tailwind3-theme/styles/rich-text-editor/index.css';Run the Application
Now run the npm run dev command in the console to start the development server. This command compiles your code and serves the application locally, opening it in the browser.
npm run devThe Syncfusion® React Markdown Editor is displayed in the browser as shown below.
