MySQL Data Binding in ASP.NET MVC Pivot Table
28 Aug 202611 minutes to read
This section describes how to retrieve data from a MySQL database using MySqlClient and bind it to the Pivot Table via a Web API controller.
Creating a Web API Service to Fetch MySQL Data
Follow these steps to create a Web API service that retrieves data from a MySQL database and prepares it for the Pivot Table.
Step 1: Create an ASP.NET Core Web Application
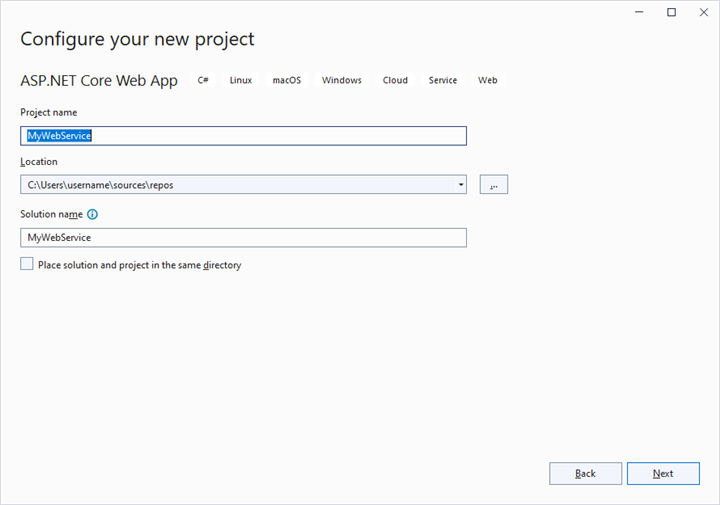
- Open Visual Studio and create a new ASP.NET Core Web App project named MyWebService.
- Follow the official Microsoft documentation for detailed instructions on creating an ASP.NET Core Web application.
Step 2: Install the MySql.Data NuGet Package
To enable MySQL database connectivity in your application:
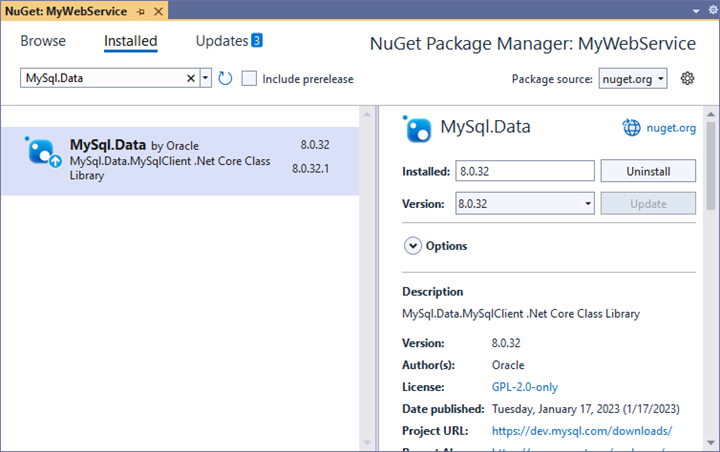
- Open the NuGet Package Manager in your project solution and search for MySql.Data.
- Install the MySql.Data package to add MySQL database support. Use
MySql.Dataversion 8.x (or later) to match this walkthrough; pin the version if you want reproducible builds. If you prefer an async-first, MIT-licensed alternative,MySqlConnectoris a drop-in replacement with the same connection-string format.
Step 3: Create a Web API Controller
- In the Controllers folder, create a new file named PivotController.cs.
- This controller handles data communication between the MySQL database and the Pivot Table.
Step 4: Connect to MySQL and Retrieve Data
In the PivotController.cs file, use the MySqlClient from the MySql.Data library to connect to a MySQL database and retrieve data for the Pivot Table.
-
Establish Connection: Use MySqlConnection with a valid connection string (e.g.,
Server=localhost;Database=mydb;Uid=myuser;Pwd=mypassword;) to connect to the MySQL database. -
Query and Fetch Data: Execute a SQL query (e.g.,
SELECT * FROM orders) using MySqlCommand to retrieve data for the Pivot Table. - Structure the Data: Use MySqlDataAdapter’s Fill method to populate query results into a DataTable for JSON serialization.
    using Microsoft.AspNetCore.Mvc;
    using MySql.Data.MySqlClient;
    using Newtonsoft.Json;
    using System.Data;

    namespace MyWebService.Controllers
    {
        [ApiController]
        [Route("[controller]")]
        public class PivotController : ControllerBase
        {
            public dynamic GetMySQLResult()
            {
                // Replace with your own connection string.
                MySqlConnection connection = new MySqlConnection("<Enter your valid connection string here>");
                connection.Open();
                MySqlCommand command = new MySqlCommand("SELECT * FROM orders", connection);
                MySqlDataAdapter dataAdapter = new MySqlDataAdapter(command);
                DataTable dataTable = new DataTable();
                dataAdapter.Fill(dataTable);
                connection.Close();
                return dataTable;
            }
        }
    }
Replace the placeholder connection string with your actual MySQL credentials.
Step 5: Serialize Data to JSON
In the PivotController.cs file, define a Get method that calls GetMySQLResult to retrieve data from the MySQL database as a DataTable. Then, use JsonConvert.SerializeObject from the Newtonsoft.Json library to convert the DataTable into a JSON format. This JSON data will be used by the Pivot Table component.
Ensure the
Newtonsoft.JsonNuGet package (version 13.x or later) is installed in your project before usingJsonConvert. TheGetmethod serializes theDataTableinto a JSON string before ASP.NET Core’s pipeline returns it as the response body. Note: returning aJsonConvert.SerializeObjectof aDataTableproduces a JSON array of row objects whose column values are mapped from the underlying SQL types.
using Microsoft.AspNetCore.Mvc;
using MySql.Data.MySqlClient;
using Newtonsoft.Json;
using System.Data;
namespace MyWebService.Controllers
{
[ApiController]
[Route("[controller]")]
public class PivotController : ControllerBase
{
[HttpGet(Name = "GetMySQLResult")]
public object Get()
{
return JsonConvert.SerializeObject(GetMySQLResult());
}
public dynamic GetMySQLResult()
{
// Replace with your own connection string.
MySqlConnection connection = new MySqlConnection("<Enter your valid connection string here>");
connection.Open();
MySqlCommand command = new MySqlCommand("SELECT * FROM orders", connection);
MySqlDataAdapter dataAdapter = new MySqlDataAdapter(command);
DataTable dataTable = new DataTable();
dataAdapter.Fill(dataTable);
connection.Close();
return dataTable;
}
}
}
### Step 6: Run the Web API Service
1. In Visual Studio, set **MyWebService** as the startup project and press <kbd>F5</kbd> (or run `dotnet run` from the project folder). The actual listening ports are read from `launchSettings.json`; both HTTP and HTTPS endpoints are printed in the console.
2. The application is hosted at a URL such as `https://localhost:7146` (the port number may vary based on your configuration). Note the exact URL printed by the runtime so you can reference it from the ASP.NET MVC project.
### Step 7: Verify the JSON Data
1. Access the Web API endpoint at `https://localhost:7146/Pivot` to view the JSON data retrieved from the MySQL database.
2. The browser displays the JSON data, as shown in the image below, ready for use by the Pivot Table.

## Connecting the Pivot Table to a MySQL Database Using the Web API Service
This section explains how to connect the Pivot Table to a MySQL database by fetching data from the Web API service created above. Ensure that the Web API service from the previous section is still running before proceeding.
### Step 1: Set up the ASP.NET MVC project
1. Set up an ASP.NET MVC project with the Pivot Table by following the [Getting Started](../getting-started) documentation.
2. Ensure all necessary Syncfusion EJ2 Pivot Table dependencies are installed in your ASP.NET MVC project.
### Step 2: Configure the Web API URL in the Pivot Table
1. In the ~/Views/Home/Index.cshtml file, map the Web API URL (`https://localhost:7146/Pivot`) to the Pivot Table using the [Url](https://help.syncfusion.com/cr/aspnetmvc-js2/Syncfusion.EJ2.PivotView.PivotViewDataSourceSettings.html#Syncfusion_EJ2_PivotView_PivotViewDataSourceSettings_Url) property within the [PivotViewDataSourceSettings](https://help.syncfusion.com/cr/aspnetmvc-js2/Syncfusion.EJ2.PivotView.PivotViewDataSourceSettingsBuilder.html).
2. Below is the sample code to configure the Pivot Table to fetch data from the Web API:
```csharp
@Html.EJS().PivotView("PivotView").Height("300").DataSourceSettings(
dataSource => dataSource.Url("https://localhost:7146/pivot"
)
//Other codes here...
).Render()Step 3: Define the Pivot Table Report
- Configure the Pivot Table report in the ~/Views/Home/Index.cshtml file to structure the data retrieved from the MySQL database.
- Use the
rows,columns,values, andfiltersproperties of PivotViewDataSourceSettings to define how data fields are organized and aggregated. - Enable the field list by setting the ShowFieldList property to true on the
PivotViewcomponent (not on the data source settings) and including theFieldListmodule in the services. This allows users to interactively modify the Pivot Table’s structure by adding or rearranging fields. Note:EnableSortingis a property of thePivotViewcomponent; the sample above demonstrates the equivalent MVC builder usage for the data source settings.
@Html.EJS().PivotView("PivotView").Height("300").DataSourceSettings(
        dataSource => dataSource.Url("https://localhost:7146/Pivot"
        ).ExpandAll(false).EnableSorting(true)
    .Rows(rows =>
    {
        rows.Name("ShipCity").Add();
    }).Columns(columns =>
    {
        columns.Name("ShipName").Add();
    }).Values(values =>
    {
        values.Name("Freight").Caption("Sum of Freight").Add();
    })).ShowFieldList(true).Render()
Step 4: Run and Verify the Pivot Table
- Run the ASP.NET MVC application.
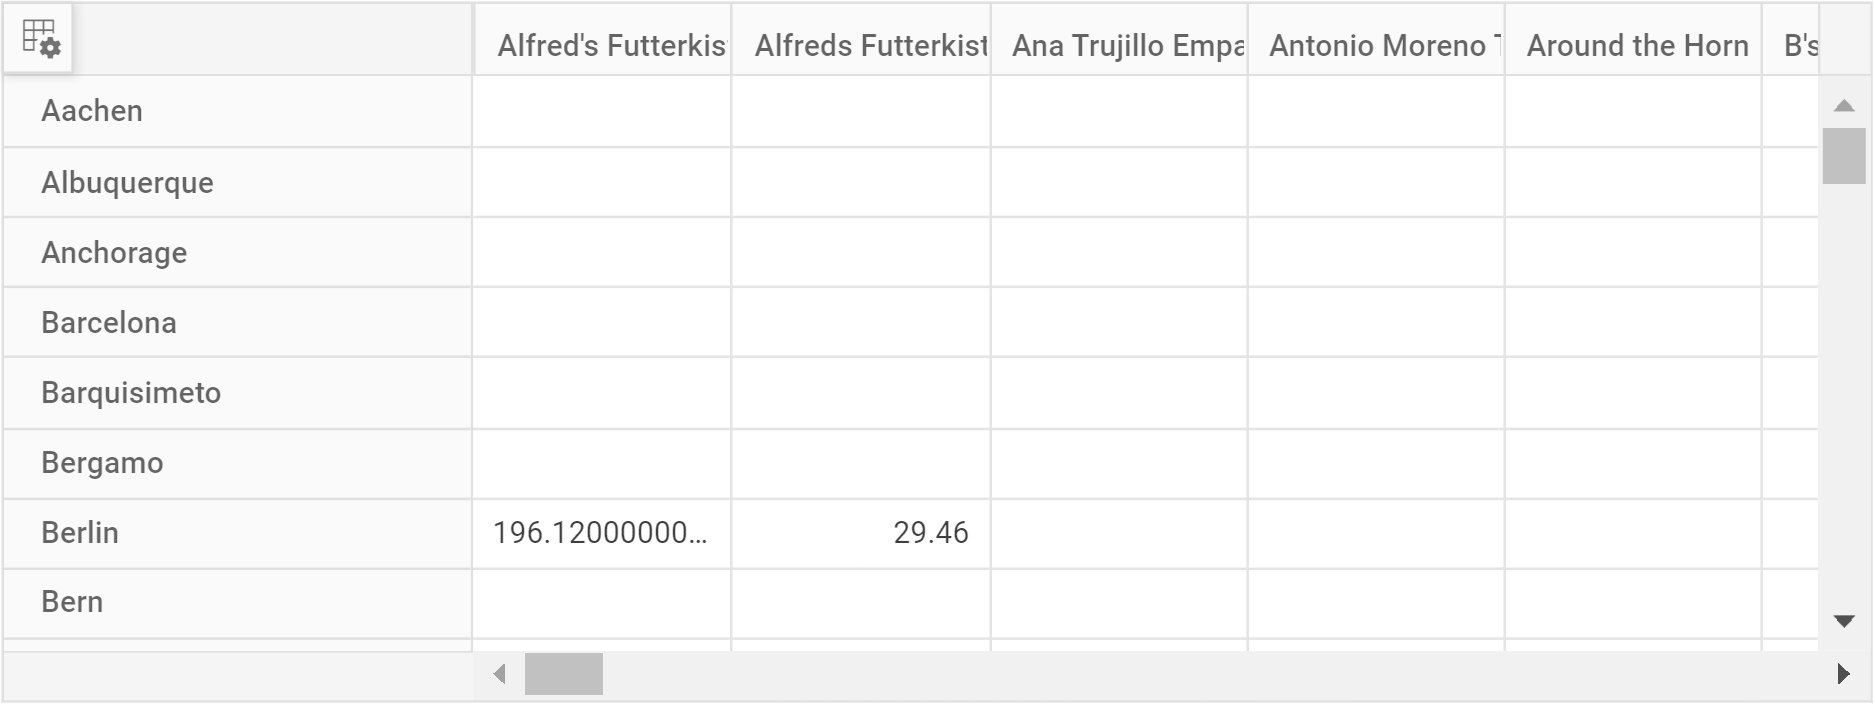
- The Pivot Table will display the data fetched from the MySQL database via the Web API, structured according to the defined report.
- The resulting Pivot Table will look like this:
Additional Resources
Explore a complete example of the ASP.NET MVC Pivot Table integrated with an ASP.NET Core Web Application to fetch data from a MySQL database in this GitHub repository.