Open and Save in the ASP.NET MVC Image Editor control
30 Jun 202524 minutes to read
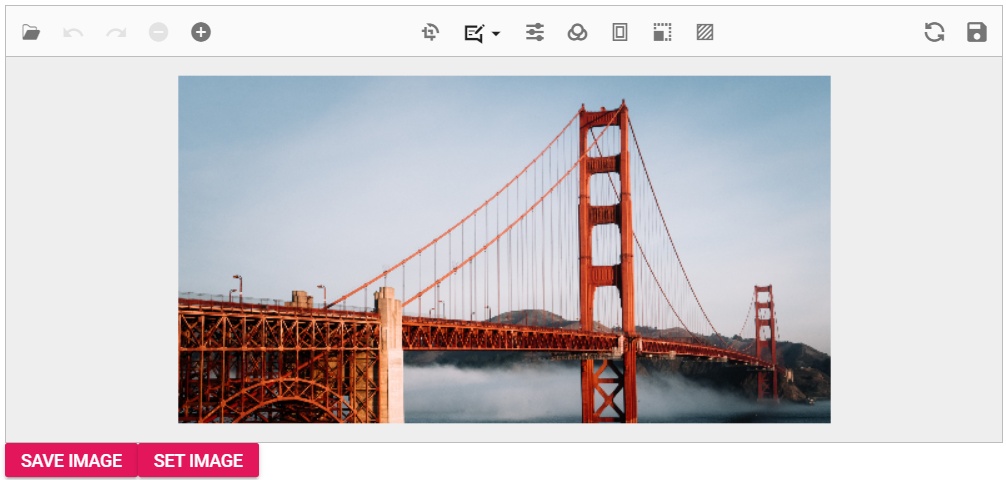
To import an image into the canvas, it must first be converted into a blob object. The Uploader component can be used to facilitate the process of uploading an image from the user interface. Once the image has been uploaded, it can then be converted into a blob and drawn onto the canvas.
To save an edited image in the Image Editor control, use the toBlob method to convert it to a blob object. This will save the image with any annotations or filters that have been applied during the editing process. The saved image can be stored as raw image data or as an image file.
Supported image formats
The Image Editor control supports five common image formats: PNG, JPEG, SVG, WEBP, and BMP. These formats allow you to work with a wide range of image files within the Image Editor.
When it comes to saving the edited image, the default file type is set as PNG. This means that when you save the edited image without specifying a different file type, it will be saved as a PNG file. However, it’s important to note that the Image Editor typically provides options or methods to specify a different file type if desired. This allows you to save the edited image in formats other than the default PNG, such as JPEG, SVG, and WEBP, based on your specific requirements or preferences.
Open an Image
The open method in the Image Editor control offers the capability to open an image by providing it in different formats. This method accepts various types of arguments, such as a base64-encoded string, raw image data, or a hosted/online URL. You can pass either the file name or the actual image data as an argument to the open method, and it will load the specified image into the Image Editor control. This flexibility allows you to work with images from different sources and formats, making it easier to integrate and manipulate images within the Image Editor control.
Opening local images in the Image Editor
Users can easily open local images in the Image Editor. Simply place the image in the same folder as the sample. By specifying the local file name directly in the open method, the image will be loaded seamlessly into the editor.
<div class="col-lg-12 control-section e-img-editor-sample">
    @Html.EJS().ImageEditor("image-editor").Created("created").Toolbar(new string[] { }).Render()
</div>

<script>
    function created() {
        var imageEditorObj = ej.base.getComponent(document.getElementById('image-editor'), 'image-editor');
        if (ej.base.Browser.isDevice) {
            imageEditorObj.open('https://ej2.syncfusion.com/demos/src/image-editor/images/flower.png');
        } else {
            imageEditorObj.open('https://ej2.syncfusion.com/demos/src/image-editor/images/bridge.png');
        }
    }
</script>

<style>
    .image-editor {
        margin: 0 auto;
    }

    .e-img-editor-sample {
        height: 80vh;
        width: 100%;
    }

    @@media only screen and (max-width: 700px) {
        .e-img-editor-sample {
            height: 75vh;
            width: 100%;
        }
    }

    .control-wrapper {
        height: 100%;
    }
</style>
public ActionResult Default()
{
return View();
}Output be like the below.
Open an image from base64 format
Users can easily open images in the Image Editor using a Base64-encoded string. This method allows you to load images directly from their Base64 representation, ensuring seamless integration and flexibility in your application. Simply pass the Base64 string to the open method, and the image will be loaded into the editor.
Note:: You can obtain the Base64 representation of an image from the Image Editor using the getImageData method. This process will be explained in the upcoming section.
<div class="col-lg-12 control-section e-img-editor-sample">
    @Html.EJS().ImageEditor("image-editor").Created("created").Render()
</div>
@Html.EJS().Button("savebase64").CssClass("e-primary").Content("SAVE BASE64").Click("savebase64").Render()
@Html.EJS().Button("openbase64").CssClass("e-primary").Content("OPEN BASE64").Click("openbase64").Render()

<script>
    var base64String;
    function created() {
        var imageEditorObj = ej.base.getComponent(document.getElementById('image-editor'), 'image-editor');
        if (ej.base.Browser.isDevice) {
            imageEditorObj.open('https://ej2.syncfusion.com/demos/src/image-editor/images/flower.png');
        } else {
            imageEditorObj.open('https://ej2.syncfusion.com/demos/src/image-editor/images/bridge.png');
        }
    }

    function savebase64() {
        var imgObj = ej.base.getComponent(document.getElementById('image-editor'), 'image-editor');
        var imageData = imgObj.getImageData();
        const canvas = document.createElement('canvas');
        canvas.width = imageData.width;
        canvas.height = imageData.height;
        const context = canvas.getContext('2d');
        context.putImageData(imageData, 0, 0);
        this.base64String = canvas.toDataURL();
    }
    function openbase64() {
        var imgObj = ej.base.getComponent(document.getElementById('image-editor'), 'image-editor');
        imgObj.open(this.base64String);
    }

</script>

<style>
    .image-editor {
        margin: 0 auto;
    }

    .e-img-editor-sample {
        height: 80vh;
        width: 100%;
    }

    @@media only screen and (max-width: 700px) {
        .e-img-editor-sample {
            height: 75vh;
            width: 100%;
        }
    }

    .control-wrapper {
        height: 100%;
    }
</style>
public ActionResult Default()
{
return View();
}Output be like the below.
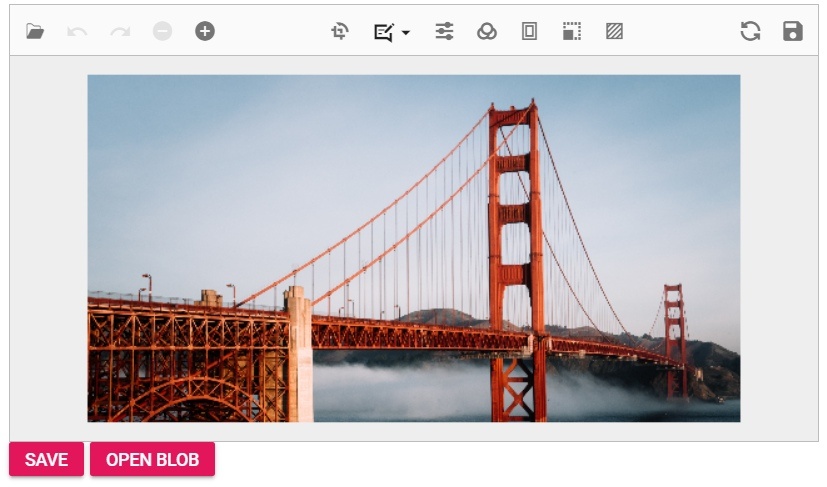
Open an image from Blob storage
User can easily open images in the Image Editor from Blob storage. This method allows you to load images directly from Blob storage, ensuring seamless integration and flexibility in your application. Simply retrieve the image Blob from storage and pass it to the open method, and the image will be loaded into the editor.
Note:: You can obtain the Blob URL representation of an image from the Image Editor using the getImageData method. This process will be explained in the upcoming section.
<div class="col-lg-12 control-section e-img-editor-sample">
    @Html.EJS().ImageEditor("image-editor").Created("created").Render()
</div>
@Html.EJS().Button("saveBlob").CssClass("e-primary").Content("SAVE BLOB").Click("saveBlob").Render()
@Html.EJS().Button("openBlob").CssClass("e-primary").Content("OPEN BLOB").Click("openBlob").Render()

<script>
    var blobUrl;
    function created() {
        var imageEditorObj = ej.base.getComponent(document.getElementById('image-editor'), 'image-editor');
        if (ej.base.Browser.isDevice) {
            imageEditorObj.open('https://ej2.syncfusion.com/demos/src/image-editor/images/flower.png');
        } else {
            imageEditorObj.open('https://ej2.syncfusion.com/demos/src/image-editor/images/bridge.png');
        }
    }

    function saveBlob() {
        var imgObj = ej.base.getComponent(document.getElementById('image-editor'), 'image-editor');
        var imageData = imgObj.getImageData();
        var canvas = document.createElement('canvas');
        var ctx = canvas.getContext('2d');
        canvas.width = imageData.width;
        canvas.height = imageData.height;
        ctx.putImageData(imageData, 0, 0);
        canvas.toBlob((blob) => {
          this.blobUrl = URL.createObjectURL(blob);// For getting blob.
        });
    }
    function openBlob() {
        var imgObj = ej.base.getComponent(document.getElementById('image-editor'), 'image-editor');
        imgObj.open(this.blobUrl);
    }

</script>

<style>
    .image-editor {
        margin: 0 auto;
    }

    .e-img-editor-sample {
        height: 80vh;
        width: 100%;
    }

    @@media only screen and (max-width: 700px) {
        .e-img-editor-sample {
            height: 75vh;
            width: 100%;
        }
    }

    .control-wrapper {
        height: 100%;
    }
</style>
public ActionResult Default()
{
return View();
}Output be like the below.
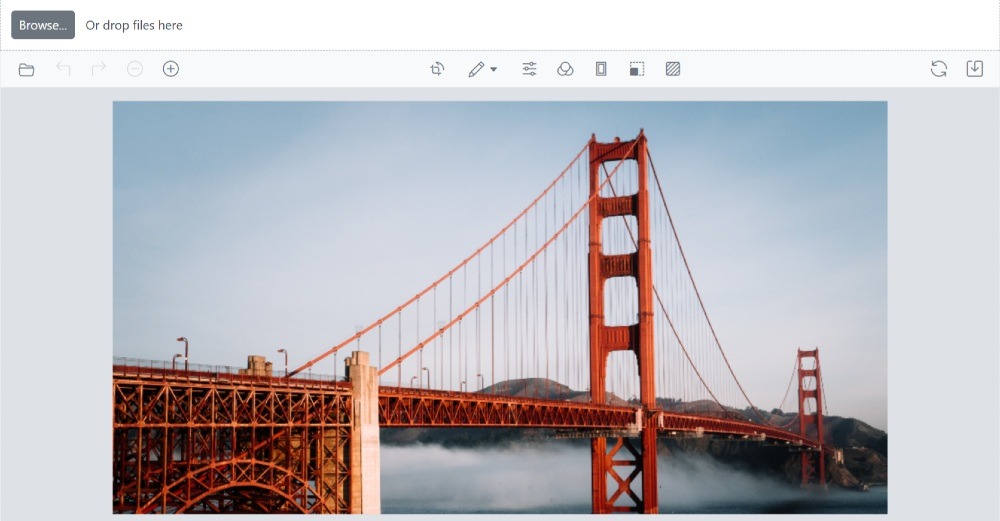
Open an image from File Uploader
User can easily open images in the Image Editor using a file uploader. This method allows users to upload an image file from their device and load it directly into the editor. Once the image is selected through the file uploader, pass the file to the open method, and the image will be seamlessly loaded into the editor.
<div class="col-lg-12 control-section e-img-editor-sample">
    @Html.EJS().Uploader("UploadFiles").ShowFileList(false).Selected("Selected").AsyncSettings(new Syncfusion.EJ2.Inputs.UploaderAsyncSettings { SaveUrl = @Url.Content("https://services.syncfusion.com/aspnet/production/api/FileUploader/Save"), RemoveUrl = @Url.Content("https://services.syncfusion.com/aspnet/production/api/FileUploader/Remove") }).Render()
    @Html.EJS().ImageEditor("image-editor").Created("created").Render()
</div>

<script>
    function created() {
        var imageEditorObj = ej.base.getComponent(document.getElementById('image-editor'), 'image-editor');
        if (ej.base.Browser.isDevice) {
            imageEditorObj.open('https://ej2.syncfusion.com/demos/src/image-editor/images/flower.png');
        } else {
            imageEditorObj.open('https://ej2.syncfusion.com/demos/src/image-editor/images/bridge.png');
        }
    }

    function Selected(args) {
        var imageEditorObj = ej.base.getComponent(document.getElementById('image-editor'), 'image-editor');
        if (args.filesData.length > 0) {
            var reader = new FileReader();
            reader.onload = () => {
                imageEditorObj.open(reader.result);
            };
            reader.readAsDataURL(args.filesData[0].rawFile);
        }
    }

</script>

<style>
    .image-editor {
        margin: 0 auto;
    }

    .e-img-editor-sample {
        height: 80vh;
        width: 100%;
    }

    @@media only screen and (max-width: 700px) {
        .e-img-editor-sample {
            height: 75vh;
            width: 100%;
        }
    }

    .control-wrapper {
        height: 100%;
    }
</style>
public ActionResult Default()
{
return View();
}Output be like the below.
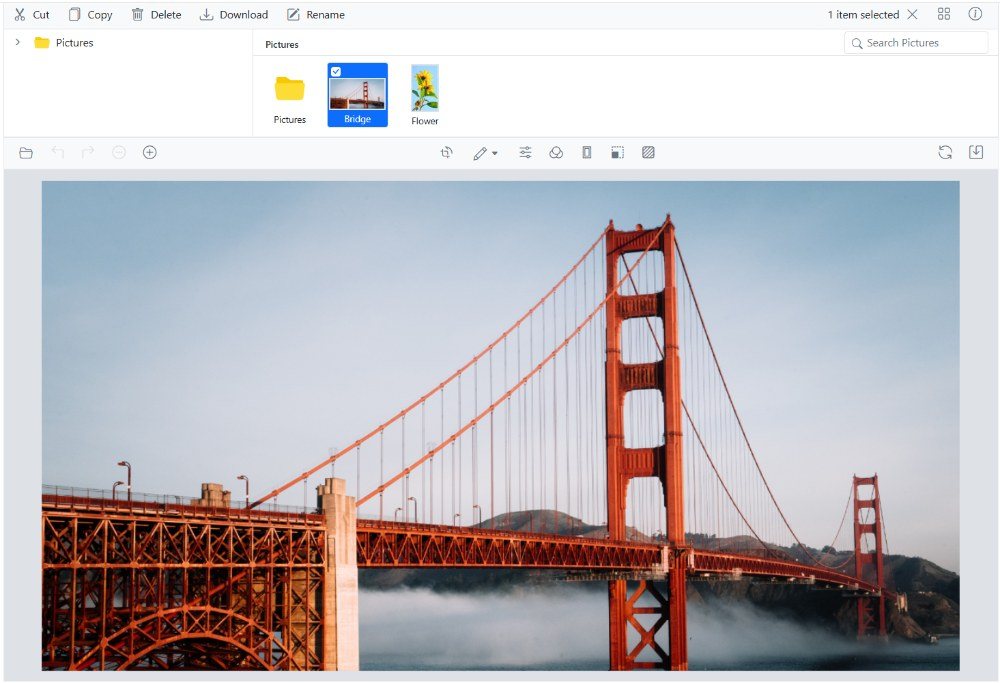
Open an image from File Manager
User can easily open images in the Image Editor using the File Manager. This method allows you to browse and select an image file directly from the File Manager and load it into the editor. Once the image is selected, pass the file to the open method, and the image will be seamlessly loaded into the editor.
<div class="sample-container">
    @Html.EJS().FileManager("flatdata").FileSystemData(ViewBag.ResultData).FileOpen("FileOpen").Render()
</div>
<div class="col-lg-12 control-section e-img-editor-sample">
    @Html.EJS().ImageEditor("image-editor").Created("created").Render()
</div>

<script>
    function created() {
        var imageEditorObj = ej.base.getComponent(document.getElementById('image-editor'), 'image-editor');
        if (ej.base.Browser.isDevice) {
            imageEditorObj.open('https://ej2.syncfusion.com/demos/src/image-editor/images/flower.png');
        } else {
            imageEditorObj.open('https://ej2.syncfusion.com/demos/src/image-editor/images/bridge.png');
        }
    }
    function FileOpen(args) {
        var imageEditorObj = ej.base.getComponent(document.getElementById('image-editor'), 'image-editor');
        var file = args.fileDetails;
        if (file.isFile && file.imageUrl) {
            args.cancel = true;
            imageEditorObj.open(file.imageUrl);
        }
    }

</script>

<style>
    .image-editor {
        margin: 0 auto;
    }

    .e-img-editor-sample {
        height: 80vh;
        width: 100%;
    }

    @@media only screen and (max-width: 700px) {
        .e-img-editor-sample {
            height: 75vh;
            width: 100%;
        }
    }

    .control-wrapper {
        height: 100%;
    }
</style>
public ActionResult Default()
{
return View();
}using System;
using System.Collections.Generic;
using System.Linq;
using System.Web;
using System.Web.Mvc;
using Syncfusion.EJ2.Popups;
using Syncfusion.EJ2.ImageEditor;
namespace EJ2MVCSampleBrowser.Controllers.ImageEditor
{
public partial class ImageEditorController : Controller
{
public ActionResult ProfilePicture()
{
var permission = new Permission
{
copy = false,
download = false,
write = false,
writeContents = false,
read = true,
upload = false,
message = ""
};
var resultData = new List<FileData>
{
new FileData
{
dateCreated = DateTime.Parse("2023-11-15T19:02:02.3419426+05:30"),
dateModified = DateTime.Parse("2024-01-08T16:55:20.9464164+05:30"),
filterPath = "\\",
hasChild = true,
id = "0",
isFile = false,
name = "Pictures",
parentId = "0",
size = 228465,
type = "folder"
},
new FileData
{
dateCreated = DateTime.Parse("2023-11-15T19:02:02.3419426+05:30"),
dateModified = DateTime.Parse("2024-01-08T16:55:20.9464164+05:30"),
filterPath = "\\",
hasChild = false,
id = "1",
isFile = true,
name = "Flower",
parentId = "0",
size = 65536,
type = ".png",
imageUrl = "https://ej2.syncfusion.com/react/demos/src/image-editor/images/flower.png"
},
new FileData
{
dateCreated = DateTime.Parse("2023-11-15T19:02:02.3419426+05:30"),
dateModified = DateTime.Parse("2024-01-08T16:55:20.9464164+05:30"),
filterPath = "\\",
hasChild = false,
id = "2",
isFile = true,
name = "Bridge",
parentId = "0",
size = 53248,
type = ".png",
imageUrl = "https://ej2.syncfusion.com/react/demos/src/image-editor/images/bridge.png"
}
};
ViewBag.ResultData = resultData;
return View();
}
}
public class DefaultButtonModel
{
public string content { get; set; }
public bool isPrimary { get; set; }
}
public class Permission
{
public bool copy { get; set; }
public bool download { get; set; }
public bool write { get; set; }
public bool writeContents { get; set; }
public bool read { get; set; }
public bool upload { get; set; }
public string message { get; set; }
}
public class FileData
{
public DateTime dateCreated { get; set; }
public DateTime dateModified { get; set; }
public string filterPath { get; set; }
public bool hasChild { get; set; }
public string id { get; set; }
public bool isFile { get; set; }
public string name { get; set; }
public string parentId { get; set; }
public int size { get; set; }
public string type { get; set; }
public Permission permission { get; set; }
public string imageUrl { get; set; }
}
}Output be like the below.
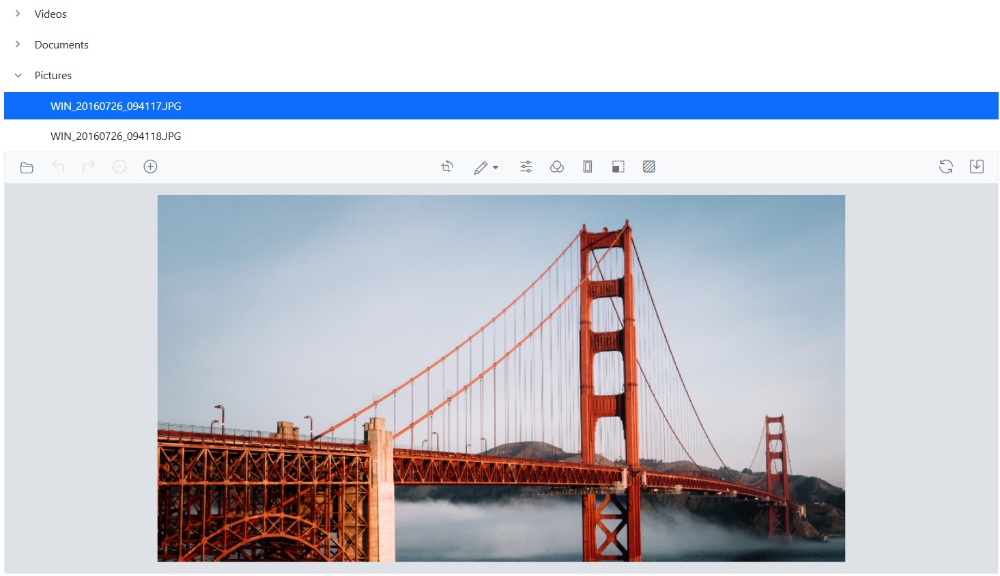
Open an image from Treeview
Users can open images in the Syncfusion Image Editor by selecting a node from a tree view. When a user clicks on an image node, the corresponding image is loaded into the editor using the open method. This allows for a seamless image editing experience directly from the TreeView component.
<div class="control_wrapper">
    @Html.EJS().TreeView("listdata").Fields(field =>
   field.Id("id").ParentID("pid").
   Expanded("expanded").Text("name").HasChildren("hasChild")
   .DataSource(ViewBag.Listdata)).NodeClicked("nodeClicked").Render()
</div>
<div class="col-lg-12 control-section e-img-editor-sample">
    @Html.EJS().ImageEditor("image-editor").Render()
</div>

<script>
    function nodeClicked(args) {
        var imageEditorObj = ej.base.getComponent(document.getElementById('image-editor'), 'image-editor');
        var treeViewObj = ej.base.getComponent(document.getElementById('listdata'), 'treeview');
        let nodeId = args.node.getAttribute('data-uid');
        let nodeData = treeViewObj.getTreeData(nodeId)[0];
        if (nodeData && nodeData.image) {
            imageEditorObj.open(nodeData.image);
        }
    }

</script>

<style>
    .image-editor {
        margin: 0 auto;
    }

    .e-img-editor-sample {
        height: 80vh;
        width: 100%;
    }

    @@media only screen and (max-width: 700px) {
        .e-img-editor-sample {
            height: 75vh;
            width: 100%;
        }
    }

    .control-wrapper {
        height: 100%;
    }
</style>
public ActionResult Default()
{
return View();
}using System;
using System.Collections.Generic;
using System.Linq;
using System.Web;
using System.Web.Mvc;
using Syncfusion.EJ2.Popups;
using Syncfusion.EJ2.ImageEditor;
namespace EJ2MVCSampleBrowser.Controllers.ImageEditor
{
public partial class ImageEditorController : Controller
{
public ActionResult ProfilePicture()
{
var listdata = new List<object>();
listdata.Add(new
{
id = 1,
name = "Videos",
icon = "folder",
hasChild = true
});
listdata.Add(new
{
id = 2,
pid = 1,
name = "Naturals.mp4",
icon = "video"
});
listdata.Add(new
{
id = 3,
pid = 1,
name = "Wild.mpeg",
icon = "video"
});
listdata.Add(new
{
id = 4,
name = "Documents",
icon = "folder",
hasChild = true
});
listdata.Add(new
{
id = 5,
pid = 4,
name = "Environment Pollution.docx",
icon = "docx"
});
listdata.Add(new
{
id = 6,
pid = 4,
name = "Global Water, Sanitation, & Hygiene.docx",
icon = "docx"
});
listdata.Add(new
{
id = 7,
pid = 4,
name = "Global Warming.ppt",
icon = "ppt"
});
listdata.Add(new
{
id = 8,
pid = 7,
name = "Social Network.pdf",
icon = "pdf"
});
listdata.Add(new
{
id = 9,
pid = 7,
name = "Youth Empowerment.pdf",
icon = "pdf"
});
listdata.Add(new
{
id = 10,
name = "Pictures",
hasChild = true,
icon = "folder",
expanded = true
});
listdata.Add(new
{
id = 11,
pid = 10,
name = "WIN_20160726_094117.JPG",
image = "https://ej2.syncfusion.com/react/demos/src/image-editor/images/bridge.png"
});
listdata.Add(new
{
id = 12,
pid = 10,
name = "WIN_20160726_094118.JPG",
image = "https://ej2.syncfusion.com/react/demos/src/image-editor/images/flower.png"
});
ViewBag.Listdata = listdata;
return View();
}
}
public class DefaultButtonModel
{
public string content { get; set; }
public bool isPrimary { get; set; }
}
}Output be like the below.
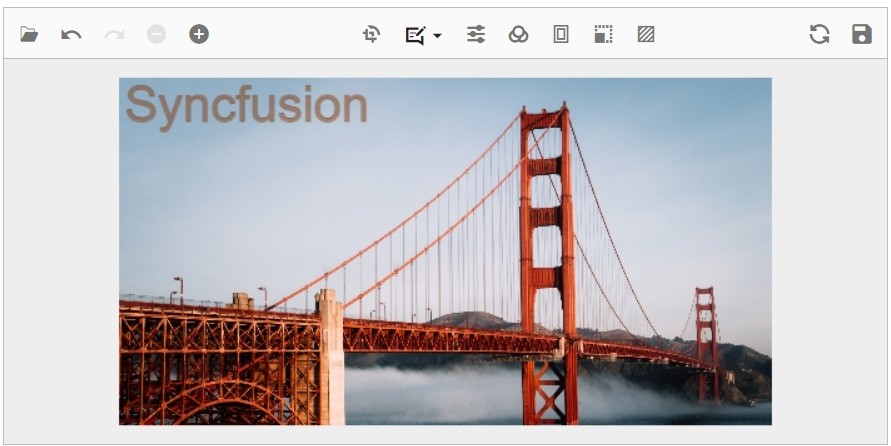
Add watermarks while opening an image
You can utilize the FileOpened event, which triggers once the image is loaded into the image editor. After this event, you can use the ‘drawText’ method to add a watermark. This approach allows the watermark to be automatically drawn on the canvas every time an image is opened in the editor, making it useful for handling copyright-related content.
<div class="col-lg-12 control-section e-img-editor-sample">
    @Html.EJS().ImageEditor("image-editor").Created("created").FileOpened(fileOpened).Render()
</div>

<script>
    function created() {
        var imageEditorObj = ej.base.getComponent(document.getElementById('image-editor'), 'image-editor');
        if (ej.base.Browser.isDevice) {
            imageEditorObj.open('https://ej2.syncfusion.com/demos/src/image-editor/images/flower.png');
        } else {
            imageEditorObj.open('https://ej2.syncfusion.com/demos/src/image-editor/images/bridge.png');
        }
    }

    function fileOpened() {
        var imgObj = ej.base.getComponent(document.getElementById('image-editor'), 'image-editor');
        imgObj.drawText(dimension.x, dimension.y, 'Syncfusion', 'Arial', 40, false, false, '#80330075');
    }

</script>

<style>
    .image-editor {
        margin: 0 auto;
    }

    .e-img-editor-sample {
        height: 80vh;
        width: 100%;
    }

    @@media only screen and (max-width: 700px) {
        .e-img-editor-sample {
            height: 75vh;
            width: 100%;
        }
    }

    .control-wrapper {
        height: 100%;
    }
</style>
public ActionResult Default()
{
return View();
}Output be like the below.
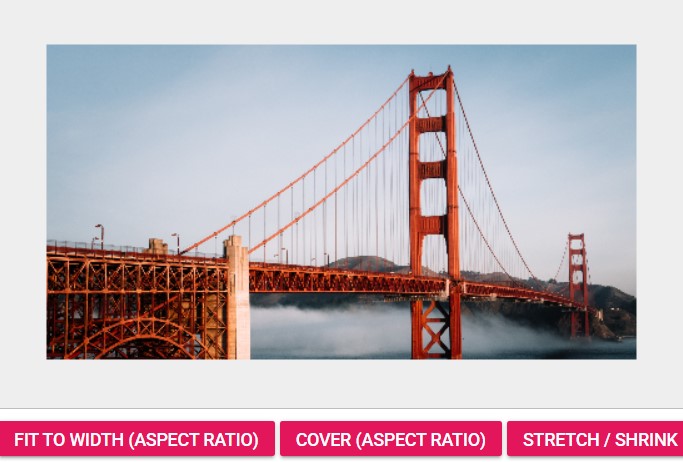
Opening Images with Custom Width and Height
Users can now open images with specific width and height values using the imageSettings parameter in the open method. This enhancement introduces three additional properties: width, height, and isAspectRatio. These options allow precise control over the image dimensions, with the flexibility to preserve the original aspect ratio if needed. This feature is especially useful when rendering high-resolution images or when fitting images into fixed-size layouts or canvas areas.
The following behaviors are supported through these properties:
- Contains behavior: By specifying only one dimension (either
widthorheight) and enablingisAspectRatio, the other dimension is automatically calculated to maintain the image’s original proportions. - Cover behavior: When both
widthandheightare specified withisAspectRatioset totrue, the image scales proportionally to fit within the given dimensions while preserving its aspect ratio. - Stretch or Shrink behavior: Setting
isAspectRatiotofalseforces the image to strictly follow the specifiedwidthandheight, allowing it to stretch or shrink regardless of its original aspect ratio.
The following example showcases how all three behaviors can be achieved using the open method.
<div class="col-lg-12 control-section e-img-editor-sample">
    @Html.EJS().ImageEditor("image-editor").Created("created").Toolbar(new string[] { }).Width("550px").Height("350px").Render()
    <div class="button-group" style="margin-top: 10px;">
        @Html.EJS().Button("contain").CssClass("e-primary").Content("Fit to Width (Aspect Ratio)").Click("contain").Render()
        @Html.EJS().Button("cover").CssClass("e-primary").Content("Cover (Aspect Ratio)").Click("cover").Render()
        @Html.EJS().Button("stretch").CssClass("e-primary").Content("Stretch / Shrink").Click("stretch").Render()
    </div>
</div>

<script>
    function created() {
        var imageEditorObj = ej.base.getComponent(document.getElementById('image-editor'), 'image-editor');
        imageEditorObj.open('https://ej2.syncfusion.com/react/demos/src/image-editor/images/bridge.png');
    }

    function contain() {
        var imageEditorObj = ej.base.getComponent(document.getElementById('image-editor'), 'image-editor');
        imageEditorObj.open('https://ej2.syncfusion.com/react/demos/src/image-editor/images/bridge.png', true, { backgroundColor: '', width: 550, height: null, isAspectRatio: true });
    }

    function cover() {
        var imageEditorObj = ej.base.getComponent(document.getElementById('image-editor'), 'image-editor');
        imageEditorObj.open('https://ej2.syncfusion.com/react/demos/src/image-editor/images/bridge.png', true, { backgroundColor: '', width: 550, height: 550, isAspectRatio: true });
    }

    function stretch() {
        var imageEditorObj = ej.base.getComponent(document.getElementById('image-editor'), 'image-editor');
        imageEditorObj.open('https://ej2.syncfusion.com/react/demos/src/image-editor/images/bridge.png', true, { backgroundColor: '', width: 350, height: 350, isAspectRatio: false });
    }
</script>

<style>
.image-editor {
    margin: 0 auto;
}
.e-img-editor-sample {
    height: 80vh;
    width: 100%;
}
@@media only screen and (max-width: 700px) {
    .e-img-editor-sample {
        height: 75vh;
        width: 100%;
    }
}
.control-wrapper {
    height: 100%;
}
</style>
public ActionResult Default()
{
return View();
}Output be like the below.
Save as image
The export method in the Image Editor control enables you to save the modified image as a file on the local device. This method accepts two parameters: the file name and the file type.
By providing a file name, you can specify the desired name for the saved image file. Additionally, you can also specify the quality and file type to determine the format in which the image should be saved. This allows you to save the image according to your specific requirements or preferences, such as PNG, JPEG, SVG, and WEBP.
By utilizing the export method with the appropriate file name and file type, you can conveniently save the modified image as a file on the local device, ensuring that it is easily accessible and shareable.
In the following example, the export method is used in the button click event.
<div class="col-lg-12 control-section e-img-editor-sample">
    @Html.EJS().ImageEditor("image-editor").Created("created").Toolbar(new string[] { }).Render()
</div>
@Html.EJS().Button("btnClick").CssClass("e-primary").Content("Click").Click("clickHandler").Render()

<script>
    function created() {
        var imageEditorObj = ej.base.getComponent(document.getElementById('image-editor'), 'image-editor');
        if (ej.base.Browser.isDevice) {
            imageEditorObj.open('https://ej2.syncfusion.com/demos/src/image-editor/images/flower.png');
        } else {
            imageEditorObj.open('https://ej2.syncfusion.com/demos/src/image-editor/images/bridge.png');
        }
    }

    function clickHandler() {
        var imageEditorObj = ej.base.getComponent(document.getElementById('image-editor'), 'image-editor');
        imageEditorObj.export("PNG", "Syncfusion"); // File type, file name
    }
</script>

<style>
    .image-editor {
        margin: 0 auto;
    }

    .e-img-editor-sample {
        height: 80vh;
        width: 100%;
    }

    @@media only screen and (max-width: 700px) {
        .e-img-editor-sample {
            height: 75vh;
            width: 100%;
        }
    }

    .control-wrapper {
        height: 100%;
    }
</style>
public ActionResult Default()
{
List<object> items = new List<object>();
items.Add(new
{
text = "Png"
});
items.Add(new
{
text = "Jpeg"
});
items.Add(new
{
text = "Svg"
});
ViewBag.datasource = items;
return View();
}Output be like the below.
Save the image as base64 format
To save an image as a base64 format, use the getImageData method of the editor to retrieve the image data and convert it into a Data URL, which contains the base64-encoded string. By invoking the open method on the Syncfusion® Image Editor instance, you can load this Data URL into the editor. The resulting base64 string can then be embedded directly in HTML or CSS or transmitted over data channels without requiring an external file.
<div class="col-lg-12 control-section e-img-editor-sample">
    @Html.EJS().ImageEditor("image-editor").Created("created").Render()
</div>
@Html.EJS().Button("saveImage").CssClass("e-primary").Content("Save Image").Click("saveImage").Render()

<script>
    var base64String;
    function created() {
        var imageEditorObj = ej.base.getComponent(document.getElementById('image-editor'), 'image-editor');
        if (ej.base.Browser.isDevice) {
            imageEditorObj.open('https://ej2.syncfusion.com/demos/src/image-editor/images/flower.png');
        } else {
            imageEditorObj.open('https://ej2.syncfusion.com/demos/src/image-editor/images/bridge.png');
        }
    }

    function saveImage() {
        var imgObj = ej.base.getComponent(document.getElementById('image-editor'), 'image-editor');
        var imageData = imgObj.getImageData();
        var canvas = document.createElement('canvas');
        canvas.width = imageData.width;
        canvas.height = imageData.height;
        // Get the 2D rendering context of the canvas
        const context = canvas.getContext('2d');
        // Put the ImageData onto the canvas
        context.putImageData(imageData, 0, 0);
        // Convert the canvas content to a Base64 encoded URL
        this.base64String = canvas.toDataURL();
    }

</script>

<style>
    .image-editor {
        margin: 0 auto;
    }

    .e-img-editor-sample {
        height: 80vh;
        width: 100%;
    }

    @@media only screen and (max-width: 700px) {
        .e-img-editor-sample {
            height: 75vh;
            width: 100%;
        }
    }

    .control-wrapper {
        height: 100%;
    }
</style>
public ActionResult Default()
{
return View();
}Output be like the below.
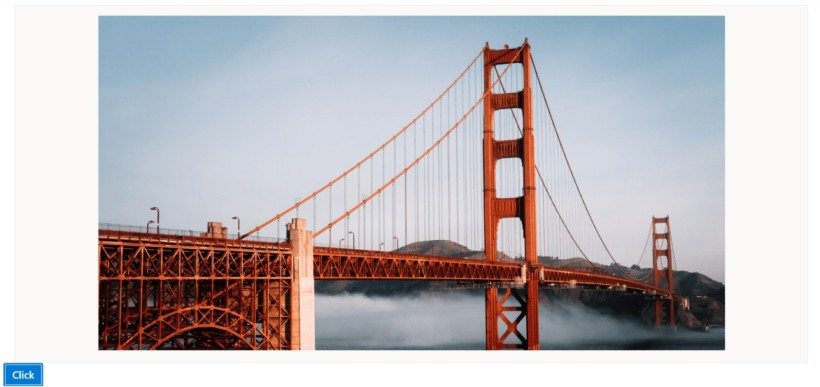
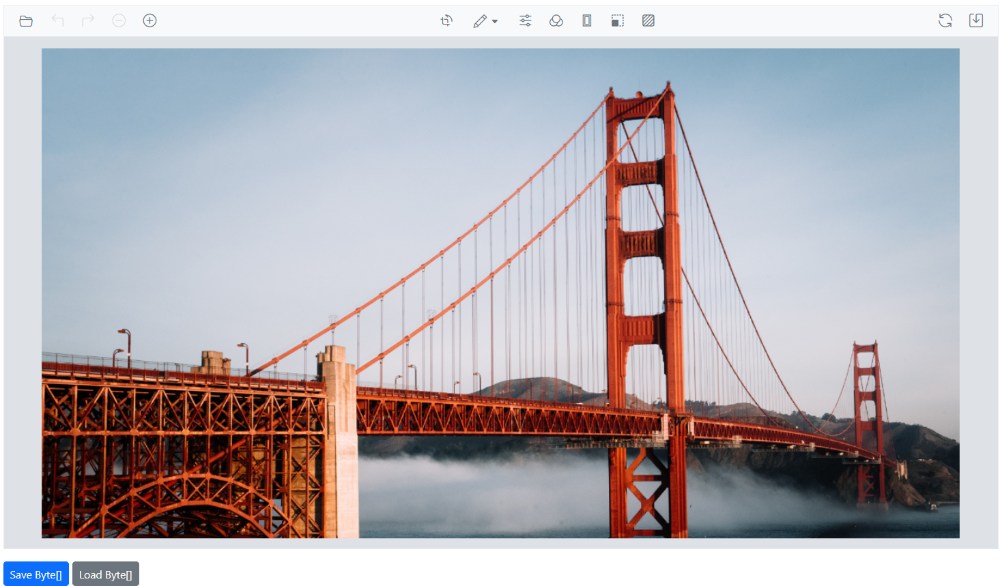
Save the image as byte[]
To save an image as a byte array (byte[]), use the getImageData method of the editor to retrieve the image data and convert it into a byte array. You can then invoke the open method on the Syncfusion® Image Editor instance to load this byte array into the editor. The resulting byte array can be stored in a database for data management and maintenance.
<div class="col-lg-12 control-section e-img-editor-sample">
    @Html.EJS().ImageEditor("image-editor").Created("created").Render()
</div>
<div class="mt-3">
    <button id="saveImage" class="e-btn e-primary">Save Byte[]</button>
    <button id="loadImage" class="e-btn e-secondary">Load Byte[]</button>
</div>

<script>
    var imageEditorObj;
    var byteArray;

    function created() {
        imageEditorObj = ej.base.getComponent(document.getElementById('image-editor'), 'image-editor');
        if (ej.base.Browser.isDevice) {
            imageEditorObj.open('https://ej2.syncfusion.com/demos/src/image-editor/images/flower.png');
        } else {
            imageEditorObj.open('https://ej2.syncfusion.com/demos/src/image-editor/images/bridge.png');
        }
    }

    document.getElementById('saveImage').onclick = function () {
        var imageData = imageEditorObj.getImageData();
        var canvas = document.createElement('canvas');
        var ctx = canvas.getContext('2d');
        if (!ctx) return;
        canvas.width = imageData.width;
        canvas.height = imageData.height;
        ctx.putImageData(imageData, 0, 0);

        canvas.toBlob((blob) => {
            if (blob) {
                let reader = new FileReader();
                reader.readAsArrayBuffer(blob);
                reader.onloadend = function () {
                    byteArray = new Uint8Array(reader.result);
                };
            }
        }, 'image/png');
    };

    document.getElementById('loadImage').onclick = function () {
        if (byteArray) {
            let blob = new Blob([byteArray], { type: 'image/png' });
            let url = URL.createObjectURL(blob);
            imageEditorObj.open(url);
        }
    };
</script>

<style>
    .e-img-editor-sample {
        height: 80vh;
        width: 100%;
    }

    @@media only screen and (max-width: 700px) {
        .e-img-editor-sample {
            height: 75vh;
            width: 100%;
        }
    }
</style>
public ActionResult Default()
{
return View();
}Output be like the below.
Save the image as Blob
To save an image as a blob, use the getImageData method of the editor to retrieve the image data and convert it into a blob. You can then invoke the open method on the Syncfusion® Image Editor instance to load this byte array into the editor. The resulting byte array can be stored in a database for data management and maintenance.
<div class="col-lg-12 control-section e-img-editor-sample">
    @Html.EJS().ImageEditor("image-editor").Created("created").Render()
</div>
@Html.EJS().Button("saveBlob").CssClass("e-primary").Content("Save Blob").Click("saveBlob").Render()

<script>
    var blobUrl;
    function created() {
        var imageEditorObj = ej.base.getComponent(document.getElementById('image-editor'), 'image-editor');
        if (ej.base.Browser.isDevice) {
            imageEditorObj.open('https://ej2.syncfusion.com/demos/src/image-editor/images/flower.png');
        } else {
            imageEditorObj.open('https://ej2.syncfusion.com/demos/src/image-editor/images/bridge.png');
        }
    }

    function saveBlob() {
        var imgObj = ej.base.getComponent(document.getElementById('image-editor'), 'image-editor');
        var imageData = imgObj.getImageData();
        var canvas = document.createElement('canvas');
        var ctx = canvas.getContext('2d');
        canvas.width = imageData.width;
        canvas.height = imageData.height;
        ctx.putImageData(imageData, 0, 0);
        canvas.toBlob((blob) =>{
            this.blobUrl = URL.createObjectURL(blob);// For getting blob.
        });
    }
</script>

<style>
    .image-editor {
        margin: 0 auto;
    }

    .e-img-editor-sample {
        height: 80vh;
        width: 100%;
    }

    @@media only screen and (max-width: 700px) {
        .e-img-editor-sample {
            height: 75vh;
            width: 100%;
        }
    }

    .control-wrapper {
        height: 100%;
    }
</style>
public ActionResult Default()
{
return View();
}Output be like the below.
Add watermarks while saving the image
You can utilize the FileOpened event, which triggers once the image is loaded into the image editor. After this event, you can use the drawText method to add a watermark. This approach allows the watermark to be automatically drawn on the canvas every time an image is opened in the editor, making it useful for handling copyright-related content.
<div class="col-lg-12 control-section e-img-editor-sample">
    @Html.EJS().ImageEditor("image-editor").Created("created").BeforeSave("beforeSaved").Saved("saved").Render()
</div>

<script>
    function created() {
        var imageEditorObj = ej.base.getComponent(document.getElementById('image-editor'), 'image-editor');
        if (ej.base.Browser.isDevice) {
            imageEditorObj.open('https://ej2.syncfusion.com/demos/src/image-editor/images/flower.png');
        } else {
            imageEditorObj.open('https://ej2.syncfusion.com/demos/src/image-editor/images/bridge.png');
        }
    }

    function beforeSaved() {
        var imgObj = ej.base.getComponent(document.getElementById('image-editor'), 'image-editor');
        imgObj.drawText(dimension.x, dimension.y, 'Syncfusion', 'Arial', 40, false, false, '#80330075');
    }
    function saved() {
        var imgObj = ej.base.getComponent(document.getElementById('image-editor'), 'image-editor');
        imgObj.deleteShape(shapes[shapes.length - 1].id);
    }

</script>

<style>
    .image-editor {
        margin: 0 auto;
    }

    .e-img-editor-sample {
        height: 80vh;
        width: 100%;
    }

    @@media only screen and (max-width: 700px) {
        .e-img-editor-sample {
            height: 75vh;
            width: 100%;
        }
    }

    .control-wrapper {
        height: 100%;
    }
</style>
public ActionResult Default()
{
return View();
}Output be like the below.
Remove default Save button and add custom button to save the image to server
User can leverage the Toolbar property to replace the default save button with a custom one. By doing so, you can use the getImageData method to retrieve the image data, convert it to base64 format, and then save it to the server. This approach gives you more control over the image-saving process.
Prevent default save option and save the image to specific location
User can make use of the BeforeSave event, which triggers just before the image is downloaded, to override the default save option by setting args.cancel to true. Afterward, you can utilize the getImageData method to retrieve the current image data and convert it into a format like byte[], blob, or base64 for further processing. This gives you greater flexibility in handling the image data.
Events to handle save actions
The Image Editor provides several events related to opening and saving images. These events offer detailed control over the image handling process. For comprehensive information about these events, including their triggers and usage, please refer to the dedicated section on open and save support. This section will provide you with the specifics needed to effectively utilize these events in your application.
File opened event
The FileOpened event is triggered in the Image Editor control after an image is successfully loaded. It provides the FileOpenEventArgs as the event argument, which contains two specific arguments:
-
FileName: This argument is a string that contains the file name of the opened image. It represents the name of the file that was selected or provided when loading the image into the Image Editor.
-
FileType: This argument is a string that contains the type of the opened image. It specifies the format or file type of the image that was loaded, such as PNG, JPEG, SVG, WEBP, and BMP.
By accessing these arguments within the FileOpened event handler, you can retrieve information about the loaded image, such as its file name and file type. This can be useful for performing additional actions or implementing logic based on the specific image that was opened in the Image Editor control.
Saving event
The saving event is triggered in the Image Editor control when an image is being saved to the local disk. It provides the SaveEventArgs as the event argument, which includes the following specific arguments:
-
FileName: This argument is a string that holds the file name of the saved image. It represents the name of the file that will be used when saving the image to the local disk.
-
FileType: This argument is a string indicating the type or format of the saved image. It specifies the desired file type in which the image will be saved, such as PNG, JPEG, SVG, and WEBP.
-
Cancel: This argument is a boolean value that can be set to true in order to cancel the saving action. By default, it is set to false, allowing the saving process to proceed. However, if you want to prevent the saving action from occurring, you can set Cancel to true within the event handler.
By accessing these arguments within the Saving event handler, you can retrieve information about the file name and file type of the image being saved. Additionally, you have the option to cancel the saving action if necessary.
Created event
The created event is triggered once the Image Editor control is created. This event serves as a notification that the component has been fully initialized and is ready to be used. It provides a convenient opportunity to render the Image Editor with a predefined set of initial settings, including the image, annotations, and transformations.
Destroyed event
The destroyed event is triggered once the Image Editor control is destroyed or removed from the application. This event serves as a notification that the component and its associated resources have been successfully cleaned up and are no longer active.