End User Capabilities in the ASP.NET MVC Image Editor control
30 Jun 20257 minutes to read
The following operations are available for end-users and the same is explained briefly in these sections.
Open an image
To open an image in the image editor, do the following steps.
-
Click the Open icon from the left side of the toolbar.
-
The file explorer lists only JPEG, PNG, JPG, WEBP, and BMP format files.
-
Select the image from the list of the images from the file explorer window.
Zooming
Image zooming can be performed in the following ways.
-
Using toolbar
-
Using pinch zoom in touch enabled devices
-
Using mouse wheel
-
Using keyboard
Using toolbar
To zoom in or out the image in the image editor, do the following steps.
- The Zoom In/ Out option only enabled after opening the image.
Using pinch
To zoom in or out the image in the image editor, do the following steps.
-
Touch with two fingers to perform zooming.
-
Zoom in and out controlled by touch gestures.
Using mouse wheel
To zoom in or out the image in the image editor, do the following steps.
-
Press the ctrl key and scroll the mouse wheel to perform zooming.
-
The zoom in and out controlled by the mouse wheel.
Using keyboard
To zoom in or out the image in the image editor, do the following steps.
-
Press the ctrl key with ‘+’ button from the keyboard to zoom in an image.
-
Press the ctrl key with ‘-’ button from the keyboard to zoom out an image.
Panning
To pan an image in the image editor, do the following steps.
-
Click on the image and do dragging to move or pan the image.
-
Panning option will be enabled in the following two cases.
-
If the selection is applied for cropping an image.
-
If the image size exceeds the canvas size while zooming an image.
-

Cropping and image transformation
To crop an image in the image editor, do the following steps.
-
Cropping can be performed based on the selection in an image editor.
-
To perform selection, click the crop button in the toolbar which opens the contextual toolbar that shows crop selection options, rotate options, flip options, and straightening options.
-
Click the crop selection button and select the type of selection such as custom, circle, square, and ratio selection from the popup.
-
Once selection is completed, do panning to move the image to get the cropped region.
-
Utilize the rotate and flip buttons along with the straighten slider to perform image transformations, including any inserted annotations.
-
Once the cropping region is finalized in the image click the tick icon at the top right of the toolbar to crop the image.
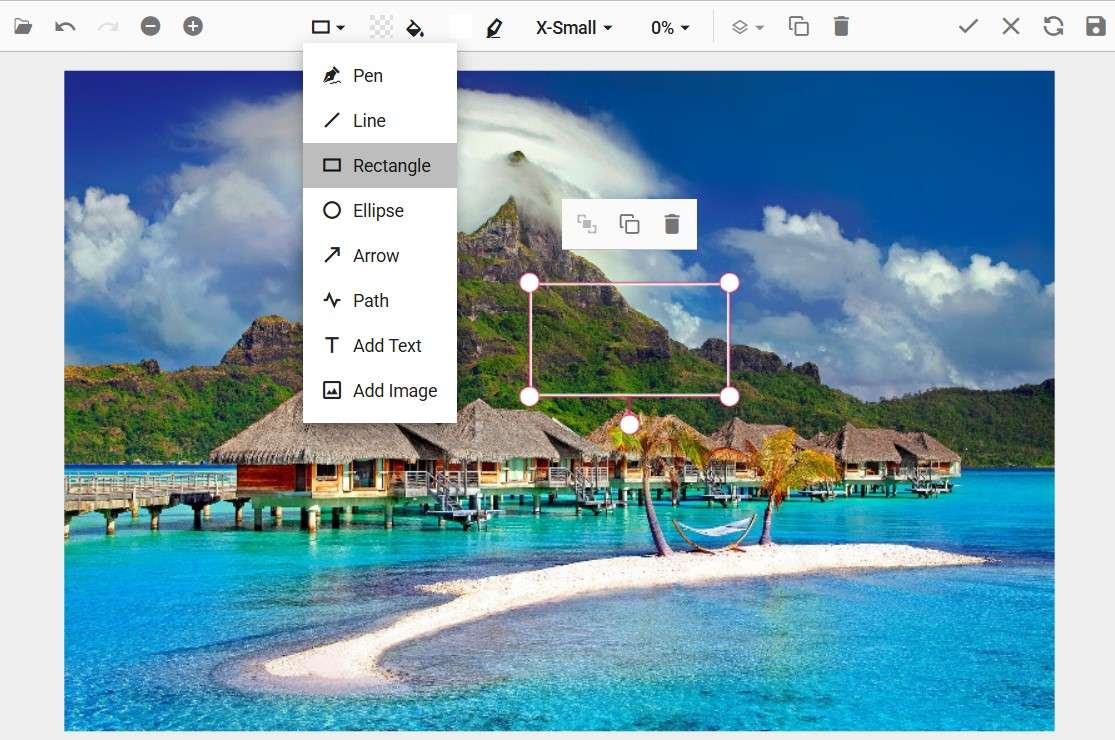
Annotations
To add annotations to an image in the image editor, do the following steps.
-
To add annotation, click the annotation button in the toolbar and select the type of annotations such as Line, Rectangle, Ellipse, Path, Arrow, Text, or Freehand drawing to be inserted to the image editor.
-
Once the annotation is added to the image, that can be repositioned by clicking and dragging the annotations using mouse as well as resized by clicking and resizing the selection circle to be placed around the annotations.
-
To rotate annotations, you can simply grab the circle located at the bottom of the annotation. The rotation can be applicable to all the annotations except text annotation.
-
Customize the annotations by changing their color, stroke width, font family, and font size through the contextual toolbar. The contextual toolbar will be enabled whenever the annotations are selected.
-
When annotations are selected in the Image Editor, the quick access toolbar becomes active, providing convenient access to various actions such as duplicating, deleting, or editing text associated with the selected annotation. This toolbar enables users to perform these common operations quickly and efficiently, streamlining their workflow and enhancing the overall editing experience.
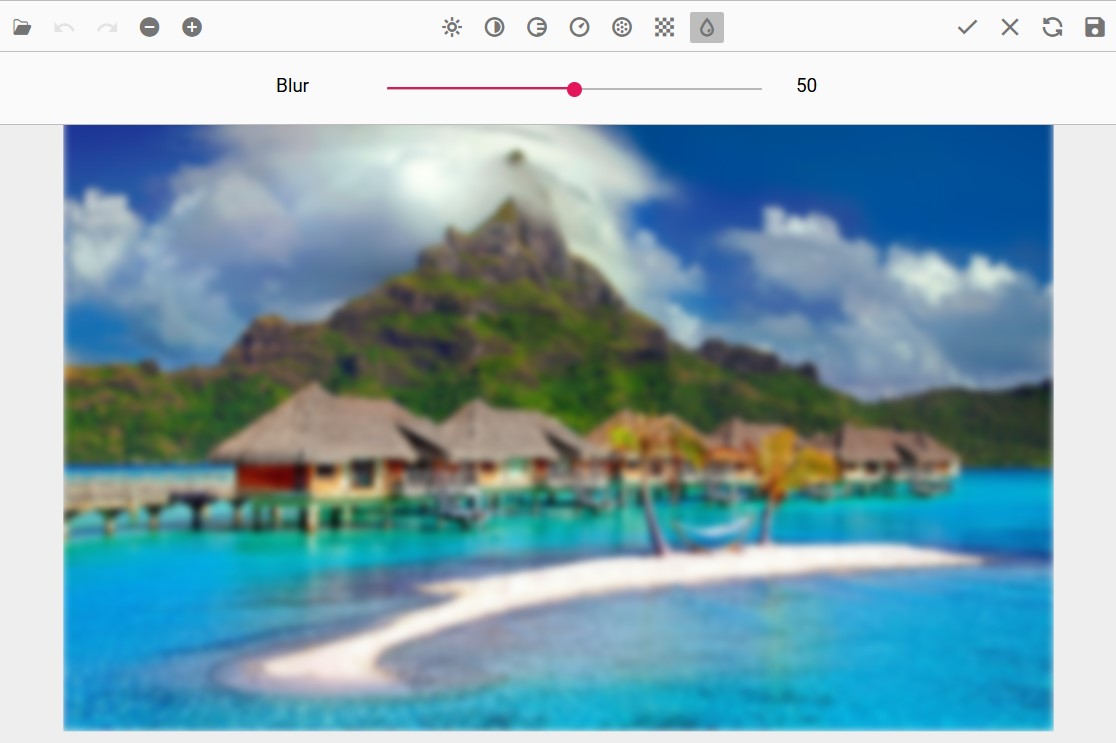
Filtering and fine-tune
To perform fine-tuning on an image in the image editor, do the following steps.
-
Click the fine-tune button which displays the list of fine-tuning available in the image editor.
-
Click one of the fine-tune options from the list of options which shows a slider to adjust the corresponding filter.
-
Click on the canvas or tick icon at the right corner of the toolbar in the image editor to apply the modifications.
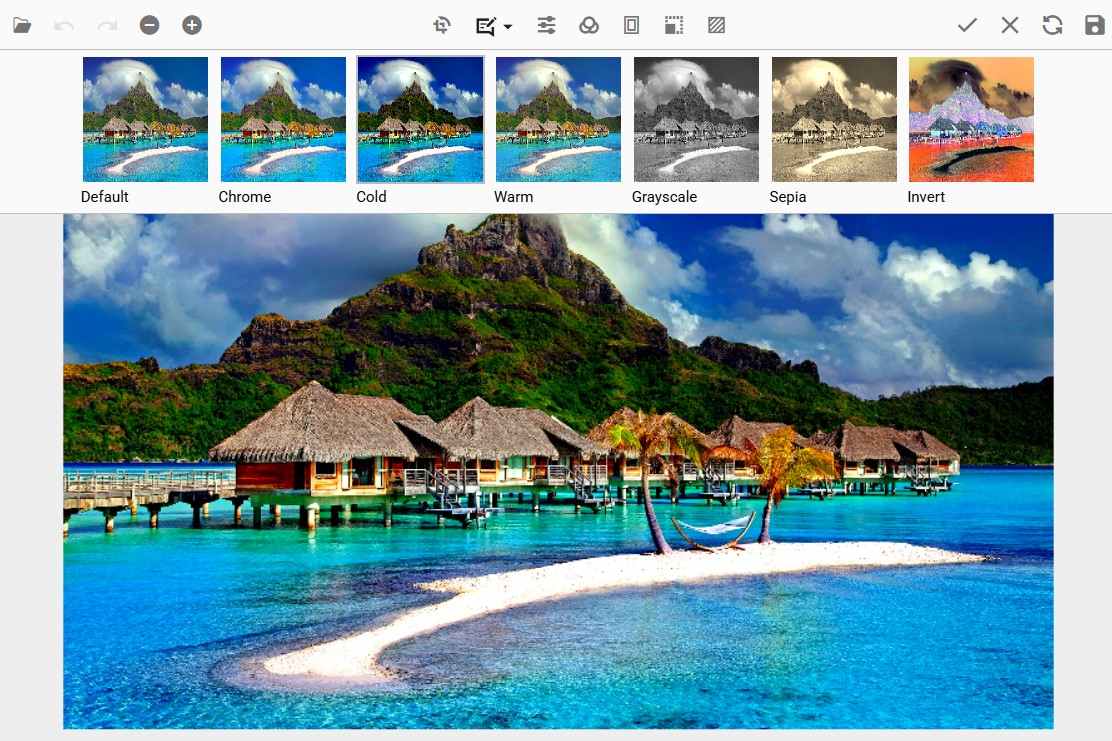
To apply filters on an image in the image editor, do the following steps.
-
Click the filter button which displays the list of filters available in the image editor.
-
Click the filter from list of options to apply the corresponding filter to an image.
-
Click on the canvas or tick icon at the right corner of the toolbar in the image editor to apply the modifications.
Undo and redo the operations
To undo and redo the actions performed in an image editor, do the following steps.
-
The undo button will be enabled once the action is performed in an image editor.
-
The redo button will be enabled once the undo action is performed in an image editor.
-
Click the undo or redo button at the left side of the toolbar to perform undo and redo operation.
-
Ctrl + Z and Ctrl + Y facilitates this process by allowing users to undo and redo actions, respectively.

Reset an image
To revert all the changes done in an image editor, do the following steps.
-
Click the reset button which is located on the right side of the toolbar.
-
This will revert all the changes performed in the image editor.
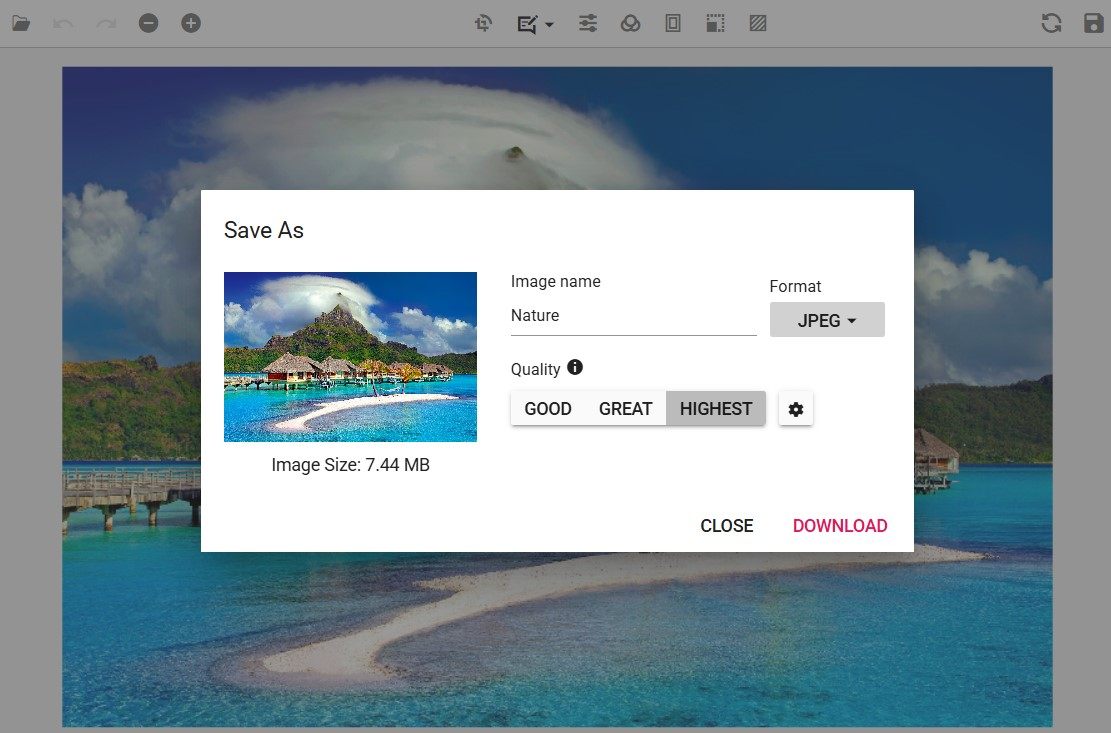
Export an image
To save the modified image in the Image Editor, follow these steps:
- Click the Save Button
- Locate the Save button on the right side of the toolbar and click it.
- Select the File Format
- In the export popup, choose your preferred file format (PNG, JPEG, SVG, or WEBP) to save the image with all
applied modifications.
- In the export popup, choose your preferred file format (PNG, JPEG, SVG, or WEBP) to save the image with all
- Adjust Image Quality (JPEG Format Only)
- If saving in JPEG, use the Image Quality slider to set the desired quality level (0-100). A higher value retains more detail but increases file size.
- Download the Image
- Click Download to save the modified image to your device.
- Use Keyboard Shortcut (Ctrl + S)
- Press Ctrl + S to download the image in the same format as the loaded image without opening the Save dialog. For example, if the loaded image is PNG, it will be saved as PNG.