How can I help you?
Getting Started with ASP.NET MVC and Syncfusion® Project Template
9 Dec 20245 minutes to read
Syncfusion® provides the Visual Studio Project Templates for the Syncfusion® ASP.NET MVC platform to create the Syncfusion® ASP.NET MVC web application using Essential® JS 2 controls.
NOTE
Starting with v16.2.0.x, if you reference to Syncfusion® assemblies from trial setup or NuGet feed, you should include a license key in your projects. Refer to this link to learn about registering Syncfusion® license key in your ASP.NET MVC application to use the controls.
Getting started with ASP.NET MVC 5
Prerequisites
To get started with ASP.NET MVC 5 application, ensure the following software to be installed on the machine.
- .Net Framework 4.5 and above.
- ASP.NET MVC 5
- Visual Studio 2017
- Essential Studio® for ASP.NET MVC (Essential® JS 2)
Create ASP.NET MVC 5 web application
-
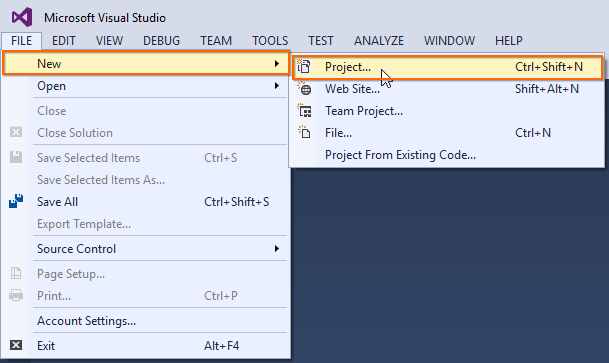
Choose File > New > Project… in the Visual Studio menu bar.
-
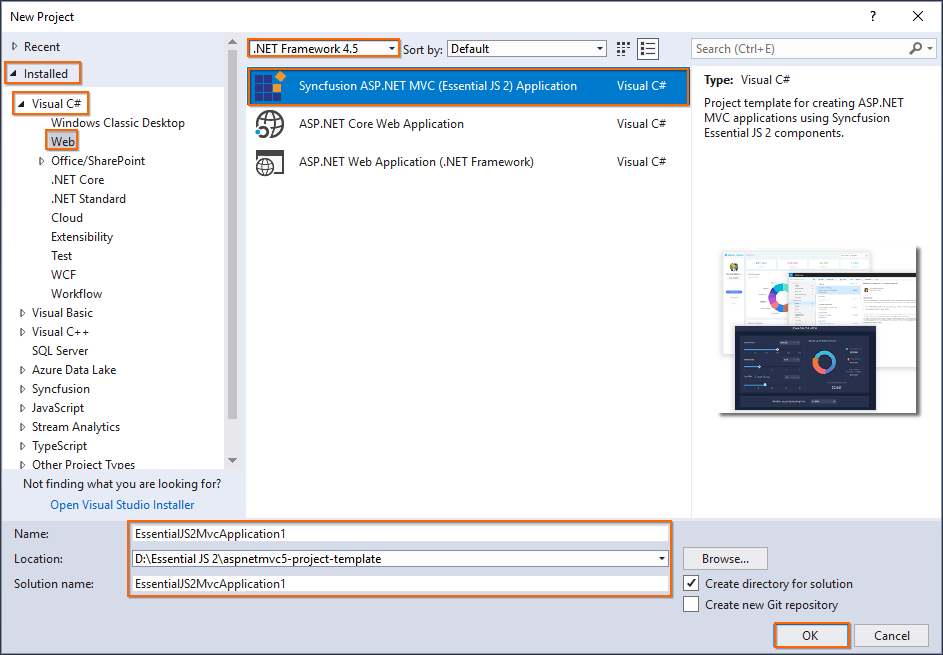
Select Installed > Visual C# > Web and choose the required .NET Framework in the drop-down.
-
Select Syncfusion® ASP.NET MVC (Essential® JS 2) Application and change the application name, and then click OK.
NOTE
The Essential® JS 2 supports 4.5+ .NET Framework in the ASP.NET MVC application. i.e. The minimum target framework is 4.5 for Syncfusion® ASP.NET MVC (Essential® JS 2).
-
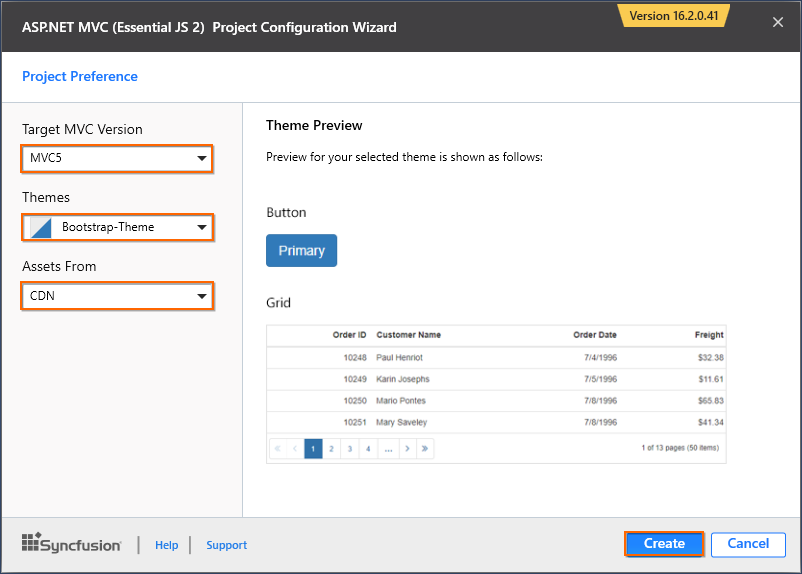
Choose the options to configure the Syncfusion® ASP.NET Core (Essential® JS 2) application by using the following Project Configuration dialog.
Target MVC Version: Select the version of ASP.NET MVC project as MVC5.
Assets From: Load the Syncfusion® Essential® JS 2 assets from ASP.NET MVC project such as NuGet, CDN or installed location.
NOTE
Installed location option is available only when the Syncfusion® Essential JavaScript 2 setup has been installed.
Theme Selection: Choose the required Theme.
-
Click Create, the Syncfusion® ASP.NET MVC (Essential® JS 2) application has been created.
The required Syncfusion® Essential® JS 2 NuGet/NPM packages, Scripts, and CSS have been added to the new project.
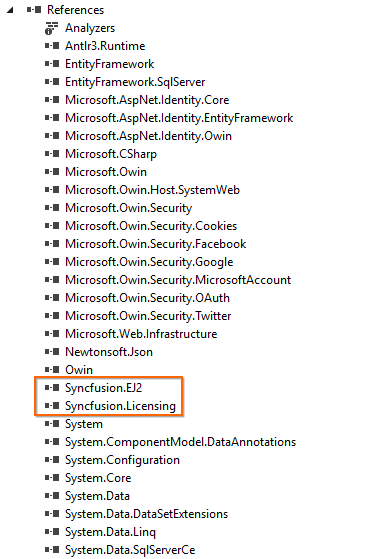
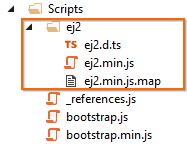
If you are choosing assets from
NuGetorInstalled Location, then the styles and scripts will be installed in theContent/ej2andScripts/ej2.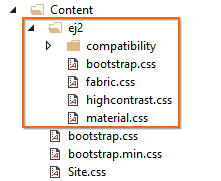
-
Add the Syncfusion® Essential® JS 2 controls directly in any web page (cshtml) in the Views folder and run the application.
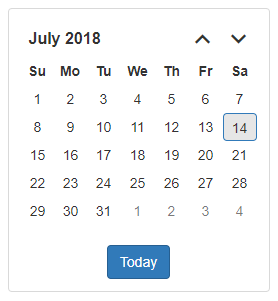
For example, the calendar control is added to the
~/Views/Home/Index.cshtmlpage.<div> @Html.EJS().Calendar("calendar").Render() </div>The final output of Essential® JS 2 calendar control in the web browser is shown as follows.
Getting Started with ASP.NET MVC 4
Prerequisites
To get started with ASP.NET MVC 4 application, ensure the following software to be installed on the machine.
- .Net Framework 4.5 and above.
- ASP.NET MVC 4
- Visual Studio 2017
- Essential Studio® for ASP.NET MVC (Essential® JS 2)
Create ASP.NET MVC 4 web application
-
Choose File > New > Project… in the Visual Studio menu bar.

-
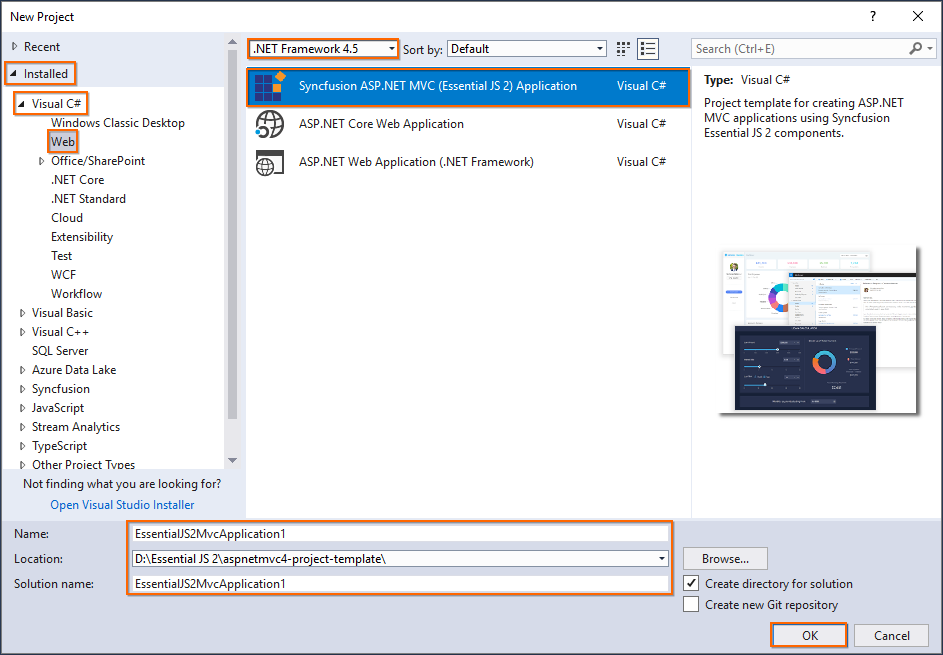
Select Installed > Visual C# > Web and choose the required .NET Framework in the drop-down and select Syncfusion® ASP.NET MVC (Essential® JS 2) Application. Change the application name and click OK.
NOTE
The Syncfusion® ASP.NET MVC UI Controls supports 4.5+ .NET Framework in the ASP.NET MVC application. i.e. The minimum target framework is 4.5.
-
Choose the options to configure the Syncfusion® ASP.NET Core (Essential® JS 2) application by using the following Project Configuration dialog.
Target MVC Version: Select the version of ASP.NET MVC Project as MVC4.
Assets From: Load the Syncfusion® Essential® JS 2 assets to ASP.NET MVC Project, either NuGet, CDN or installed location.
NOTE
Installed location option will be available only when the Syncfusion® Essential JavaScript 2 setup has been installed.
Theme Selection: Choose the required Theme.
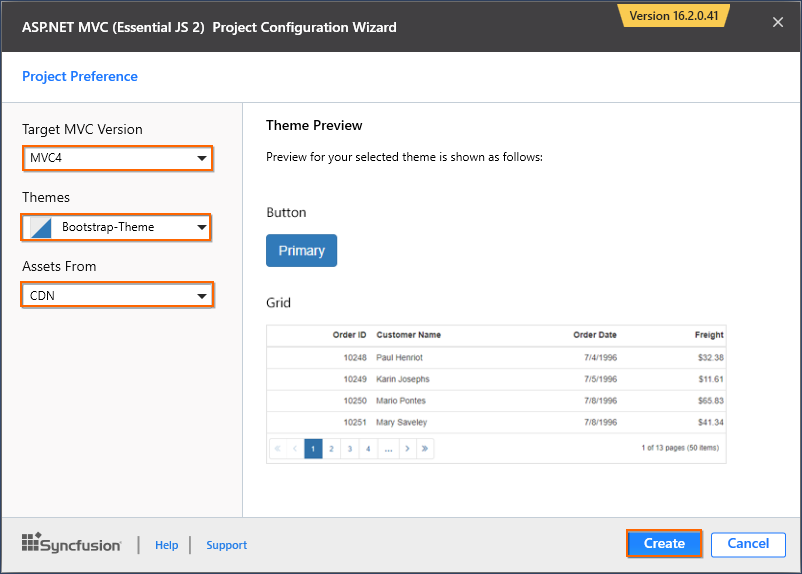
-
Click Create, the Syncfusion® ASP.NET MVC (Essential® JS 2) application has been created.
-
Required Syncfusion® Essential® JS 2 NuGet/NPM packages, Scripts, and CSS have been added to the new project.

If you are choosing assets from
NuGetorInstalled Location, then the styles and scripts will be installed in theContent/ej2andScripts/ej2.

-
Add the Syncfusion® ASP.NET MVC UI controls directly in any web page (cshtml) in the
Viewsfolder and run the application.For example, the calendar control is added to the
~/Views/Home/Index.cshtmlpage.<div> @Html.EJS().Calendar("calendar").Render() </div>The final output of Syncfusion® ASP.NET MVC Calendar UI control in the web browser is shown as follows.
