Getting Started with ASP.NET Core Uploader Control
16 Feb 20245 minutes to read
This section briefly explains about how to include ASP.NET Core Uploader control in your ASP.NET Core application using Visual Studio.
Prerequisites
System requirements for ASP.NET Core controls
Create ASP.NET Core web application with Razor pages
Install ASP.NET Core package in the application
To add ASP.NET Core controls in the application, open the NuGet package manager in Visual Studio (Tools → NuGet Package Manager → Manage NuGet Packages for Solution), search for Syncfusion.EJ2.AspNet.Core and then install it. Alternatively, you can utilize the following package manager command to achieve the same.
Install-Package Syncfusion.EJ2.AspNet.Core -Version 25.1.35NOTE
Syncfusion ASP.NET Core controls are available in nuget.org. Refer to NuGet packages topic to learn more about installing NuGet packages in various OS environments. The Syncfusion.EJ2.AspNet.Core NuGet package has dependencies, Newtonsoft.Json for JSON serialization and Syncfusion.Licensing for validating Syncfusion license key.
Add Syncfusion ASP.NET Core Tag Helper
Open ~/Pages/_ViewImports.cshtml file and import the Syncfusion.EJ2 TagHelper.
@addTagHelper *, Syncfusion.EJ2Add stylesheet and script resources
Here, the theme and script is referred using CDN inside the <head> of ~/Pages/Shared/_Layout.cshtml file as follows,
<head>
    ...
    <!-- Syncfusion ASP.NET Core controls styles -->
    <link rel="stylesheet" href="https://cdn.syncfusion.com/ej2/25.1.35/fluent.css" />
    <!-- Syncfusion ASP.NET Core controls scripts -->
    <script src="https://cdn.syncfusion.com/ej2/25.1.35/dist/ej2.min.js"></script>
</head>
NOTE
Checkout the Themes topic to learn different ways (CDN, NPM package, and CRG) to refer styles in ASP.NET Core application, and to have the expected appearance for Syncfusion ASP.NET Core controls.
NOTE
Checkout the Adding Script Reference topic to learn different approaches for adding script references in your ASP.NET Core application.
Register Syncfusion Script Manager
Also, register the script manager <ejs-script> at the end of <body> in the ASP.NET Core application as follows.
<body>
    ...
    <!-- Syncfusion ASP.NET Core Script Manager -->
    <ejs-scripts></ejs-scripts>
</body>
Add ASP.NET Core Uploader control
Now, add the Syncfusion ASP.NET Core Uploader tag helper in ~/Pages/Index.cshtml page.
NOTE
From v16.2.41 version, the
Essential JS2 AJAXlibrary has been integrated for uploader server requests.
Hence, use the third partypromiselibrary like blue-bird to use the uploader in Internet Explorer.
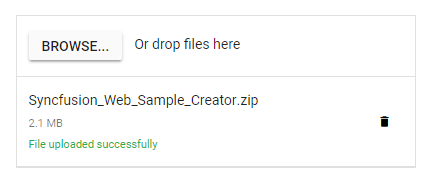
<ejs-uploader id="uploadFiles" autoUpload="false"></ejs-uploader>Press Ctrl+F5 (Windows) or ⌘+F5 (macOS) to run the app. Then, the Syncfusion ASP.NET Core Uploader control will be rendered in the default web browser.
Adding drop area
By default, the uploader control allows to upload files by drag the files from file explorer, and drop into the drop area. You can configure any other external element as drop target using dropArea property.
In the following sample, drop target is configured.
<div id='droparea'>Drop files here to upload</div>

<ejs-uploader id="uploadFiles" dropArea="#droparea" autoUpload="false"></ejs-uploader>

<style>
    .fileupload {
        margin: 20px auto;
        width: 400px;
    }

    #droparea {
        padding: 50px 25px;
        margin: 30px auto;
        border: 1px solid #c3c3c3;
        text-align: center;
        width: 20%;
        display: inline-flex;
    }

    .e-file-select,
    .e-file-drop {
        display: none;
    }

    body .e-upload-drag-hover {
        outline: 2px dashed brown;
    }

    #uploadfile {
        width: 60%;
        display: inline-flex;
        margin-left: 5%;
    }
</style>
Configure asynchronous settings
The uploader control process the files to upload in Asynchronous mode by default. Define the properties saveUrl and removeUrl to handle the save and remove action as follows.
@{
    var asyncSettings = new Syncfusion.EJ2.Inputs.UploaderAsyncSettings { SaveUrl = "https://services.syncfusion.com/aspnet/production/api/FileUploader/Save", RemoveUrl = "https://services.syncfusion.com/aspnet/production/api/FileUploader/Remove" };
}

<ejs-uploader id="uploadFiles" asyncSettings="@asyncSettings" autoUpload="false"></ejs-uploader>
Handle success and failed upload
You can handle the success and failure actions using the success and failure events. To handle these events, define the function and assign it to the corresponding event as follows.
@{
    var asyncSettings = new Syncfusion.EJ2.Inputs.UploaderAsyncSettings { SaveUrl = "https://services.syncfusion.com/aspnet/production/api/FileUploader/Save", RemoveUrl = "https://services.syncfusion.com/aspnet/production/api/FileUploader/Remove" };
}
<ejs-uploader id="uploadFiles" asyncSettings="@asyncSettings" success="onUploadSuccess" failure="onUploadFailure" autoUpload="false"></ejs-uploader>
<script>
    function onUploadSuccess(args) {
        if (args.operation === 'upload') {
            console.log('success');
        }
    }
    function onUploadFailure(args) {
        console.log('failed');
    }
</script>
NOTE