Asynchronous Upload in ASP.NET CORE File Upload
14 Sep 202619 minutes to read
The Uploader control allows you to upload the files asynchronously. The upload process requires a save and remove action URL to manage the upload process in the server.
- The save action is necessary to handle the upload operation.
- The remove action is optional; you can handle file removal on the server.
The file can be uploaded automatically or manually. For more information, you can refer to the Auto Upload section from the documentation.
Multiple file upload
By default, the Uploader control allows you to select and upload multiple files simultaneously. The selected files are organized in a list for every file selection until you clear it by clicking the clear button shown in the footer. You can enable multi-file selection on the underlying the file input element by setting the multiple property true.
@{
    var asyncSettings = new Syncfusion.EJ2.Inputs.UploaderAsyncSettings { SaveUrl = "https://services.syncfusion.com/aspnet/production/api/FileUploader/Save", RemoveUrl = "https://services.syncfusion.com/aspnet/production/api/FileUploader/Remove" };
}
<ejs-uploader id="uploadFiles" asyncSettings="@asyncSettings" autoUpload="false"></ejs-uploader>
using System;
using System.Collections.Generic;
using System.Linq;
using System.Threading.Tasks;
using Microsoft.AspNetCore.Mvc;
namespace EJ2CoreSampleBrowser.Controllers.TextBoxes
{
public partial class UploaderController : Controller
{
public ActionResult DefaultFunctionalities()
{
return View();
}
}
}Single file upload
You can select and upload a single file by disabling the multiple file selection property. The file list item is removed for every selection and it always maintains a single file to upload. You can remove the multiple attributes from the original input element of file by enabling the single file upload property.
The following example explains about single file upload settings.
@{
    var asyncSettings = new Syncfusion.EJ2.Inputs.UploaderAsyncSettings { SaveUrl = "https://services.syncfusion.com/aspnet/production/api/FileUploader/Save", RemoveUrl = "https://services.syncfusion.com/aspnet/production/api/FileUploader/Remove" };
}
<ejs-uploader id="uploadFiles" asyncSettings="@asyncSettings" multiple="false" autoUpload="false"></ejs-uploader>
using System;
using System.Collections.Generic;
using System.Linq;
using System.Threading.Tasks;
using Microsoft.AspNetCore.Mvc;
namespace EJ2CoreSampleBrowser.Controllers.TextBoxes
{
public partial class UploaderController : Controller
{
public ActionResult DefaultFunctionalities()
{
return View();
}
}
}Save action
The save action handler uploads the files that needs to be uploaded in the saveUrl property. The save handler receives the submitted files and manages the save process in server. After uploading the files to server location, the color of the file name appears in green and the remove icon becomes a bin icon.
- When the file is uploaded successfully, the
successevent triggers to handle the operation after upload. - When the file is failed to upload, the
failureevent triggers with information about the cause of the failure.
You can cancel the upload process by setting the upload event argument eventargs.cancel to true.
@{
    var asyncSettings = new Syncfusion.EJ2.Inputs.UploaderAsyncSettings { SaveUrl = "https://services.syncfusion.com/aspnet/production/api/FileUploader/Save" };
}
<ejs-uploader id="uploadFiles" asyncSettings="@asyncSettings" autoUpload="false"></ejs-uploader>
using System;
using System.Collections.Generic;
using System.Linq;
using System.Threading.Tasks;
using Microsoft.AspNetCore.Mvc;
namespace EJ2CoreSampleBrowser.Controllers.TextBoxes
{
public partial class UploaderController : Controller
{
public ActionResult DefaultFunctionalities()
{
return View();
}
}
}Server-side configuration for save action
This section explains how to handle the server-side action for saving the file from server.
public string uploads = ".\\Uploaded Files"; // replace with your directory path

public async Task<IActionResult> Save(IFormFile UploadFiles)
{
    if (UploadFiles.Length > 0)
    {
        if (!Directory.Exists(uploads)) // Create the directory if not exists
        {
            Directory.CreateDirectory(uploads);
        }

        var filePath = Path.Combine(uploads, UploadFiles.FileName); // Get the file path
        using (var fileStream = new FileStream(filePath, FileMode.Create)) // Create the file
        {
            await UploadFiles.CopyToAsync(fileStream); // Save the file
        }
    }
    return Ok();
}
Saving and returning responses
Server-side configuration
The following example demonstrates the server-side action for saving files on the server and returning responses in JSON, String, and File formats.
[AcceptVerbs("Post")]
public IActionResult Save()
{
    // for JSON Data
    try
     {
        // Process uploaded data
        var responseData = new
        {
            Success = true,
            Message = "Files uploaded successfully",
            // Additional data can be added here
        };

        return Json(responseData);
     }
     catch (Exception e)
     {
         var errorResponse = new
         {
            Success = false,
            Message = "File upload failed: " + e.Message
         };

         return Json(errorResponse);
     }

    // for String Data
    try
    {
        // Process string data
        var data = "success";
        // Return the string data
        return Content(data);
    }
    catch (Exception)
    {
        var data = "failed";
        return Content(data);
    }

    // for File Data
    try
    {
        // Example: Retrieve file path for stream.txt
        var filePath = "stream.txt"; // Example file path

        // Get full file path
        var fullPath = Path.GetFullPath(filePath);

        // Return the file
        return PhysicalFile(fullPath, "text/plain");
    }
    catch (Exception e)
    {
        // Handle file retrieval failure
        return Content("Failed to retrieve file response: " + e.Message, "text/plain");
    }
}
Client-side configuration
The following example demonstrates the client-side action for saving files on the server and returning responses in JSON, String, and File formats.
@using Syncfusion.EJ2

@{
    var asyncSettings = new Syncfusion.EJ2.Inputs.UploaderAsyncSettings { SaveUrl = @Url.Content("/api/FileUploader/Save") };
}

<ejs-uploader id="UploadFiles" success="OnSuccessHandler" asyncSettings="@asyncSettings">
</ejs-uploader>

<script>

    function OnSuccessHandler(args) {
        if (args.e !== null) // Check if the event argument is not null
        {
            var responseText = args.e.target.responseText;
            if (responseText.trim() !== "") {

                // for JSON and File data
                var jsonResponse = JSON.parse(responseText);
                if (jsonResponse !== null && jsonResponse.hasOwnProperty("success"))
                {
                    var isSuccess = jsonResponse["success"];
                    if (isSuccess) {
                        // File upload success
                        var message = jsonResponse.hasOwnProperty("message") ? jsonResponse["message"] : "File uploaded successfully";
                        // Additional processing as needed
                    }
                }

                // for string Data
                var message = responseText;
                // Additional processing as needed
            }
        }
    }
</script>
Remove action
The remove action is optional. Specify the URL to handle remove process from server. The remove handler receives the posted files and handles the remove operation in server.
- When the files are removed successfully from the server, the success event triggers to denote the process has completed.
- When remove action fails, the event failure triggers with information, which cause failure in remove process.
You can differentiate the file operation whether the success event triggers from save or remove action in its arguments eventArgs.operation.
You can remove the files which is not uploaded locally by clicking the remove icon. In this case, the success or failure events will not be triggered.
@{
    var asyncSettings = new Syncfusion.EJ2.Inputs.UploaderAsyncSettings { SaveUrl = "https://services.syncfusion.com/aspnet/production/api/FileUploader/Save", RemoveUrl = "https://services.syncfusion.com/aspnet/production/api/FileUploader/Remove" };
}
<ejs-uploader id="uploadFiles" asyncSettings="@asyncSettings" autoUpload="false"></ejs-uploader>
using System;
using System.Collections.Generic;
using System.Linq;
using System.Threading.Tasks;
using Microsoft.AspNetCore.Mvc;
namespace EJ2CoreSampleBrowser.Controllers.TextBoxes
{
public partial class UploaderController : Controller
{
public ActionResult DefaultFunctionalities()
{
return View();
}
}
}Server-side configuration for remove action
To remove an uploaded file from the server, it is sufficient to send only the file name. You can achieve this by setting the postRawFile property of the RemovingEventArgs to false during the removing event. This ensures that only the file name is sent to the server in the Remove action.
Here is an example:
<ejs-uploader id="uploadFiles" asyncSettings="@asyncSettings" removing="onFileRemove"></ejs-uploader>function onFileRemove(args) {
args.postRawFile = false;
}Here’s how to handle the server-side action for removing the file from server.
public void Remove(string UploadFiles)
{
    if (UploadFiles != null)
    {
        var filePath = Path.Combine(uploads, UploadFiles);
        if (System.IO.File.Exists(filePath))
        {
            System.IO.File.Delete(filePath); // Delete the file
        }
    }
}
When postRawFile is enabled, the complete file data will be sent to the server-side Remove action. The postRawFile option is enabled by default.
Here is an example:
<ejs-uploader id="uploadFiles" asyncSettings="@asyncSettings" removing="onFileRemove"></ejs-uploader>function onFileRemove(args) {
// The `postRawFile` option is enabled by default.
}Here’s how to receive the file data in the server-side Remove action:
public void Remove(IFormFile UploadFiles)
{
    // Your file removal logic goes here!
}
Auto upload
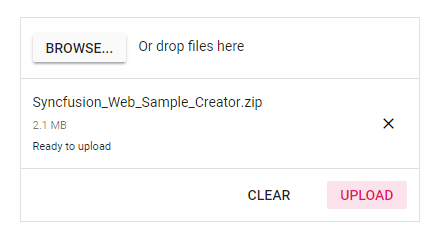
By default, uploads files automatically once they are selected and added in upload queue. To upload manually, disable the autoUpload property. When you disable this property, you can use the action buttons to call upload all or clear all actions manually. You can change those buttons text using the buttons property in Uploader control.
<ejs-uploader id="uploadFiles" autoUpload="false"></ejs-uploader>using System;
using System.Collections.Generic;
using System.Linq;
using System.Threading.Tasks;
using Microsoft.AspNetCore.Mvc;
namespace EJ2CoreSampleBrowser.Controllers.TextBoxes
{
public partial class UploaderController : Controller
{
public ActionResult DefaultFunctionalities()
{
return View();
}
}
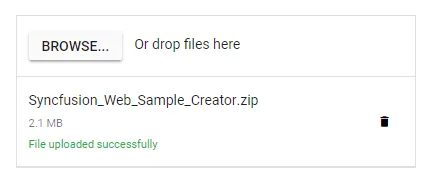
}The output when autoupload is enabled is shown below.
The output when autoupload is disabled is shown below.
Sequential upload
By default, the Uploader control processes multiple files to upload simultaneously. When you enable the sequentialUpload property, the selected files will be processed sequentially (one after the other) to the server. If a file uploads successfully or fails, the next file will upload automatically in this sequential upload. This feature reduces upload traffic and the number failed file uploads.
@{
    var asyncSettings = new Syncfusion.EJ2.Inputs.UploaderAsyncSettings { SaveUrl = "https://services.syncfusion.com/aspnet/production/api/FileUploader/Save", RemoveUrl = "https://services.syncfusion.com/aspnet/production/api/FileUploader/Remove" };
}

<ejs-uploader id="uploadFiles" sequentialUpload="true" asyncSettings="@asyncSettings"></ejs-uploader>
using System;
using System.Collections.Generic;
using System.Linq;
using System.Threading.Tasks;
using Microsoft.AspNetCore.Mvc;
namespace EJ2CoreSampleBrowser.Controllers.TextBoxes
{
public partial class UploaderController : Controller
{
public ActionResult SequentialUpload()
{
return View();
}
}
}Preloaded files
The Uploader control supports a preloaded list of files that are uploaded in the server. The preloaded files are useful to view and remove the files from server that can be achieved by the files property. By default, the files are configured with uploaded successfully state on rendering file list. The following properties are mandatory to configure the preloaded files:
- Name
- Size
- Type
@{
    var asyncSettings = new Syncfusion.EJ2.Inputs.UploaderAsyncSettings { SaveUrl = "https://services.syncfusion.com/aspnet/production/api/FileUploader/Save", RemoveUrl = "https://services.syncfusion.com/aspnet/production/api/FileUploader/Remove" };
}

<ejs-uploader id="uploadFiles" asyncSettings="@asyncSettings">
    <e-uploader-files>
        <e-uploader-uploadedfiles name="Books" Size=500000 type=".png"></e-uploader-uploadedfiles>
        <e-uploader-uploadedfiles name="Movies" Size=12000 type=".pdf"></e-uploader-uploadedfiles>
        <e-uploader-uploadedfiles name="Study materials" size="500000" type=".docx"></e-uploader-uploadedfiles>
    </e-uploader-files>
</ejs-uploader>
using System;
using System.Collections.Generic;
using System.Linq;
using System.Threading.Tasks;
using Microsoft.AspNetCore.Mvc;
namespace EJ2CoreSampleBrowser.Controllers.TextBoxes
{
public partial class UploaderController : Controller
{
public ActionResult DefaultFunctionalities()
{
return View();
}
}
}
Adding additional HTTP headers with upload action
The Uploader control allows you to add the additional headers with save and remove action requests using the uploading and removing events, which helps to send validation token on file upload. Access the current request and set the request header within these events.
The following code block shows how to add the additional headers with save and remove action request.
<ejs-uploader id="UploadFiles" dropArea=".control-fluid" uploading="addHeaders" removing = "addHeaders" asyncSettings="@asyncSettings"></ejs-uploader> function addHeaders(args) {
args.currentRequest.setRequestHeader('custom-header', 'Syncfusion');
}Explore the ASP.NET Core File Upload feature tour page to discover its groundbreaking features. You can also check out our ASP.NET Core File Upload example to see how to browse and select files for upload to the server.
See also
- How to add additional data on upload
- How to add confirm dialog to remove the files
- Check the MIME type of file before uploading it
- How to open and edit the uploaded files