Areas in ASP.NET Core
17 Feb 20226 minutes to read
This article provides a step-by-step introduction to add areas and configure the EJ2 Syncfusion component in the ASP.NET Core platform.
Areas
ASP.NET Areas is a feature that allows you to create a separate module in the application with its own set of Razor Pages, controllers, views, and models.
MVC Areas
-
Create ASP.NET Core web application with MVC(views and controllers). Refer to this documentation to get started with ASP.NET Core application.
-
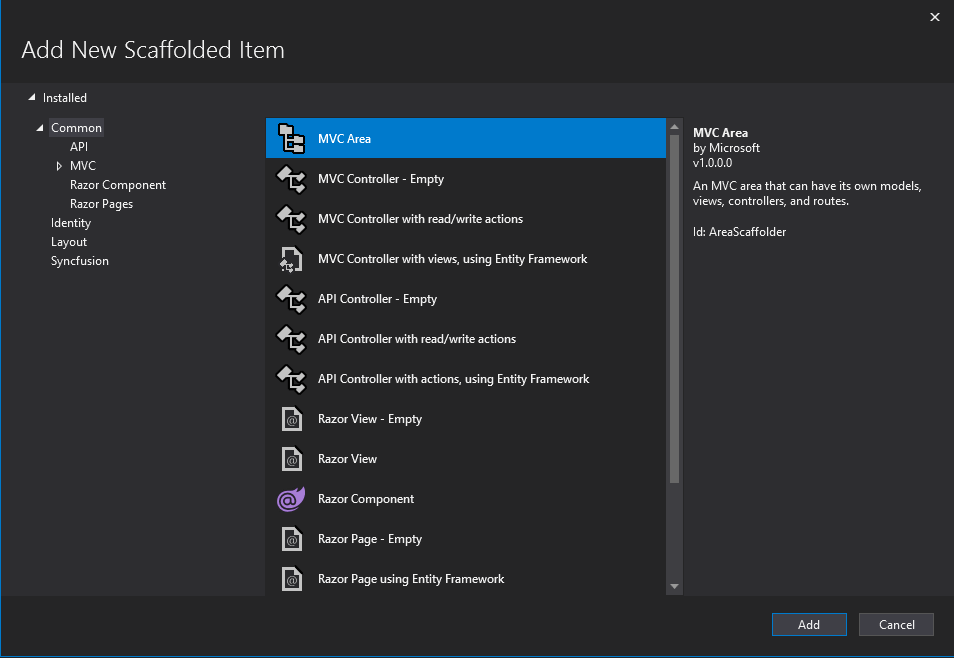
To add the MVC Area, right-click the application in the solution explorer and choose ADD -> New Scaffolded Item.

Select MVC Area from the pop-up and click Add to create an Area.

-
Now, created MVC Area is added to the root of the application with its Controllers, Data, Models, Views folders like the below structure.

-
Add the controller
HomeController.csin theAreas/Products/Controllers/folder location and then add the area attribute[Area("area name")]like below.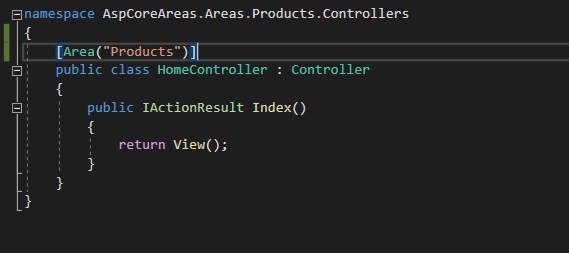
-
Add the View page in the
~/Areas/Products/Views/folder location.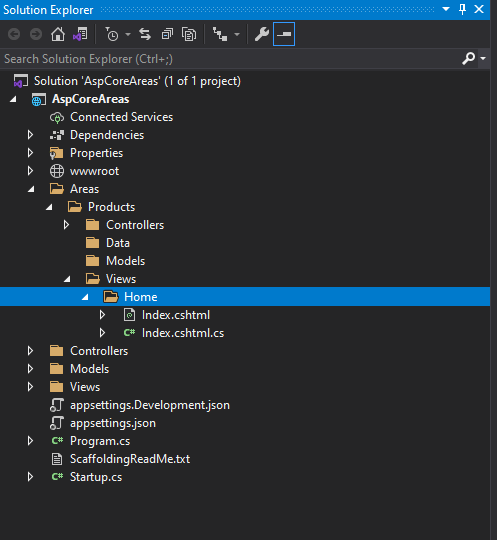
-
Move the Razor View Imports
_ViewImports.cshtmland Razor View Start_ViewStart.cshtmlfiles from~/Views/to the application root folder to share the common layout and view imports to all views.
You can also add the
_ViewImports.cshtmland_ViewStart.cshtmlfiles to the appropriate Views folder under areas if want to maintain it separately. -
Open the
_ViewImports.cshtmlfile and import theSyncfusion.EJ2package.@addTagHelper *, Syncfusion.EJ2If
_ViewImports.cshtmlfile is added in the appropriate Views folder under the areas, import theSyncfusion.EJ2package into each_ViewImports.cshtmlfile. -
Add the Area routing configuration before the default routing in the
Startup.cspage.app.UseEndpoints(endpoints => { endpoints.MapControllerRoute( name : "MyAreas", pattern : "{area:exists}/{controller=Home}/{action=Index}/{id?}" ); --- }); -
Add the client-side resources through CDN or local npm package in the
<head>element of~/Views/Shared/_Layout.cshtmllayout page.<head> .... .... <!-- Syncfusion Essential JS 2 Styles --> <link rel="stylesheet" href="https://cdn.syncfusion.com/ej2//material.css" /> <!-- Syncfusion Essential JS 2 Scripts --> <script src="https://cdn.syncfusion.com/ej2//dist/ej2.min.js"></script> </head> -
Add the Essential JS 2 Script Manager at the end of
<body>element in the~/Views/Shared/_Layout.cshtmllayout page.<body> .... .... <!-- Syncfusion Essential JS 2 ScriptManager --> <ejs-scripts></ejs-scripts> </body>If
_ViewStart.cshtmlfile is added in the appropriate Views folder under the areas, add the Essential JS 2 Script Manager in that referred layout page. -
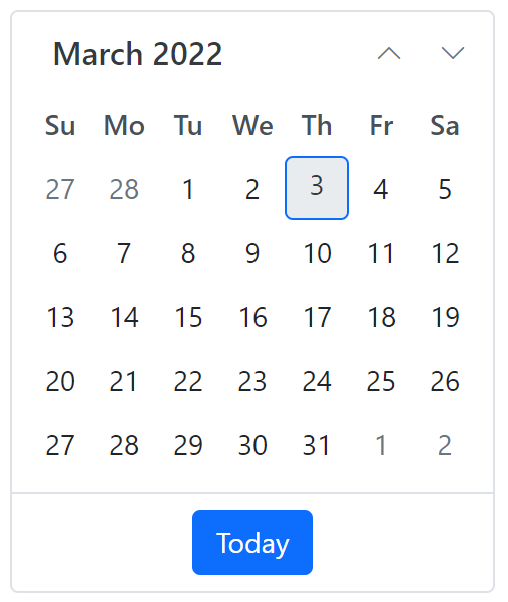
Now, you can add the Syncfusion Essential JS 2 components in
Index.cshtmlView file in the~/Areas/Products/Views/folder.<div> <ejs-calendar id="calendar"></ejs-calendar> </div> -
Run the application. The Essential JS 2 calendar component will render in the web browser on the Products(
localhost:[port]/products/home/index) page.
Areas with Razor Pages
-
Create an ASP.NET Core web application with Razor pages. Refer to this documentation to get started with ASP.NET Core application.
-
Create the folders
Areas/<area name>/Pagesto the application root like the below structure.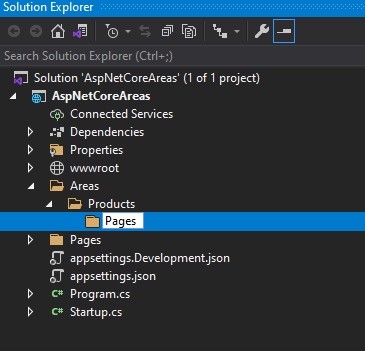
-
Add the Razor Page in the
~/Areas/Products/Pages/folder location.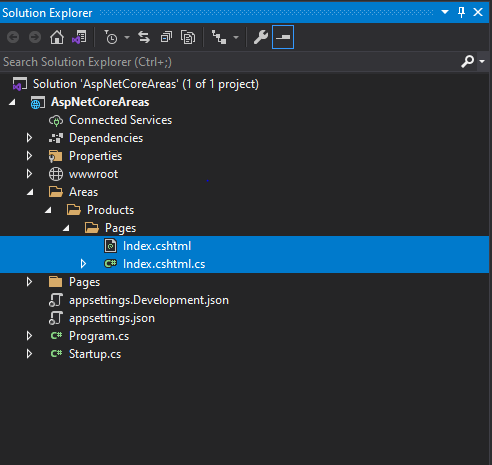
-
Move the Razor View Imports
_ViewImports.cshtmland Razor View Start_ViewStart.cshtmlfiles from~/Pages/to the application root folder to share the common layout and view imports to all Razor Pages.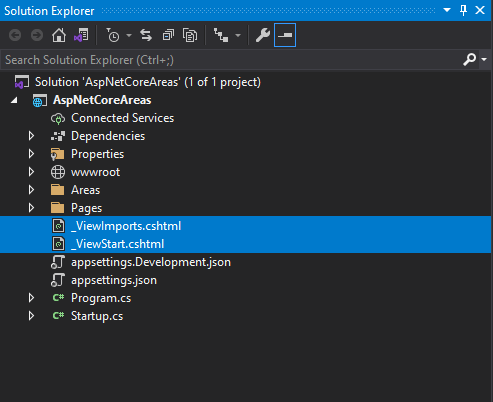
You can also add the
_ViewImports.cshtmland_ViewStart.cshtmlfiles to the appropriate Pages folder under areas if want to maintain it separately. -
Open the
_ViewImports.cshtmlfile and import theSyncfusion.EJ2package.@addTagHelper *, Syncfusion.EJ2If
_ViewImports.cshtmlfile is added in the appropriate Pages folder under the areas, import theSyncfusion.EJ2package into each_ViewImports.cshtmlfile. -
Add the client-side resources through CDN or local npm package in the
<head>element of~/Pages/Shared/_Layout.cshtmllayout page.<head> .... .... <!-- Syncfusion Essential JS 2 Styles --> <link rel="stylesheet" href="https://cdn.syncfusion.com/ej2//material.css" /> <!-- Syncfusion Essential JS 2 Scripts --> <script src="https://cdn.syncfusion.com/ej2//dist/ej2.min.js"></script> </head> -
Add the Essential JS 2 Script Manager at the end of
<body>element in the~/Pages/Shared/_Layout.cshtmllayout page.<body> .... .... <!-- Syncfusion Essential JS 2 ScriptManager --> <ejs-scripts></ejs-scripts> </body>If
_ViewStart.cshtmlfile is added in the appropriate Pages folder under the areas, add the Essential JS 2 Script Manager in that referred layout page. -
Now, you can add the Syncfusion Essential JS 2 components in
Index.cshtmlRazor Page file in the~/Areas/Products/Pages/folder.<div> <ejs-calendar id="calendar"></ejs-calendar> </div> -
Run the application. The Essential JS 2 calendar component will render in the web browser on the Products(
localhost:[port]/products/home/index) page.