Resizing of panels
23 Jan 20257 minutes to read
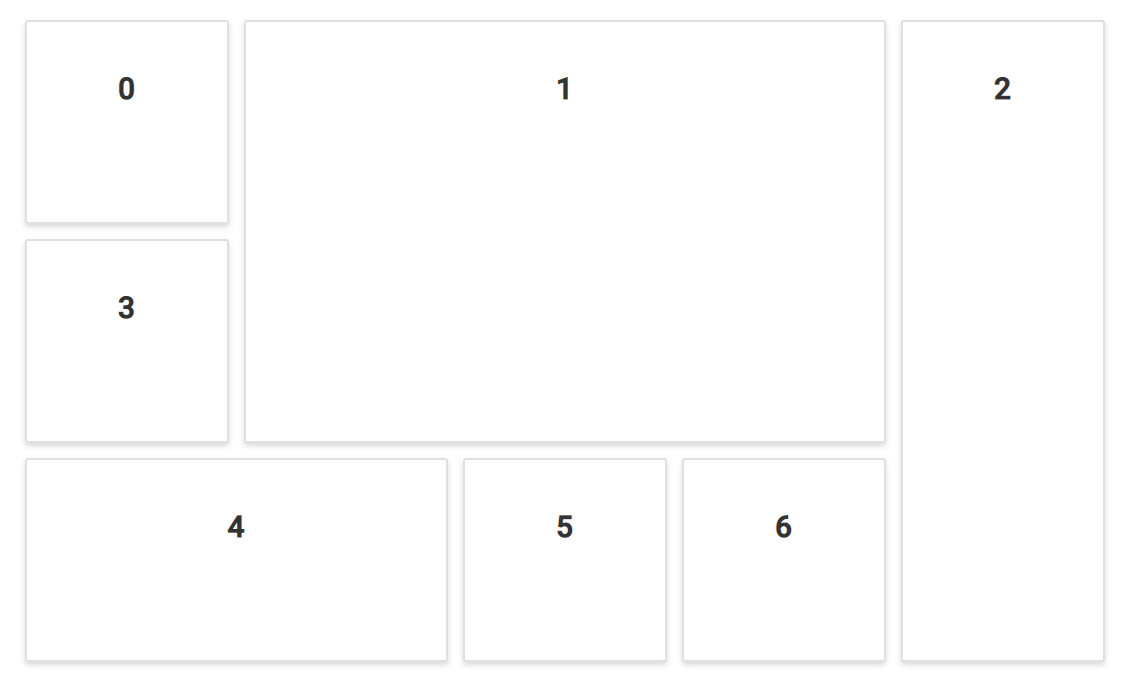
The DashboardLayout control is also provided with the panel resizing functionality which can be enabled or disabled using the allowResizing property. This functionality allows you to resize the panels dynamically through UI interactions using the resizing handlers, which controls the panel resizing in various directions.
Initially, the panels can be resized only in south-east direction. However, panels can also be resized in east, west, north, south, and south-west directions by defining the required directions with the resizableHandles property.
On resizing a panel in Dashboard Layout the following events will be triggered,
- resizeStart - Triggers when panel resize starts
- resize - Triggers when panel is being resized
- resizeStop - Triggers when panel resize stops
@{
    ...
    ddCellSpacingModel modelValue = new ddCellSpacingModel();
    modelValue.cellSpacing = new double[] { 10, 10 };
    modelValue.handles = new string[] { "e-south-east", "e-east", "e-west", "e-south-west", "e-south" };
}

<div>
    <!--  DashboardLayout element declaration -->
    <ejs-dashboardlayout id="dashboard_default" columns="5" resizableHandles="@modelValue.handles" allowResizing="true" resize="onResize" resizeStart="onResizeStart" resizeStop="onResizeStop" cellSpacing="@modelValue.cellSpacing">
        <e-dashboardlayout-panels>
            <e-dashboardlayout-panel sizeX="1" sizeY="1" row="0" col="0" content="<div class='content'>0</div>">
            </e-dashboardlayout-panel>
            <e-dashboardlayout-panel sizeX="3" sizeY="2" row="0" col="1" content="<div class='content'>1</div>">
            </e-dashboardlayout-panel>
            <e-dashboardlayout-panel sizeX="1" sizeY="3" row="0" col="4" content="<div class='content'>2</div>">
            </e-dashboardlayout-panel>
            <e-dashboardlayout-panel sizeX="1" sizeY="1" row="1" col="0" content="<div class='content'>3</div>">
            </e-dashboardlayout-panel>
            <e-dashboardlayout-panel sizeX="2" sizeY="1" row="2" col="0" content="<div class='content'>4</div>">
            </e-dashboardlayout-panel>
            <e-dashboardlayout-panel sizeX="1" sizeY="1" row="2" col="2" content="<div class='content'>5</div>">
            </e-dashboardlayout-panel>
            <e-dashboardlayout-panel sizeX="1" sizeY="1" row="2" col="3" content="<div class='content'>6</div>">
            </e-dashboardlayout-panel>
        </e-dashboardlayout-panels>
    </ejs-dashboardlayout>
    <!-- end of dashboardlayout element -->
</div>
<script>
    function onResize(args) {
        console.log("Resizing");
    }
    function onResizeStart(args) {
        console.log("Resize start");
    }
    function onResizeStop(args) {
        console.log("Resize Stop");
    }
</script>
<style>
    /* DashboardLayout element styles  */
    #dashboard_default .e-panel .e-panel-container .content {
        vertical-align: middle;
        font-weight: 600;
        font-size: 20px;
        text-align: center;
        line-height: 90px;
    }
</style>
public class ddCellSpacingModel
{
public double[]? cellSpacing { get; set; }
public string[] handles { get; set; }
}
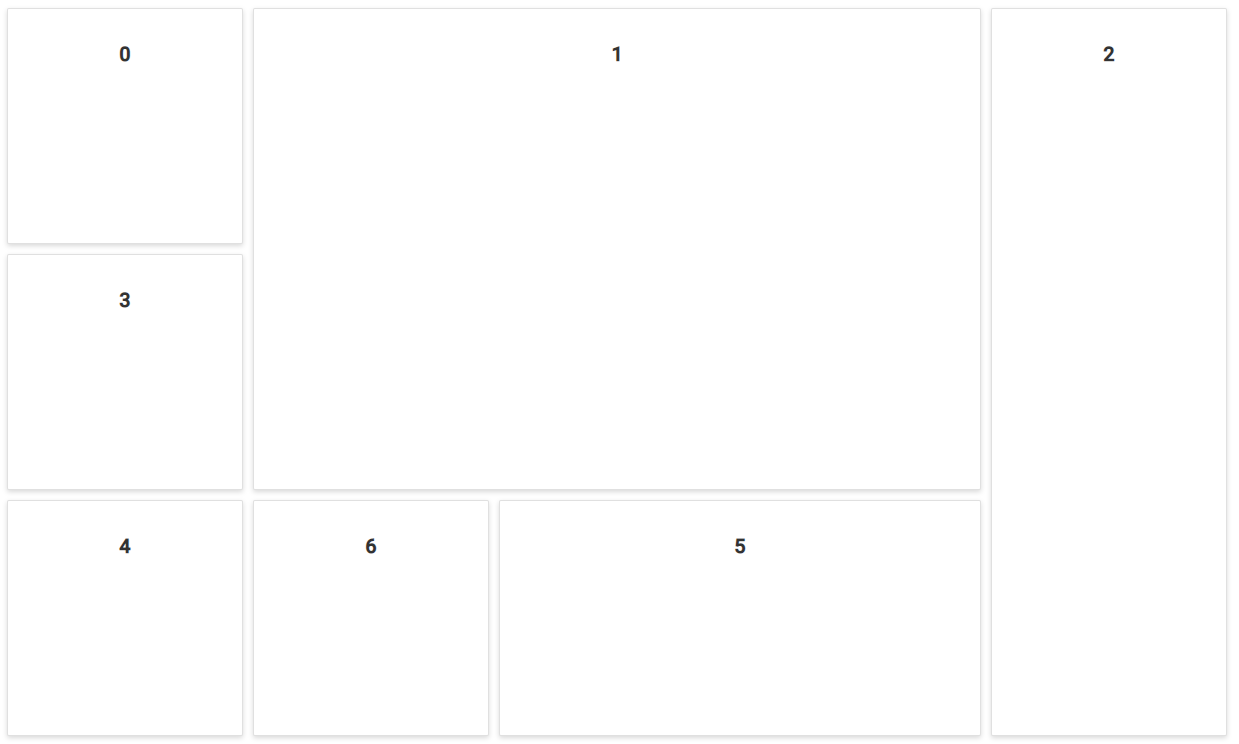
Resizing panels programatically
The Dashboard Layout panels can also be resized programatically by using resizePanel method. The method is invoked as follows,
resizePanel(id, sizeX, sizeY)Where,
-
id- ID of the panel which needs to be resized. -
sizeX- New panel width in cells count for resizing the panel. -
sizeY- New panel height in cells count for resizing the panel.
The following sample demonstrates resizing panels programatically in the Dashboard Layout’s created event.
@{
    ...
    ddCellSpacingModel modelValue = new ddCellSpacingModel();
    modelValue.cellSpacing = new double[] { 10, 10 };
}

<div>
    <ejs-dashboardlayout id="dashboard_default" columns="5" allowResizing="true" created="onCreated" cellSpacing="@modelValue.cellSpacing">
        <e-dashboardlayout-panels>
            <e-dashboardlayout-panel sizeX="1" sizeY="1" row="0" col="0" content="<div class='content'>0</div>">
            </e-dashboardlayout-panel>
            <e-dashboardlayout-panel sizeX="3" sizeY="2" row="0" col="1" content="<div class='content'>1</div>">
            </e-dashboardlayout-panel>
            <e-dashboardlayout-panel sizeX="1" sizeY="3" row="0" col="4" content="<div class='content'>2</div>">
            </e-dashboardlayout-panel>
            <e-dashboardlayout-panel sizeX="1" sizeY="1" row="1" col="0" content="<div class='content'>3</div>">
            </e-dashboardlayout-panel>
            <e-dashboardlayout-panel sizeX="2" sizeY="1" row="2" col="0" content="<div class='content'>4</div>">
            </e-dashboardlayout-panel>
            <e-dashboardlayout-panel sizeX="1" sizeY="1" row="2" col="2" content="<div class='content'>5</div>">
            </e-dashboardlayout-panel>
            <e-dashboardlayout-panel sizeX="1" sizeY="1" row="2" col="3" content="<div class='content'>6</div>">
            </e-dashboardlayout-panel>
        </e-dashboardlayout-panels>
    </ejs-dashboardlayout>
</div>
<script>
    //Dashboard Layout's created event function
    function onCreated(args) {
        // resizePanel("id", sizeX, sizeY)
        this.resizePanel("layout_4", 1, 1);
        this.resizePanel("layout_5", 2, 1);
    }

</script>
<style>
    #dashboard_default .e-panel .e-panel-container .content {
        vertical-align: middle;
        font-weight: 600;
        font-size: 20px;
        text-align: center;
        line-height: 90px;
    }
</style>
public class ddCellSpacingModel
{
public double[]? cellSpacing { get; set; }
}
NOTE
You can refer to our ASP.NET Core Dashboard Layout feature tour page for its groundbreaking feature representations. You can also explore our ASP.NET Core Dashboard Layout example to know how to present and manipulate data.