How can I help you?
Extend and Customize Syncfusion® Controls
4 Dec 20249 minutes to read
The ASP.NET Core provides the support to extend a component or customize it within another component for a strong composite model.
Extend Syncfusion® ASP.NET Core Control
The Syncfusion® ASP.NET Core Controls can extend and customize the logic by creating a new tag helper component.
1.Right-click on the ~/Pages folder in the Visual Studio and select Add -> New Item -> Class to create a new tag helper component (SyncButton.cs).
2.Inherit any Syncfusion® ASP.NET Core control and use HtmlTargetElement to create tag helper component. Render your component based on your logic with Syncfusion® ASP.NET Core API.
using Microsoft.AspNetCore.Razor.TagHelpers;

namespace ASPCore.Pages
{
    [HtmlTargetElement("SyncButton")]
    public class SyncButton : Syncfusion.EJ2.Buttons.Button
    {
        public string className = "e-control e-btn";
        public ButtonStyles Styles { get; set; }
        public enum ButtonStyles
        {
            Basic,
            Success,
            Info,
            Warning,
            Danger
        }

        public override void Process(TagHelperContext context, TagHelperOutput output)
        {
            output.TagName = "button";
            output.TagMode = TagMode.StartTagAndEndTag;
            output.Content.SetContent(Content);
            if(Disabled)
            {
                output.Attributes.SetAttribute("disabled", Disabled);
            }
            if (IsPrimary)
            {
                className += " e-primary";
            }
            else if (Styles == ButtonStyles.Success)
            {
                className += " e-success";
            }
            else if (Styles == ButtonStyles.Info)
            {
                className += " e-info";
            }
            else if (Styles == ButtonStyles.Warning)
            {
                className += " e-warning";
            }
            else
            {
                className += " e-danger";
            }
            output.Attributes.SetAttribute("Class", className);
        }
    }
}
3.Open ~/Pages/_ViewImports.cshtml file and import the project Name as TagHelper.
@addTagHelper *, ASPCORE4.Render your new component in the view page ~/Pages/Index.cshtml and run the application.
<SyncButton Content="Primary" IsPrimary="true" Disabled="true"></SyncButton>
<SyncButton Content="Success" Styles="@ASPCore.Pages.SyncButton.ButtonStyles.Success"></SyncButton>
<SyncButton Content="Info" Styles="@ASPCore.Pages.SyncButton.ButtonStyles.Info"></SyncButton>
<SyncButton Content="Warning" Styles="@ASPCore.Pages.SyncButton.ButtonStyles.Warning"></SyncButton>
<SyncButton Content="Danger" Styles="@ASPCore.Pages.SyncButton.ButtonStyles.Danger"></SyncButton>
NOTE
Use Syncfusion® ASP.NET Core Control within Another view component
The Syncfusion® ASP.NET Core control can be implemented within another view component.
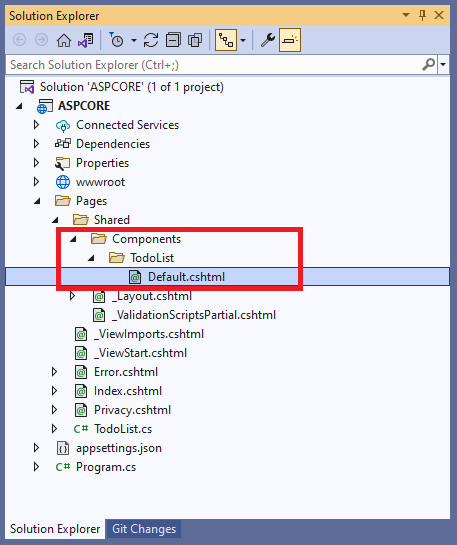
1.Create a folder with component name TodoList in ~/Pages/Shared/Components and add the Default.cshtml razor view in ~/Components/TodoList like below.

2.Right-click on the ~/Pages folder in the Visual Studio and select Add -> New Item -> Class to create a view component class (TodoList.cs) then add the below code.
using Microsoft.AspNetCore.Mvc;

namespace ASPCORE.Pages
{
    public class TodoList : ViewComponent
    {
        public IViewComponentResult Invoke()
        {
            return View();
        }
    }
}
3.Add any Syncfusion® ASP.NET Core control to the newly created ASP.NET Core view component ~/Components/TodoList/Default.cshtml.
<h3>Todo List</h3>

<div class="form-group">
    <ejs-textbox id="text" placeholder="Add new item" change="onchange" width="20%"></ejs-textbox>
    <ejs-button id="add" content="Add"></ejs-button>
</div>

<ejs-listview id="list" width="40%">
    <e-listview-fieldsettings text="text"></e-listview-fieldsettings>
</ejs-listview>

<script>
    var data;
    var flag = true;
    function onchange(e) {
        data = {
            text: e.value,
            id: (Math.random() * 1000).toFixed(0).toString(),
        }
    }
    document.getElementById("add").addEventListener("click", function (e) {
        var listviewInstance = document.getElementById("list").ej2_instances[0];
        if (data.text != "") {
          listviewInstance.addItem([data]);
          document.getElementById("text").value = ""
          if (flag)
          {
            listviewInstance.element.style.display = "block";
            flag = false;
           }
        }
    });

</script>

<style>
    #list {
        display: none;
    }
    .form-group {
        padding-bottom: 20px;
    }
</style>
4.Open ~/Pages/_ViewImports.cshtml file and import the project Name as TagHelper.
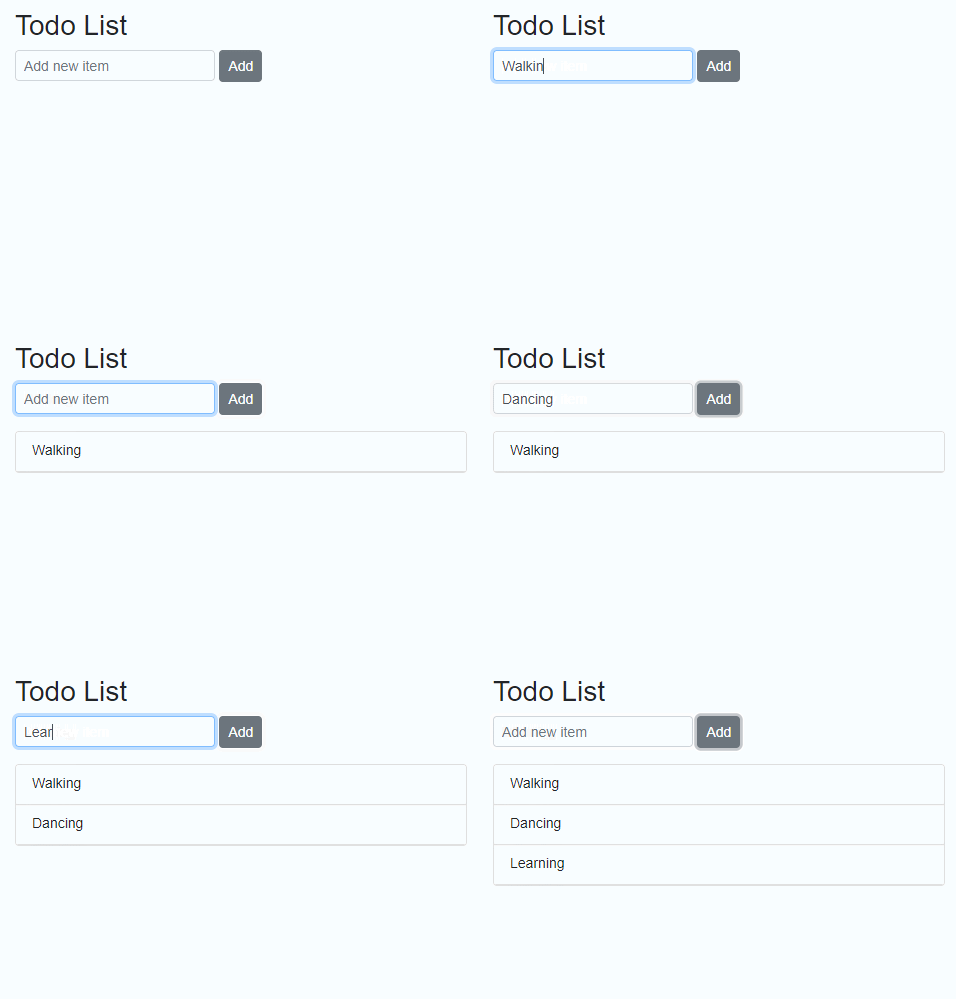
@addTagHelper *, ASPCORE5.Render your new view component in the view page ~/Pages/Index.cshtml and run the application.
<vc:todo-list></vc:todo-list>
NOTE